HP C8180 Windows Help - Page 126
Adjust the lightness and darkness of your copy, Change default copy settings, Lighter / Darker
 |
UPC - 883585123384
View all HP C8180 manuals
Add to My Manuals
Save this manual to your list of manuals |
Page 126 highlights
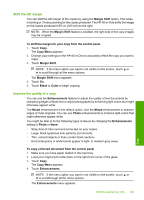
• Normal delivers high quality and is the recommended setting for most of your copying. Normal copies faster than Best and is the default setting. • Fast copies faster than the Normal setting. The text is comparable to the quality of the Normal setting, but the graphics might be lower quality. The Fast setting uses less ink and extends the life of your ink cartridges. To change the copy quality from the control panel 1. Make sure you have paper loaded in the input tray. 2. Load your original print side down on the right front corner of the glass. 3. Touch Copy. The Copy Menu appears. 4. Touch Quality. The Quality menu appears. 5. Touch the appropriate copy quality. 6. Touch Done. Adjust the lightness and darkness of your copy You can use the Lighter / Darker option to adjust the contrast of the copies you make. To adjust the copy contrast from the control panel 1. Make sure you have paper loaded in the input tray. 2. Load your original print side down on the right front corner of the glass. 3. Touch Copy. The Copy Menu appears. 4. Touch Lighter / Darker. NOTE: If the menu option you want is not visible on the screen, touch or to scroll through all the menu options. The Lighter / Darker menu appears. 5. Do one of the following: • Touch to darken the copy. • Touch to lighten the copy. 6. Touch Done. Change default copy settings When you change copy settings from the control panel, the settings apply only to the current copy job. To apply copy settings to all future copy jobs, you can save the settings as defaults. To set default copy settings from the control panel 1. Touch Copy. The Copy Menu appears. 2. Make any needed changes to the copy settings. Change default copy settings 125 Copy
-
 1
1 -
2
-
3
-
4
-
5
-
6
-
7
-
8
-
9
-
10
-
11
-
12
-
13
-
14
-
15
-
16
-
17
-
18
-
19
-
20
-
21
-
22
-
23
-
24
-
25
-
26
-
27
-
28
-
29
-
30
-
31
-
32
-
33
-
34
-
35
-
36
-
37
-
38
-
39
-
40
-
41
-
42
-
43
-
44
-
45
-
46
-
47
-
48
-
49
-
50
-
51
-
52
-
53
-
54
-
55
-
56
-
57
-
58
-
59
-
60
-
61
-
62
-
63
-
64
-
65
-
66
-
67
-
68
-
69
-
70
-
71
-
72
-
73
-
74
-
75
-
76
-
77
-
78
-
79
-
80
-
81
-
82
-
83
-
84
-
85
-
86
-
87
-
88
-
89
-
90
-
91
-
92
-
93
-
94
-
95
-
96
-
97
-
98
-
99
-
100
-
101
-
102
-
103
-
104
-
105
-
106
-
107
-
108
-
109
-
110
-
111
-
112
-
113
-
114
-
115
-
116
-
117
-
118
-
119
-
120
-
 121
121 -
 122
122 -
 123
123 -
 124
124 -
 125
125 -
 126
126 -
 127
127 -
 128
128 -
 129
129 -
 130
130 -
 131
131 -
132
-
133
-
134
-
135
-
136
-
137
-
138
-
139
-
140
-
141
-
142
-
143
-
144
-
145
-
146
-
147
-
148
-
149
-
150
-
151
-
152
-
153
-
154
-
155
-
156
-
157
-
158
-
159
-
160
-
161
-
162
-
163
-
164
-
165
-
166
-
167
-
168
-
169
-
170
-
171
-
172
-
173
-
174
-
175
-
176
-
177
-
178
-
179
-
180
-
181
-
182
-
183
-
184
-
185
-
186
-
187
-
188
-
189
-
190
-
191
-
192
-
193
-
194
-
195
-
196
-
197
-
198
-
199
-
200
-
201
-
202
-
203
-
204
-
205
-
206
-
207
-
208
-
209
-
210
-
211
-
212
-
213
-
214
-
215
-
216
-
217
-
218
-
219
-
220
-
221
-
222
-
223
-
224
-
225
-
226
-
227
-
228
-
229
-
230
-
231
-
232
-
233
-
234
-
235
 |
 |