HP NetServer AA 4000 HP AA HP Netserver 4000 Reference Guide - Page 128
Replacing the IL Cable, Replacing an IOPx.Ethernet Cable
 |
View all HP NetServer AA 4000 manuals
Add to My Manuals
Save this manual to your list of manuals |
Page 128 highlights
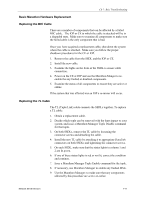
HP NetServer AA 10. If any components are faulted or disabled, re-enable them using the appropriate Marathon Manager Enable command. 11. Make sure that a mirror copy is started. Replacing the IL Cable The IL (IOP Link) cable provides a direct Ethernet connection between the IOPs. To replace an IL cable: 1. Obtain a replacement IL cable from your service provider. The IL cable is a Category 5 Ethernet twisted-pair crossover cable. 2. Decide which IOP can be removed with the least impact to your system, and shut down that IOP. 3. Detach the IL cable from IOP1 and IOP2. 4. Install the new IL cable by attaching it to IOP1 and IOP2. 5. Reboot the IOP that you shut down. 6. Using the Marathon Manager: • Re-enable any faulted or disabled components. • Make sure that any components affected by this procedure are active or online. Replacing an IOPx.Ethernet Cable The IOPx.Ethernet cable connects the IOP to the public Ethernet. To replace an IOPx.Ethernet cable: 1. Obtain a replacement Ethernet cable from your service provider that meets the specifications for your network. 2. Using Marathon Manager, make sure that the other IOP is active and that it has public network connectivity (the IOPy.Ethernet is online or on standby). 3. Remove the IOPx.Ethernet cable by detaching it from the IOP and the public Ethernet network. 4. Install the new Ethernet cable by attaching it to the IOP and the public Ethernet. 5. Using the Marathon Manager: • Make sure that the Ethernet connection that uses the replacement cable is active and on standby (appears dark green). • Make sure that any components affected by this procedure are active or online. • Re-enable any faulted or disabled components. 6. Confirm that the new Ethernet cable operates properly: 7-12 Hewlett-Packard Company
-
 1
1 -
2
-
3
-
4
-
5
-
6
-
7
-
8
-
9
-
10
-
11
-
12
-
13
-
14
-
15
-
16
-
17
-
18
-
19
-
20
-
21
-
22
-
23
-
24
-
25
-
26
-
27
-
28
-
29
-
30
-
31
-
32
-
33
-
34
-
35
-
36
-
37
-
38
-
39
-
40
-
41
-
42
-
43
-
44
-
45
-
46
-
47
-
48
-
49
-
50
-
51
-
52
-
53
-
54
-
55
-
56
-
57
-
58
-
59
-
60
-
61
-
62
-
63
-
64
-
65
-
66
-
67
-
68
-
69
-
70
-
71
-
72
-
73
-
74
-
75
-
76
-
77
-
78
-
79
-
80
-
81
-
82
-
83
-
84
-
85
-
86
-
87
-
88
-
89
-
90
-
91
-
92
-
93
-
94
-
95
-
96
-
97
-
98
-
99
-
100
-
101
-
102
-
103
-
104
-
105
-
106
-
107
-
108
-
109
-
110
-
111
-
112
-
113
-
114
-
115
-
116
-
117
-
118
-
119
-
120
-
121
-
122
-
 123
123 -
 124
124 -
 125
125 -
 126
126 -
 127
127 -
 128
128 -
 129
129 -
 130
130 -
 131
131 -
 132
132 -
 133
133 -
134
-
135
-
136
-
137
-
138
-
139
-
140
-
141
-
142
 |
 |