HP NetServer AA 4000 HP AA HP Netserver 4000 Reference Guide - Page 138
Replacing a Failed NetRAID Adapter
 |
View all HP NetServer AA 4000 manuals
Add to My Manuals
Save this manual to your list of manuals |
Page 138 highlights
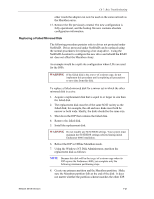
HP NetServer AA The re-mirroring process will overwrite everything. It is important the Marathon partition be at the end of the drive. 9. After the initial mirror copy completes, this disk will have the correct disk format, disk label, disk partitions, and disk data. Open the Marathon Configuration Utility and complete the following: 10. Save the current configuration to a file. 11. Remove the configuration entry for the disk to be replaced and select Commit. CAUTION The MTC Configuration tool must see a mirrored disk entry in your system. For this reason, if the failed disk is your only mirrored disk, you cannot delete its entry from the configuration file. CAUTION In this case, you first need to add a fake mirrored disk entry, assigning it a substitute SCSI address (with an unused SCSI address). For example, try 7-0-0-0. This enables you to remove the disk entry for the disk you need to replace. 12. Remove the disk entry for the disk to be replaced and select Commit. 13. Reload the configuration file you saved when you first opened the Configuration Utility, and Commit the changes. 14. Reboot the IOP in Online Marathon mode. 15. Using Marathon Manager: 16. Re-enable any faulted or disabled components. 17. Make sure that any components affected by this procedure are active or online. 18. Make sure that the IOP joins the server. 19. Make sure that a mirror copy is either started or pending for all mirrored devices, including the disk that previously was failed. Replacing a Failed NetRAID Adapter 1. Power off the IOP where the failed NetRAID adapter is installed. 2. Remove the faulted NetRAID adapter and install an identical model into the exact slot. If an identical model of NetRAID adapter cannot be found then the NetRAID adapters on both IOPs will need to have the NetRAID adapters replaced with identical models. 3. When booting the IOP examine the BIOS and Firmware of the NetRAID Adapter. Confirm they match the redundant adapter in the other IOP. If necessary flash the BIOS and update the firmware. 7-22 Hewlett-Packard Company
-
 1
1 -
2
-
3
-
4
-
5
-
6
-
7
-
8
-
9
-
10
-
11
-
12
-
13
-
14
-
15
-
16
-
17
-
18
-
19
-
20
-
21
-
22
-
23
-
24
-
25
-
26
-
27
-
28
-
29
-
30
-
31
-
32
-
33
-
34
-
35
-
36
-
37
-
38
-
39
-
40
-
41
-
42
-
43
-
44
-
45
-
46
-
47
-
48
-
49
-
50
-
51
-
52
-
53
-
54
-
55
-
56
-
57
-
58
-
59
-
60
-
61
-
62
-
63
-
64
-
65
-
66
-
67
-
68
-
69
-
70
-
71
-
72
-
73
-
74
-
75
-
76
-
77
-
78
-
79
-
80
-
81
-
82
-
83
-
84
-
85
-
86
-
87
-
88
-
89
-
90
-
91
-
92
-
93
-
94
-
95
-
96
-
97
-
98
-
99
-
100
-
101
-
102
-
103
-
104
-
105
-
106
-
107
-
108
-
109
-
110
-
111
-
112
-
113
-
114
-
115
-
116
-
117
-
118
-
119
-
120
-
121
-
122
-
123
-
124
-
125
-
126
-
127
-
128
-
129
-
130
-
131
-
132
-
 133
133 -
 134
134 -
 135
135 -
 136
136 -
 137
137 -
 138
138 -
 139
139 -
 140
140 -
 141
141 -
 142
142
 |
 |