HP NetServer AA 4000 HP AA HP Netserver 4000 Reference Guide - Page 136
Reboot the IOP in Online Marathon Mode.
 |
View all HP NetServer AA 4000 manuals
Add to My Manuals
Save this manual to your list of manuals |
Page 136 highlights
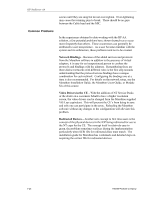
HP NetServer AA • Issue a Marathon Manager Enable IOPy.Ethernet command for the Ethernet connection. • Establish a network connection to validate that the connection is operating properly. For example, use Windows NT Explorer to connect to a network node. • Using the Marathon Manager main window, confirm that the Ethernet connection that uses the replacement cable is active and primary. • If the Ethernet connection supported by the replacement cable remains active and primary, the cable that you replaced is fully operational. WARNING Do not make any further network configuration changes until you complete the information in the Reconfiguring an Endurance 4000 Public Ethernet Adapter section. Reconfiguring an Endurance 4000 Public Ethernet Adapter After you replace and configure an Endurance 4000 Ethernet adapter that serviced a public network, you must update the Endurance 4000 configuration to include the new adapter's address. 1. Schedule an appropriate time to shut down the Endurance 4000. At that time, shut down the CE OS. On IOP1, start the Marathon Configuration Utility and complete the following: 2. Save the configuration to a file on the IOP system disk (as a backup precaution). 3. Select the network icon (for the redundant adapter set) that includes the adapter that you replaced. 4. Click Remove and then Commit. 5. Select the network icon and click Add. 6. When prompted, enter the Ethernet address parameters for each network adapter. 7. Click Finish. 8. Click Commit. 9. Reboot the IOP in Online Marathon Mode. 10. Repeat the previous steps on IOP2. 11. Make sure that any components affected by this procedure are active or online. Re-enable any faulted or disabled components. 12. Locate any adapter that was previously labeled against re-use on the same Ethernet as this Endurance 4000 server. Completing this procedure removes the previous configuration restriction. In 7-20 Hewlett-Packard Company
-
 1
1 -
2
-
3
-
4
-
5
-
6
-
7
-
8
-
9
-
10
-
11
-
12
-
13
-
14
-
15
-
16
-
17
-
18
-
19
-
20
-
21
-
22
-
23
-
24
-
25
-
26
-
27
-
28
-
29
-
30
-
31
-
32
-
33
-
34
-
35
-
36
-
37
-
38
-
39
-
40
-
41
-
42
-
43
-
44
-
45
-
46
-
47
-
48
-
49
-
50
-
51
-
52
-
53
-
54
-
55
-
56
-
57
-
58
-
59
-
60
-
61
-
62
-
63
-
64
-
65
-
66
-
67
-
68
-
69
-
70
-
71
-
72
-
73
-
74
-
75
-
76
-
77
-
78
-
79
-
80
-
81
-
82
-
83
-
84
-
85
-
86
-
87
-
88
-
89
-
90
-
91
-
92
-
93
-
94
-
95
-
96
-
97
-
98
-
99
-
100
-
101
-
102
-
103
-
104
-
105
-
106
-
107
-
108
-
109
-
110
-
111
-
112
-
113
-
114
-
115
-
116
-
117
-
118
-
119
-
120
-
121
-
122
-
123
-
124
-
125
-
126
-
127
-
128
-
129
-
130
-
 131
131 -
 132
132 -
 133
133 -
 134
134 -
 135
135 -
 136
136 -
 137
137 -
 138
138 -
 139
139 -
 140
140 -
 141
141 -
142
 |
 |