Lexmark M410 User's Guide - Page 177

on for more information.

Page 177 highlights

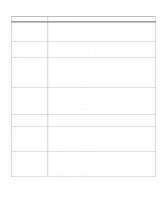
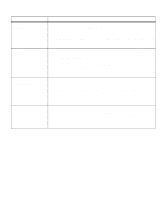
Attendance Message 58 Too Many Flash Options 61 Defective Disk 62 Disk Full 63 Unformatted Disk 70 - 79 messages 200 Paper Jam Remove Cartridge 201 Paper Jam Remove Cartridge Meaning and Required Action The printer detects more than one flash option installed. Your printer can only have one flash option installed. • Press Go to clear the error. • Turn the printer power Off (O). Remove the extra option. Turn the printer power On (|). See "Removing Memory Options" on page 210 for more information. The printer detects a defective hard disk option. This message appears when you power On (|) the printer, or during hard disk format or write operations. Press Go to clear the message and continue printing. You must install a different hard disk option before you can perform any hard disk operations. There is not enough free space in the hard disk option to store the data that was sent. • Press Go to clear the message and continue processing. Any information not previously stored in the hard disk option is deleted. • Reset the printer. Press Menu> or or

  • 1
  • 2
  • 3
  • 4
  • 5
  • 6
  • 7
  • 8
  • 9
  • 10
  • 11
  • 12
  • 13
  • 14
  • 15
  • 16
  • 17
  • 18
  • 19
  • 20
  • 21
  • 22
  • 23
  • 24
  • 25
  • 26
  • 27
  • 28
  • 29
  • 30
  • 31
  • 32
  • 33
  • 34
  • 35
  • 36
  • 37
  • 38
  • 39
  • 40
  • 41
  • 42
  • 43
  • 44
  • 45
  • 46
  • 47
  • 48
  • 49
  • 50
  • 51
  • 52
  • 53
  • 54
  • 55
  • 56
  • 57
  • 58
  • 59
  • 60
  • 61
  • 62
  • 63
  • 64
  • 65
  • 66
  • 67
  • 68
  • 69
  • 70
  • 71
  • 72
  • 73
  • 74
  • 75
  • 76
  • 77
  • 78
  • 79
  • 80
  • 81
  • 82
  • 83
  • 84
  • 85
  • 86
  • 87
  • 88
  • 89
  • 90
  • 91
  • 92
  • 93
  • 94
  • 95
  • 96
  • 97
  • 98
  • 99
  • 100
  • 101
  • 102
  • 103
  • 104
  • 105
  • 106
  • 107
  • 108
  • 109
  • 110
  • 111
  • 112
  • 113
  • 114
  • 115
  • 116
  • 117
  • 118
  • 119
  • 120
  • 121
  • 122
  • 123
  • 124
  • 125
  • 126
  • 127
  • 128
  • 129
  • 130
  • 131
  • 132
  • 133
  • 134
  • 135
  • 136
  • 137
  • 138
  • 139
  • 140
  • 141
  • 142
  • 143
  • 144
  • 145
  • 146
  • 147
  • 148
  • 149
  • 150
  • 151
  • 152
  • 153
  • 154
  • 155
  • 156
  • 157
  • 158
  • 159
  • 160
  • 161
  • 162
  • 163
  • 164
  • 165
  • 166
  • 167
  • 168
  • 169
  • 170
  • 171
  • 172
  • 173
  • 174
  • 175
  • 176
  • 177
  • 178
  • 179
  • 180
  • 181
  • 182
  • 183
  • 184
  • 185
  • 186
  • 187
  • 188
  • 189
  • 190
  • 191
  • 192
  • 193
  • 194
  • 195
  • 196
  • 197
  • 198
  • 199
  • 200
  • 201
  • 202
  • 203
  • 204
  • 205
  • 206
  • 207
  • 208
  • 209
  • 210
  • 211
  • 212
  • 213
  • 214
  • 215
  • 216
  • 217
  • 218
  • 219
  • 220
  • 221
  • 222
  • 223
  • 224
  • 225
  • 226
  • 227
  • 228
  • 229
  • 230
  • 231
  • 232
  • 233
  • 234
  • 235
  • 236
  • 237
  • 238
  • 239
  • 240
  • 241
  • 242
  • 243
  • 244
  • 245
  • 246
  • 247
  • 248
  • 249
  • 250
  • 251
  • 252
  • 253
  • 254
  • 255
  • 256
  • 257
  • 258
  • 259
  • 260
  • 261
  • 262
  • 263
  • 264
  • 265
  • 266
  • 267
  • 268
  • 269
  • 270
  • 271
  • 272
  • 273
  • 274
  • 275
  • 276
  • 277
  • 278
  • 279
  • 280
  • 281
  • 282
  • 283
  • 284
  • 285
  • 286
  • 287
  • 288
  • 289
  • 290
  • 291
  • 292
  • 293
  • 294
  • 295
  • 296
  • 297
  • 298
  • 299
  • 300
  • 301
  • 302
  • 303
  • 304
  • 305
  • 306
  • 307
  • 308
  • 309
  • 310
  • 311
  • 312

165
Attendance Messages
58 Too Many
Flash Options
The printer detects more than one flash option installed. Your printer can only have
one flash option installed.
Press
Go
to clear the error.
Turn the printer power Off (O). Remove the extra option. Turn the printer power
On (|). See “Removing Memory Options” on page 210 for more information.
61 Defective
Disk
The printer detects a defective hard disk option. This message appears when you
power On (|) the printer, or during hard disk format or write operations.
Press
Go
to clear the message and continue printing. You must install a different hard
disk option before you can perform any hard disk operations.
62 Disk Full
There is not enough free space in the hard disk option to store the data that was sent.
Press
Go
to clear the message and continue processing. Any information not
previously stored in the hard disk option is deleted.
Reset the printer. Press
Menu>
or
<Menu
. The
JOB MENU
displays. Press
Menu>
or
<Menu
until
Reset Printer
appears on the second line of the operator panel
display. Press
Select
.
Note:
Resetting the printer deletes all current data from the print buffer, including all
Print and Hold jobs. See
Reset Printer
on page 70 for more information.
63 Unformatted
Disk
The printer detects an unformatted hard disk option. This message appears when you
power On (|) the printer.
You must format the hard disk option before you can perform any hard disk operations.
To format the hard disk option, select
Format Disk
from the
UTILITIES MENU
.
Press
Go
to clear the message and continue printing. If the error message remains,
the hard disk option may be defective and need replacing. Hard disk operations are
not allowed until the defective disk is replaced and the new one is formatted.
70 - 79 messages
Reserved for messages relating to the optional internal print server.
For more information, refer to the online documentation that comes with your printer.
Also, refer to the documentation that comes with the optional internal print server.
200 Paper Jam
Remove Cartridge
The printer detects a paper jam. Open the upper front door, remove the print cartridge,
and gently remove the jammed print material. Reinstall the print cartridge and close
the upper front door. See “200 and 201 Paper Jam - Remove Cartridge” on page 184
for more information.
Press
Go
to clear the message and continue printing. The printer prints a new copy of
the page that jammed if
Jam Recovery
is set to
On
or
Auto
. However, the
Auto
setting
does not guarantee the page will print.
201 Paper Jam
Remove Cartridge
The printer detects a paper jam. Open the upper front door, remove the print cartridge,
and gently remove the jammed print material. Reinstall the print cartridge and close
the upper front door. See “200 and 201 Paper Jam - Remove Cartridge” on page 184
for more information.
Press
Go
to clear the message and continue printing. The printer prints a new copy of
the page that jammed if
Jam Recovery
is set to
On
or
Auto
. However, the
Auto
setting
does not guarantee the page will print.
Attendance Message
Meaning and Required Action