Lexmark M410 User's Guide - Page 191
Print Quality Problems, Toner Darkness, QUALITY MENU, Toner, Darkness, Print Resolution, Res Reduced - printhead
 |
UPC - 734646261005
View all Lexmark M410 manuals
Add to My Manuals
Save this manual to your list of manuals |
Page 191 highlights
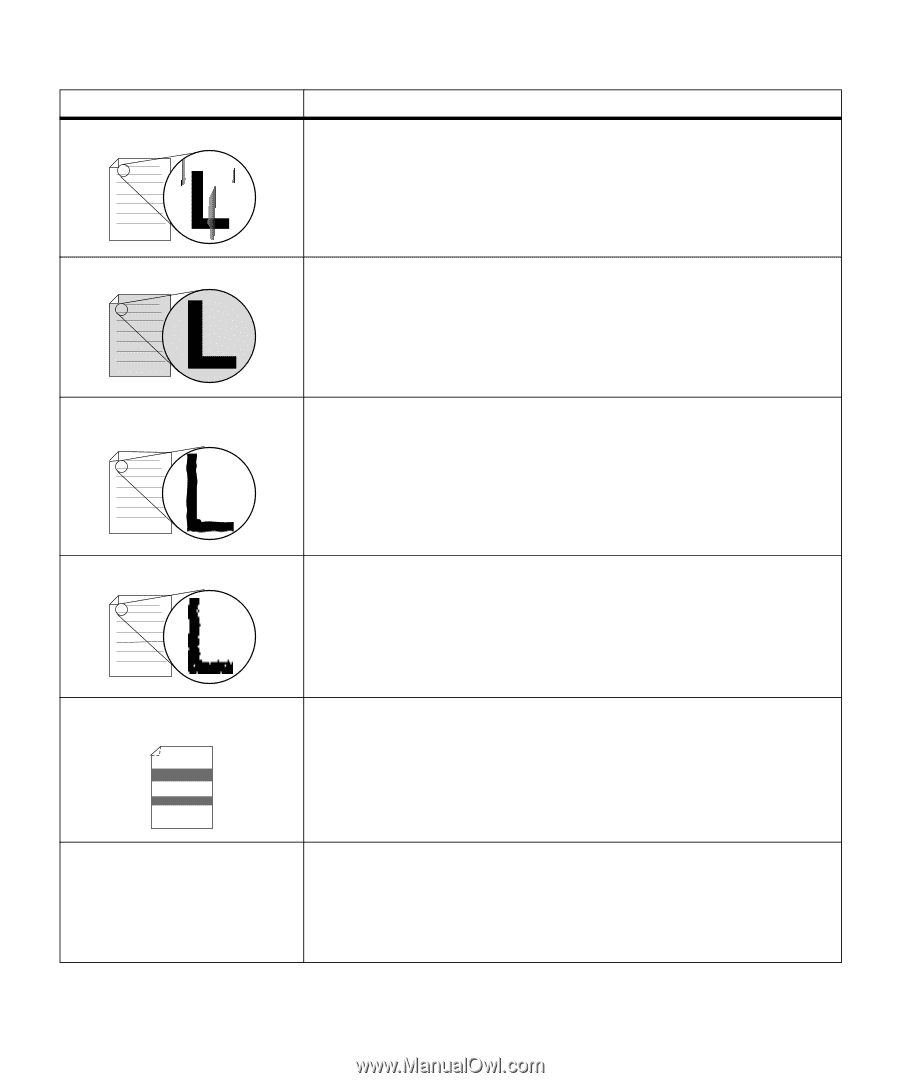
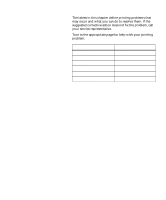
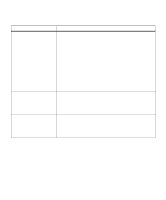
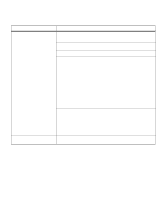
Problem (continued) Streaks appear on the page. Printing is too dark. Action (continued) • The toner may be low. Remove the cartridge. To utilize the remaining toner, shake the cartridge gently. Reinstall the same print cartridge. See "Installing the Print Cartridge" on page 5 for directions. • If you are using preprinted forms, make sure the ink can withstand temperatures of 200°C (392°F). • The printhead lens may need cleaning. See "Cleaning the Printhead Lens" on page 195 for directions. Change the Toner Darkness setting in the QUALITY MENU. See Toner Darkness on page 71 for more information. Note: Macintosh users should make sure the lines per inch (lpi) setting is not set too high in the software application. Characters have jagged or uneven edges. • Change the Print Resolution setting in the QUALITY MENU to 600 dpi. See Print Resolution on page 71 for more information. • Turn PQET in the QUALITY MENU to On. See PQET on page 72 for more information. • If you are using downloaded fonts, verify that the fonts are supported by the printer, the host computer, and the software application. Image quality is poor. Resolution was automatically reduced. Reduce the complexity of the print job or add additional printer memory. See Res Reduced on page 157 for more information. Part of all of the page is printed in black. • Check the print cartridge to see if it is installed correctly. See "Installing the Print Cartridge" on page 5 for more information. • If the charge roll has been replaced, verify that it has been installed correctly. Refer to the installation instructions that come with the charge roll kit. See "Ordering a Charge Roll Kit" on page 195 for more information. The job prints, but the left and top margins are incorrect. • Make sure the PAPER SIZE setting is set correctly in the PAPER MENU. See PAPER SIZE on page 45 for more information. • Make sure the margins are set correctly in the software application you are using. • Check the Print Area setting in the SETUP MENU. Set the value to Normal. See Print Area on page 76 for more information. Print Quality Problems 179
-
 1
1 -
2
-
3
-
4
-
5
-
6
-
7
-
8
-
9
-
10
-
11
-
12
-
13
-
14
-
15
-
16
-
17
-
18
-
19
-
20
-
21
-
22
-
23
-
24
-
25
-
26
-
27
-
28
-
29
-
30
-
31
-
32
-
33
-
34
-
35
-
36
-
37
-
38
-
39
-
40
-
41
-
42
-
43
-
44
-
45
-
46
-
47
-
48
-
49
-
50
-
51
-
52
-
53
-
54
-
55
-
56
-
57
-
58
-
59
-
60
-
61
-
62
-
63
-
64
-
65
-
66
-
67
-
68
-
69
-
70
-
71
-
72
-
73
-
74
-
75
-
76
-
77
-
78
-
79
-
80
-
81
-
82
-
83
-
84
-
85
-
86
-
87
-
88
-
89
-
90
-
91
-
92
-
93
-
94
-
95
-
96
-
97
-
98
-
99
-
100
-
101
-
102
-
103
-
104
-
105
-
106
-
107
-
108
-
109
-
110
-
111
-
112
-
113
-
114
-
115
-
116
-
117
-
118
-
119
-
120
-
121
-
122
-
123
-
124
-
125
-
126
-
127
-
128
-
129
-
130
-
131
-
132
-
133
-
134
-
135
-
136
-
137
-
138
-
139
-
140
-
141
-
142
-
143
-
144
-
145
-
146
-
147
-
148
-
149
-
150
-
151
-
152
-
153
-
154
-
155
-
156
-
157
-
158
-
159
-
160
-
161
-
162
-
163
-
164
-
165
-
166
-
167
-
168
-
169
-
170
-
171
-
172
-
173
-
174
-
175
-
176
-
177
-
178
-
179
-
180
-
181
-
182
-
183
-
184
-
185
-
 186
186 -
 187
187 -
 188
188 -
 189
189 -
 190
190 -
 191
191 -
 192
192 -
 193
193 -
 194
194 -
 195
195 -
 196
196 -
197
-
198
-
199
-
200
-
201
-
202
-
203
-
204
-
205
-
206
-
207
-
208
-
209
-
210
-
211
-
212
-
213
-
214
-
215
-
216
-
217
-
218
-
219
-
220
-
221
-
222
-
223
-
224
-
225
-
226
-
227
-
228
-
229
-
230
-
231
-
232
-
233
-
234
-
235
-
236
-
237
-
238
-
239
-
240
-
241
-
242
-
243
-
244
-
245
-
246
-
247
-
248
-
249
-
250
-
251
-
252
-
253
-
254
-
255
-
256
-
257
-
258
-
259
-
260
-
261
-
262
-
263
-
264
-
265
-
266
-
267
-
268
-
269
-
270
-
271
-
272
-
273
-
274
-
275
-
276
-
277
-
278
-
279
-
280
-
281
-
282
-
283
-
284
-
285
-
286
-
287
-
288
-
289
-
290
-
291
-
292
-
293
-
294
-
295
-
296
-
297
-
298
-
299
-
300
-
301
-
302
-
303
-
304
-
305
-
306
-
307
-
308
-
309
-
310
-
311
-
312
 |
 |