Lexmark M410 User's Guide - Page 180
menu item or, is selected from
 |
UPC - 734646261005
View all Lexmark M410 manuals
Add to My Manuals
Save this manual to your list of manuals |
Page 180 highlights
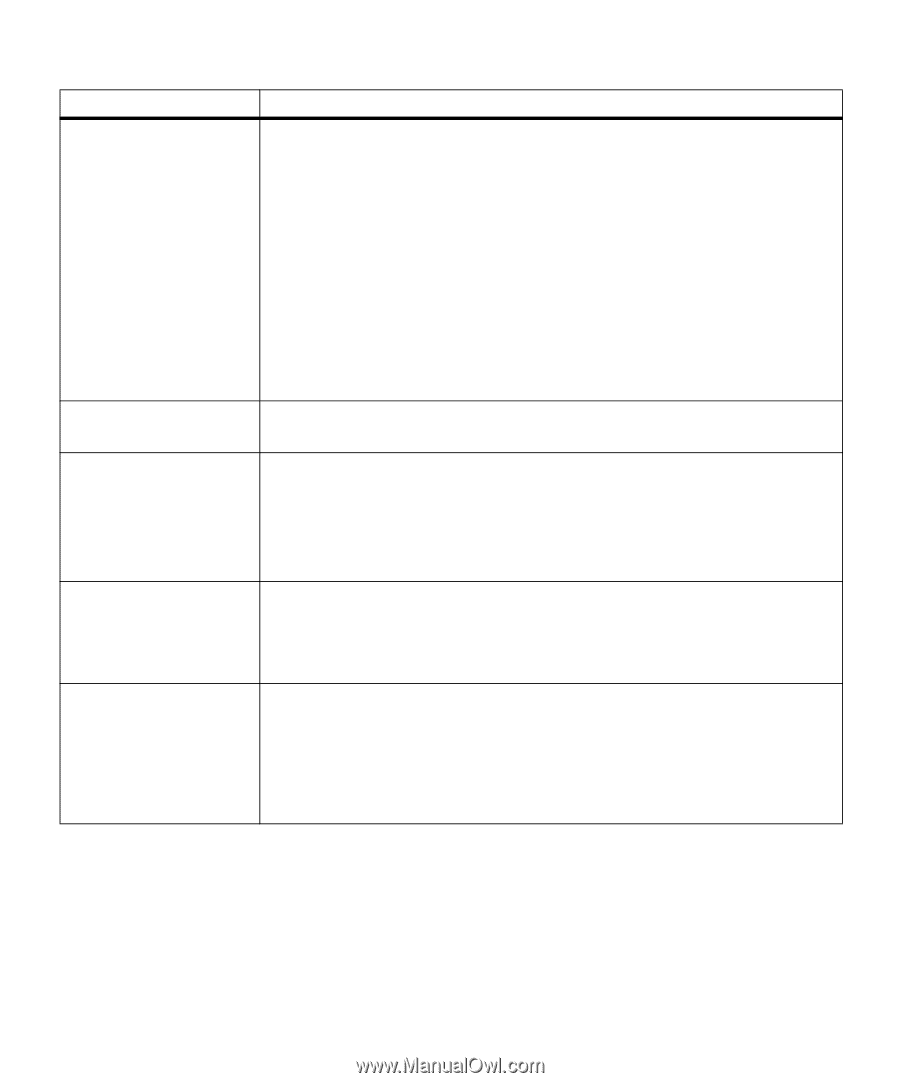
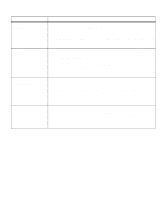
Attendance Message Check Tray 2 Connection Close Door or Insert Cartridge Delete All Jobs. Go/Stop? Enter PIN: =____ Files will be Lost. Go/Stop? Meaning and Required Action The printer has lost communication with the optional 500-sheet drawer. Communication may be lost if the optional 500-sheet drawer was removed from the printer, for example, to clear a paper jam. The optional 500-sheet drawer may still be attached to the printer, but may not be fully connected or may be experiencing a hardware failure. Note: This message only displays if the optional 500-sheet drawer is installed. If this message displays: • Reestablish communication by removing the optional 500-sheet drawer and reattaching it to the printer. See "Installing the Optional Drawer" on page 223 for more information. When the optional 500-sheet drawer is recognized by the printer, the message clears. • In case of a hardware failure, turn the printer power Off (O) and back On (|). If the error recurs, turn the printer power Off (O), remove the optional 500-sheet drawer, and call for service. The upper front door is open or the print cartridge is not installed. Close the door or install the print cartridge, then close the door. The printer requests confirmation to delete all Print and Hold jobs. This message displays if Delete All Jobs is selected from the CONFIDENTIAL JOB menu item or from the HELD JOBS menu item. • Press Go to continue. The printer deletes all Print and Hold jobs. • Press Stop to cancel this operation. See CONFIDENTIAL JOB on page 60 or HELD JOBS on page 65 for more information. The printer requests you enter a four-digit Personal Identification Number (PIN) associated with your Confidential Job once you enter the CONFIDENTIAL JOB menu item on the operator panel. You use the operator panel buttons to enter the number. See "Entering a Personal Identification Number (PIN)" on page 111 for more information. This message displays when you change the Job Buffer Size setting on the operator panel. The printer must reformat the hard disk option. The message asks for confirmation to continue and erase all files on the hard disk option. • Press Go to continue. The hard disk option formats and the specified job buffer partition is created. The message Format Disk displays while the hard disk option formats. • Press Stop to cancel this operation. 168 Chapter 6: Understanding Printer Messages
-
 1
1 -
2
-
3
-
4
-
5
-
6
-
7
-
8
-
9
-
10
-
11
-
12
-
13
-
14
-
15
-
16
-
17
-
18
-
19
-
20
-
21
-
22
-
23
-
24
-
25
-
26
-
27
-
28
-
29
-
30
-
31
-
32
-
33
-
34
-
35
-
36
-
37
-
38
-
39
-
40
-
41
-
42
-
43
-
44
-
45
-
46
-
47
-
48
-
49
-
50
-
51
-
52
-
53
-
54
-
55
-
56
-
57
-
58
-
59
-
60
-
61
-
62
-
63
-
64
-
65
-
66
-
67
-
68
-
69
-
70
-
71
-
72
-
73
-
74
-
75
-
76
-
77
-
78
-
79
-
80
-
81
-
82
-
83
-
84
-
85
-
86
-
87
-
88
-
89
-
90
-
91
-
92
-
93
-
94
-
95
-
96
-
97
-
98
-
99
-
100
-
101
-
102
-
103
-
104
-
105
-
106
-
107
-
108
-
109
-
110
-
111
-
112
-
113
-
114
-
115
-
116
-
117
-
118
-
119
-
120
-
121
-
122
-
123
-
124
-
125
-
126
-
127
-
128
-
129
-
130
-
131
-
132
-
133
-
134
-
135
-
136
-
137
-
138
-
139
-
140
-
141
-
142
-
143
-
144
-
145
-
146
-
147
-
148
-
149
-
150
-
151
-
152
-
153
-
154
-
155
-
156
-
157
-
158
-
159
-
160
-
161
-
162
-
163
-
164
-
165
-
166
-
167
-
168
-
169
-
170
-
171
-
172
-
173
-
174
-
 175
175 -
 176
176 -
 177
177 -
 178
178 -
 179
179 -
 180
180 -
 181
181 -
 182
182 -
 183
183 -
 184
184 -
 185
185 -
186
-
187
-
188
-
189
-
190
-
191
-
192
-
193
-
194
-
195
-
196
-
197
-
198
-
199
-
200
-
201
-
202
-
203
-
204
-
205
-
206
-
207
-
208
-
209
-
210
-
211
-
212
-
213
-
214
-
215
-
216
-
217
-
218
-
219
-
220
-
221
-
222
-
223
-
224
-
225
-
226
-
227
-
228
-
229
-
230
-
231
-
232
-
233
-
234
-
235
-
236
-
237
-
238
-
239
-
240
-
241
-
242
-
243
-
244
-
245
-
246
-
247
-
248
-
249
-
250
-
251
-
252
-
253
-
254
-
255
-
256
-
257
-
258
-
259
-
260
-
261
-
262
-
263
-
264
-
265
-
266
-
267
-
268
-
269
-
270
-
271
-
272
-
273
-
274
-
275
-
276
-
277
-
278
-
279
-
280
-
281
-
282
-
283
-
284
-
285
-
286
-
287
-
288
-
289
-
290
-
291
-
292
-
293
-
294
-
295
-
296
-
297
-
298
-
299
-
300
-
301
-
302
-
303
-
304
-
305
-
306
-
307
-
308
-
309
-
310
-
311
-
312
 |
 |