Lexmark M410 User's Guide - Page 66
Finishing Menu continued, Separator Sheets
 |
UPC - 734646261005
View all Lexmark M410 manuals
Add to My Manuals
Save this manual to your list of manuals |
Page 66 highlights
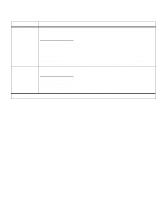
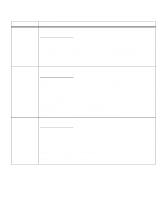
Finishing Menu (continued) Menu Item Separator Sheets Values None* Between Copies Between Jobs Between Pages Separator Source You can have the printer insert blank separator sheets between jobs, between multiple copies of a job, or between each page of a job. Separator sheets are pulled from the source specified in the Separator Source menu item. Select Between Copies for multiple copy jobs. If Collation is set to Off, a blank page is inserted between sets of each printed page. If Collation is set to On, a blank page is inserted between each copy of the job. Select Between Jobs to insert a blank page after each print job. This may be helpful when several people are using the printer. Select Between Pages to insert a blank page between each page of a job. This is useful if you are printing transparencies and want to reduce static build-up when stacking transparencies in the output bin. Tray 1* Tray 2 MP Feeder Multipage Print If you are using separator sheets, Separator Source lets you specify the paper source that holds the separator sheets. Only installed paper sources display as values. You can only select MP Feeder as the separator source if Configure MP is set to Cassette. If Separator Source is set to MP Feeder and Configure MP is set to First, the Separator Source setting automatically changes to Tray 1. See "Configure MP" on page 49 for more information. Off* 2-Up 3-Up 4-Up 6-Up 9-Up 12-Up 16-Up *Factory default Use the Multipage Print (N-up) setting to print multiple page images on a single page. For example, 2-Up means two page images are printed on one page, 3-Up means three page images are printed on one page, and so forth. The printer uses the Multipage Order, Multipage View, and Multipage Border settings to determine the order and orientation of the page images and if a border is printed around each page image. Printer setting changes within a print job may affect the results you get when using Multipage Print. 54 Chapter 3: Using the Operator Panel and Menus
-
 1
1 -
2
-
3
-
4
-
5
-
6
-
7
-
8
-
9
-
10
-
11
-
12
-
13
-
14
-
15
-
16
-
17
-
18
-
19
-
20
-
21
-
22
-
23
-
24
-
25
-
26
-
27
-
28
-
29
-
30
-
31
-
32
-
33
-
34
-
35
-
36
-
37
-
38
-
39
-
40
-
41
-
42
-
43
-
44
-
45
-
46
-
47
-
48
-
49
-
50
-
51
-
52
-
53
-
54
-
55
-
56
-
57
-
58
-
59
-
60
-
 61
61 -
 62
62 -
 63
63 -
 64
64 -
 65
65 -
 66
66 -
 67
67 -
 68
68 -
 69
69 -
 70
70 -
 71
71 -
72
-
73
-
74
-
75
-
76
-
77
-
78
-
79
-
80
-
81
-
82
-
83
-
84
-
85
-
86
-
87
-
88
-
89
-
90
-
91
-
92
-
93
-
94
-
95
-
96
-
97
-
98
-
99
-
100
-
101
-
102
-
103
-
104
-
105
-
106
-
107
-
108
-
109
-
110
-
111
-
112
-
113
-
114
-
115
-
116
-
117
-
118
-
119
-
120
-
121
-
122
-
123
-
124
-
125
-
126
-
127
-
128
-
129
-
130
-
131
-
132
-
133
-
134
-
135
-
136
-
137
-
138
-
139
-
140
-
141
-
142
-
143
-
144
-
145
-
146
-
147
-
148
-
149
-
150
-
151
-
152
-
153
-
154
-
155
-
156
-
157
-
158
-
159
-
160
-
161
-
162
-
163
-
164
-
165
-
166
-
167
-
168
-
169
-
170
-
171
-
172
-
173
-
174
-
175
-
176
-
177
-
178
-
179
-
180
-
181
-
182
-
183
-
184
-
185
-
186
-
187
-
188
-
189
-
190
-
191
-
192
-
193
-
194
-
195
-
196
-
197
-
198
-
199
-
200
-
201
-
202
-
203
-
204
-
205
-
206
-
207
-
208
-
209
-
210
-
211
-
212
-
213
-
214
-
215
-
216
-
217
-
218
-
219
-
220
-
221
-
222
-
223
-
224
-
225
-
226
-
227
-
228
-
229
-
230
-
231
-
232
-
233
-
234
-
235
-
236
-
237
-
238
-
239
-
240
-
241
-
242
-
243
-
244
-
245
-
246
-
247
-
248
-
249
-
250
-
251
-
252
-
253
-
254
-
255
-
256
-
257
-
258
-
259
-
260
-
261
-
262
-
263
-
264
-
265
-
266
-
267
-
268
-
269
-
270
-
271
-
272
-
273
-
274
-
275
-
276
-
277
-
278
-
279
-
280
-
281
-
282
-
283
-
284
-
285
-
286
-
287
-
288
-
289
-
290
-
291
-
292
-
293
-
294
-
295
-
296
-
297
-
298
-
299
-
300
-
301
-
302
-
303
-
304
-
305
-
306
-
307
-
308
-
309
-
310
-
311
-
312
 |
 |