Netgear RAXE290 User Manual - Page 134
Specify ReadyDLNA media server settings
 |
View all Netgear RAXE290 manuals
Add to My Manuals
Save this manual to your list of manuals |
Page 134 highlights
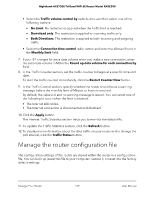
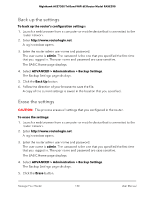
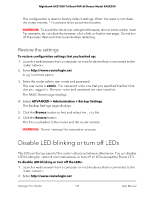
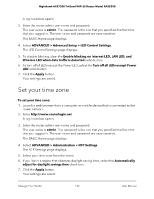
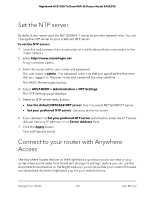
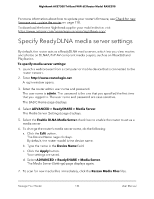
Nighthawk AXE7300 Tri-Band WiFi 6E Router Model RAXE290 For more information about how to update your router's firmware, see Check for new firmware and update the router on page 118. To download the latest Nighthawk app for your mobile device, visit https://www.netgear.com/home/apps-services/nighthawk-app/. Specify ReadyDLNA media server settings By default, the router acts as a ReadyDLNA media server, which lets you view movies and photos on DLNA/UPnP AV-compliant media players, such as an Xbox360 and PlayStation. To specify media server settings: 1. Launch a web browser from a computer or mobile device that is connected to the router network. 2. Enter http://www.routerlogin.net. A login window opens. 3. Enter the router admin user name and password. The user name is admin. The password is the one that you specified the first time that you logged in. The user name and password are case-sensitive. The BASIC Home page displays. 4. Select ADVANCED > ReadySHARE > Media Server. The Media Server (Settings) page displays. 5. Select the Enable DLNA Media Server check box to enable the router to act as a media server. 6. To change the router's media server name, do the following: a. Click the Edit button. The Device Name page displays. By default, the router model is the device name. b. Type the name in the Device Name field. c. Click the Apply button. Your settings are saved. d. Select ADVANCED > ReadySHARE > Media Server. The Media Server (Settings) page displays again. 7. To scan for new media files immediately, click the Rescan Media Files files. Manage Your Router 134 User Manual
-
 1
1 -
2
-
3
-
4
-
5
-
6
-
7
-
8
-
9
-
10
-
11
-
12
-
13
-
14
-
15
-
16
-
17
-
18
-
19
-
20
-
21
-
22
-
23
-
24
-
25
-
26
-
27
-
28
-
29
-
30
-
31
-
32
-
33
-
34
-
35
-
36
-
37
-
38
-
39
-
40
-
41
-
42
-
43
-
44
-
45
-
46
-
47
-
48
-
49
-
50
-
51
-
52
-
53
-
54
-
55
-
56
-
57
-
58
-
59
-
60
-
61
-
62
-
63
-
64
-
65
-
66
-
67
-
68
-
69
-
70
-
71
-
72
-
73
-
74
-
75
-
76
-
77
-
78
-
79
-
80
-
81
-
82
-
83
-
84
-
85
-
86
-
87
-
88
-
89
-
90
-
91
-
92
-
93
-
94
-
95
-
96
-
97
-
98
-
99
-
100
-
101
-
102
-
103
-
104
-
105
-
106
-
107
-
108
-
109
-
110
-
111
-
112
-
113
-
114
-
115
-
116
-
117
-
118
-
119
-
120
-
121
-
122
-
123
-
124
-
125
-
126
-
127
-
128
-
 129
129 -
 130
130 -
 131
131 -
 132
132 -
 133
133 -
 134
134 -
 135
135 -
 136
136 -
 137
137 -
 138
138 -
 139
139 -
140
-
141
-
142
-
143
-
144
-
145
-
146
-
147
-
148
-
149
-
150
-
151
-
152
-
153
-
154
-
155
-
156
-
157
-
158
-
159
-
160
-
161
-
162
-
163
-
164
-
165
-
166
-
167
-
168
-
169
-
170
-
171
-
172
-
173
-
174
-
175
-
176
-
177
-
178
-
179
-
180
-
181
-
182
-
183
-
184
-
185
-
186
 |
 |