Netgear RAXE290 User Manual - Page 157
Install OpenVPN software on a Windows-based computer, ADVANCED > Advanced Setup > VPN Service
 |
View all Netgear RAXE290 manuals
Add to My Manuals
Save this manual to your list of manuals |
Page 157 highlights
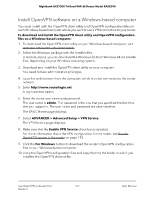
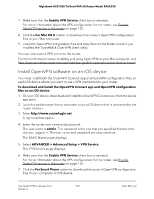
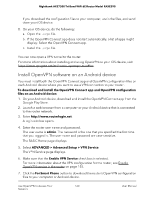
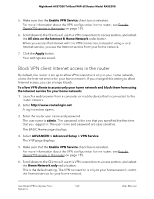
Nighthawk AXE7300 Tri-Band WiFi 6E Router Model RAXE290 Install OpenVPN software on a Windows-based computer You must install both the OpenVPN client utility and OpenVPN configuration files on each Windows-based computer where you want to use a VPN connection to your router. To download and install the OpenVPN client utility and OpenVPN configuration files on a Windows-based computer: 1. To download the OpenVPN client utility on your Windows-based computer, visit openvpn.net/community-downloads/. 2. Select the Windows package with the installer files. In most situations, you can download the Windows 32-bit or Windows 64-bit installer files, depending on your Windows operating system. 3. Download and install the OpenVPN client utility on your computer. You need to have administrative privileges. 4. Launch a web browser from the computer, which must be connected to the router network. 5. Enter http://www.routerlogin.net. A login window opens. 6. Enter the router user name and password. The user name is admin. The password is the one that you specified the first time that you logged in. The user name and password are case-sensitive. The BASIC Home page displays. 7. Select ADVANCED > Advanced Setup > VPN Service. The VPN Service page displays. 8. Make sure that the Enable VPN Service check box is selected. For more information about the VPN configuration for the router, see Enable OpenVPN service in the router on page 155. 9. Click the For Windows button to download the router's OpenVPN configuration files to your Windows-based computer. 10. Unzip the OpenVPN configuration files and copy them to the folder in which you installed the OpenVPN client utility. Use OpenVPN to Access Your 157 Network User Manual
-
 1
1 -
2
-
3
-
4
-
5
-
6
-
7
-
8
-
9
-
10
-
11
-
12
-
13
-
14
-
15
-
16
-
17
-
18
-
19
-
20
-
21
-
22
-
23
-
24
-
25
-
26
-
27
-
28
-
29
-
30
-
31
-
32
-
33
-
34
-
35
-
36
-
37
-
38
-
39
-
40
-
41
-
42
-
43
-
44
-
45
-
46
-
47
-
48
-
49
-
50
-
51
-
52
-
53
-
54
-
55
-
56
-
57
-
58
-
59
-
60
-
61
-
62
-
63
-
64
-
65
-
66
-
67
-
68
-
69
-
70
-
71
-
72
-
73
-
74
-
75
-
76
-
77
-
78
-
79
-
80
-
81
-
82
-
83
-
84
-
85
-
86
-
87
-
88
-
89
-
90
-
91
-
92
-
93
-
94
-
95
-
96
-
97
-
98
-
99
-
100
-
101
-
102
-
103
-
104
-
105
-
106
-
107
-
108
-
109
-
110
-
111
-
112
-
113
-
114
-
115
-
116
-
117
-
118
-
119
-
120
-
121
-
122
-
123
-
124
-
125
-
126
-
127
-
128
-
129
-
130
-
131
-
132
-
133
-
134
-
135
-
136
-
137
-
138
-
139
-
140
-
141
-
142
-
143
-
144
-
145
-
146
-
147
-
148
-
149
-
150
-
151
-
 152
152 -
 153
153 -
 154
154 -
 155
155 -
 156
156 -
 157
157 -
 158
158 -
 159
159 -
 160
160 -
 161
161 -
 162
162 -
163
-
164
-
165
-
166
-
167
-
168
-
169
-
170
-
171
-
172
-
173
-
174
-
175
-
176
-
177
-
178
-
179
-
180
-
181
-
182
-
183
-
184
-
185
-
186
 |
 |