Netgear RAXE290 User Manual - Page 158
Install OpenVPN software on a Mac computer
 |
View all Netgear RAXE290 manuals
Add to My Manuals
Save this manual to your list of manuals |
Page 158 highlights
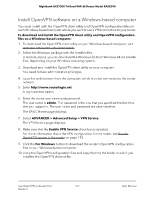
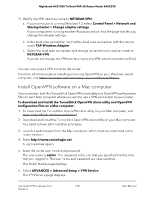
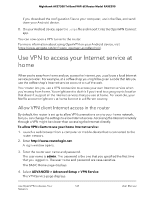
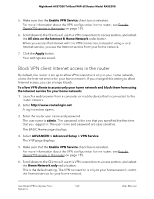
Nighthawk AXE7300 Tri-Band WiFi 6E Router Model RAXE290 11. Modify the VPN interface name to NETGEAR-VPN: a. If your computer is running Windows 10, select Control Panel > Network and Sharing Center > Change adapter settings. If your computer is running another Windows version, find the page that lets you change the adapter settings. b. In the local area connection list, find the local area connection with the device name TAP-Windows Adapter. c. Select the local area connection and change its name (not its device name) to NETGEAR-VPN. If you do not change the VPN interface name, the VPN tunnel connection will fail. You can now open a VPN tunnel to the router. For more information about installing and using OpenVPN on your Windows-based computer, visit https://openvpn.net/community-resources/how-to/#quick. Install OpenVPN software on a Mac computer You must install both the Tunnelblick OpenVPN client utility and OpenVPN configuration files on each Mac computer where you want to use a VPN connection to your router. To download and install the Tunnelblick OpenVPN client utility and OpenVPN configuration files on a Mac computer: 1. To download the Tunnelblick OpenVPN client utility on your Mac computer, visit https://tunnelblick.net/downloads.html. 2. Download and install the Tunnelblick OpenVPN client utility on your Mac computer. You need to have administrative privileges. 3. Launch a web browser from the Mac computer, which must be connected to the router network. 4. Enter http://www.routerlogin.net. A login window opens. 5. Enter the router user name and password. The user name is admin. The password is the one that you specified the first time that you logged in. The user name and password are case-sensitive. The BASIC Home page displays. 6. Select ADVANCED > Advanced Setup > VPN Service. The VPN Service page displays. Use OpenVPN to Access Your 158 Network User Manual
-
 1
1 -
2
-
3
-
4
-
5
-
6
-
7
-
8
-
9
-
10
-
11
-
12
-
13
-
14
-
15
-
16
-
17
-
18
-
19
-
20
-
21
-
22
-
23
-
24
-
25
-
26
-
27
-
28
-
29
-
30
-
31
-
32
-
33
-
34
-
35
-
36
-
37
-
38
-
39
-
40
-
41
-
42
-
43
-
44
-
45
-
46
-
47
-
48
-
49
-
50
-
51
-
52
-
53
-
54
-
55
-
56
-
57
-
58
-
59
-
60
-
61
-
62
-
63
-
64
-
65
-
66
-
67
-
68
-
69
-
70
-
71
-
72
-
73
-
74
-
75
-
76
-
77
-
78
-
79
-
80
-
81
-
82
-
83
-
84
-
85
-
86
-
87
-
88
-
89
-
90
-
91
-
92
-
93
-
94
-
95
-
96
-
97
-
98
-
99
-
100
-
101
-
102
-
103
-
104
-
105
-
106
-
107
-
108
-
109
-
110
-
111
-
112
-
113
-
114
-
115
-
116
-
117
-
118
-
119
-
120
-
121
-
122
-
123
-
124
-
125
-
126
-
127
-
128
-
129
-
130
-
131
-
132
-
133
-
134
-
135
-
136
-
137
-
138
-
139
-
140
-
141
-
142
-
143
-
144
-
145
-
146
-
147
-
148
-
149
-
150
-
151
-
152
-
 153
153 -
 154
154 -
 155
155 -
 156
156 -
 157
157 -
 158
158 -
 159
159 -
 160
160 -
 161
161 -
 162
162 -
 163
163 -
164
-
165
-
166
-
167
-
168
-
169
-
170
-
171
-
172
-
173
-
174
-
175
-
176
-
177
-
178
-
179
-
180
-
181
-
182
-
183
-
184
-
185
-
186
 |
 |