Netgear RAXE290 User Manual - Page 165
Manage port forwarding to a local server
 |
View all Netgear RAXE290 manuals
Add to My Manuals
Save this manual to your list of manuals |
Page 165 highlights
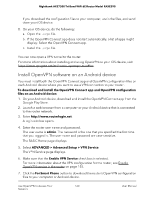
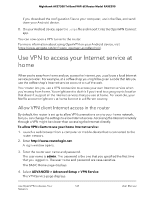
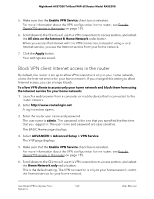
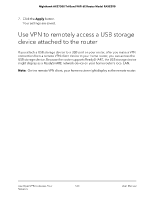
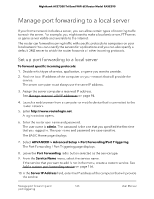
Nighthawk AXE7300 Tri-Band WiFi 6E Router Model RAXE290 Manage port forwarding to a local server If your home network includes a server, you can allow certain types of incoming traffic to reach the server. For example, you might want to make a local web server, FTP server, or game server visible and available to the Internet. The router can forward incoming traffic with specific protocols to computers on your local network.You can specify the servers for applications and you can also specify a default DMZ server to which the router forwards all other incoming protocols. Set up port forwarding to a local server To forward specific incoming protocols: 1. Decide which type of service, application, or game you want to provide. 2. Find the local IP address of the computer on your network that will provide the service. The server computer must always use the same IP address. 3. Assign the server computer a reserved IP address. See Manage reserved LAN IP addresses on page 94. 4. Launch a web browser from a computer or mobile device that is connected to the router network. 5. Enter http://www.routerlogin.net. A login window opens. 6. Enter the router user name and password. The user name is admin. The password is the one that you specified the first time that you logged in. The user name and password are case-sensitive. The BASIC Home page displays. 7. Select ADVANCED > Advanced Setup > Port Forwarding/Port Triggering. The Port Forwarding / Port Triggering page displays. 8. Leave the Port Forwarding radio button selected as the service type. 9. From the Service Name menu, select the service name. If the service that you want to add is not in the menu, create a custom service. See Add a custom port forwarding service on page 166. 10. In the Server IP Address field, enter the IP address of the computer that will provide the service. Manage port forwarding and 165 port triggering User Manual
-
 1
1 -
2
-
3
-
4
-
5
-
6
-
7
-
8
-
9
-
10
-
11
-
12
-
13
-
14
-
15
-
16
-
17
-
18
-
19
-
20
-
21
-
22
-
23
-
24
-
25
-
26
-
27
-
28
-
29
-
30
-
31
-
32
-
33
-
34
-
35
-
36
-
37
-
38
-
39
-
40
-
41
-
42
-
43
-
44
-
45
-
46
-
47
-
48
-
49
-
50
-
51
-
52
-
53
-
54
-
55
-
56
-
57
-
58
-
59
-
60
-
61
-
62
-
63
-
64
-
65
-
66
-
67
-
68
-
69
-
70
-
71
-
72
-
73
-
74
-
75
-
76
-
77
-
78
-
79
-
80
-
81
-
82
-
83
-
84
-
85
-
86
-
87
-
88
-
89
-
90
-
91
-
92
-
93
-
94
-
95
-
96
-
97
-
98
-
99
-
100
-
101
-
102
-
103
-
104
-
105
-
106
-
107
-
108
-
109
-
110
-
111
-
112
-
113
-
114
-
115
-
116
-
117
-
118
-
119
-
120
-
121
-
122
-
123
-
124
-
125
-
126
-
127
-
128
-
129
-
130
-
131
-
132
-
133
-
134
-
135
-
136
-
137
-
138
-
139
-
140
-
141
-
142
-
143
-
144
-
145
-
146
-
147
-
148
-
149
-
150
-
151
-
152
-
153
-
154
-
155
-
156
-
157
-
158
-
159
-
 160
160 -
 161
161 -
 162
162 -
 163
163 -
 164
164 -
 165
165 -
 166
166 -
 167
167 -
 168
168 -
 169
169 -
 170
170 -
171
-
172
-
173
-
174
-
175
-
176
-
177
-
178
-
179
-
180
-
181
-
182
-
183
-
184
-
185
-
186
 |
 |