Netgear RAXE290 User Manual - Page 15
Router label
 |
View all Netgear RAXE290 manuals
Add to My Manuals
Save this manual to your list of manuals |
Page 15 highlights
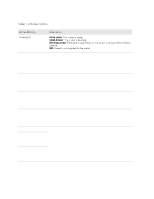
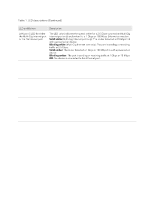
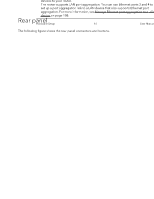
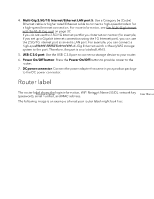
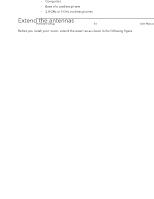
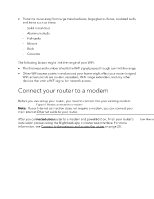
Nighthawk AXE7300 Tri-Band WiFi 6E Router Model RAXE290 4. Multi-Gig 2.5G/1G Internet/Ethernet LAN port 5: Use a Category 5e (Cat5e) Ethernet cable or higher rated Ethernet cable to connect a high-speed modem for a high-speed Internet connection. For more information, see Get Multi-Gig Internet with the Multi-Gig port on page 32. If you do not use the 2.5G/1G Internet port for your Internet connection (for example, if you set up a Gigabit Internet connection using the 1G Internet port), you can use the 2.5G/1G Internet port as an extra LAN port. For example, you can connect a high-speed LAN device such as a Multi-Gig Ethernet switch or ReadyNAS storage system to the port. Therefore, the port is also labeled LAN 5. 5. USB-C 3.0 port: Use the USB-C 3.0 port to connect a storage device to your router. 6. Power On/Off button: Press the Power On/Off button to provide power to the router. 7. DC power connector: Connect the power adapter that came in your product package to the DC power connector. Router label The router label shows the login information, WiFi Network Name (SSID), network key (password), serial number, and MAC address. The following image is an example of what your router label might look like: Figure 4. RAXE290 router label Hardware Setup 15 User Manual
-
 1
1 -
2
-
3
-
4
-
5
-
6
-
7
-
8
-
9
-
 10
10 -
 11
11 -
 12
12 -
 13
13 -
 14
14 -
 15
15 -
 16
16 -
 17
17 -
 18
18 -
 19
19 -
 20
20 -
21
-
22
-
23
-
24
-
25
-
26
-
27
-
28
-
29
-
30
-
31
-
32
-
33
-
34
-
35
-
36
-
37
-
38
-
39
-
40
-
41
-
42
-
43
-
44
-
45
-
46
-
47
-
48
-
49
-
50
-
51
-
52
-
53
-
54
-
55
-
56
-
57
-
58
-
59
-
60
-
61
-
62
-
63
-
64
-
65
-
66
-
67
-
68
-
69
-
70
-
71
-
72
-
73
-
74
-
75
-
76
-
77
-
78
-
79
-
80
-
81
-
82
-
83
-
84
-
85
-
86
-
87
-
88
-
89
-
90
-
91
-
92
-
93
-
94
-
95
-
96
-
97
-
98
-
99
-
100
-
101
-
102
-
103
-
104
-
105
-
106
-
107
-
108
-
109
-
110
-
111
-
112
-
113
-
114
-
115
-
116
-
117
-
118
-
119
-
120
-
121
-
122
-
123
-
124
-
125
-
126
-
127
-
128
-
129
-
130
-
131
-
132
-
133
-
134
-
135
-
136
-
137
-
138
-
139
-
140
-
141
-
142
-
143
-
144
-
145
-
146
-
147
-
148
-
149
-
150
-
151
-
152
-
153
-
154
-
155
-
156
-
157
-
158
-
159
-
160
-
161
-
162
-
163
-
164
-
165
-
166
-
167
-
168
-
169
-
170
-
171
-
172
-
173
-
174
-
175
-
176
-
177
-
178
-
179
-
180
-
181
-
182
-
183
-
184
-
185
-
186
 |
 |