Panasonic KX-HNC850G HomeHawk Users Guide - Page 101
Recording settings, Bit rate settings for Amazon Echo Show and Google Home
 |
View all Panasonic KX-HNC850G manuals
Add to My Manuals
Save this manual to your list of manuals |
Page 101 highlights
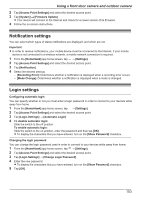
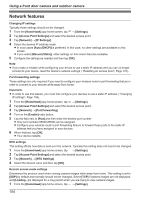
Using a front door camera and outdoor camera 5 Tap [OK]. Status LED settings You can specify whether the device's LED indicator lights or is disabled. 1 From the [HomeHawk] app home screen, tap ® [Settings]. 2 Tap [Access Point Settings] and select the desired access point. 3 Tap [System]. - [Status LED]: Determines whether the device's LED indicator lights or is disabled. Resetting an access point 1 From the [HomeHawk] app home screen, tap ® [Settings]. 2 Tap [Access Point Settings] and select the desired access point. 3 Tap [System] ® [Reset Access Point]. 4 Select the desired setting. - [Reset All Settings]: Resets all access point settings except camera registration settings. - [Reset Access Point Settings]: Resets access point settings except for camera registration information, smartphone registration information, and network related settings. 5 Follow the on-screen instructions. Note: R An access point can also be restarted or reset manually by pressing buttons on the access point. - To restart an access point: Press the reset button using an object with a thin tip. - To reset all access point settings except camera registration settings: Press and hold the reset button for about 5 seconds using an object with a thin tip. - To reset access point network settings (do this if the network settings ( "Changing IP settings", Page 104) are incorrectly configured): While pressing and holding the SETUP button, press the reset button using an object with a thin tip. Recording settings You can specify whether to allow recorded camera images to be erased automatically by new images when the SD card is full, and check the remaining capacity of the SD card. 1 From the [HomeHawk] app home screen, tap ® [Settings]. 2 Tap [Access Point Settings] and select the desired access point. 3 Tap [Recording]. 4 Select the desired setting. - [Overwrite Recording]: Determines whether recorded camera images are erased automatically by new images when the SD card is full. - [SD Card]: Displays the remaining capacity of the SD card. Bit rate settings for Amazon Echo Show and Google Home You can select the bit rate to be used when transmitting data for Amazon Echo Show or Google Home Chromecast. If you cannot display camera images on Amazon Echo Show or via Google Home Chromecast, or if images are not displayed smoothly, try using a lower bit rate setting. 101
-
 1
1 -
2
-
3
-
4
-
5
-
6
-
7
-
8
-
9
-
10
-
11
-
12
-
13
-
14
-
15
-
16
-
17
-
18
-
19
-
20
-
21
-
22
-
23
-
24
-
25
-
26
-
27
-
28
-
29
-
30
-
31
-
32
-
33
-
34
-
35
-
36
-
37
-
38
-
39
-
40
-
41
-
42
-
43
-
44
-
45
-
46
-
47
-
48
-
49
-
50
-
51
-
52
-
53
-
54
-
55
-
56
-
57
-
58
-
59
-
60
-
61
-
62
-
63
-
64
-
65
-
66
-
67
-
68
-
69
-
70
-
71
-
72
-
73
-
74
-
75
-
76
-
77
-
78
-
79
-
80
-
81
-
82
-
83
-
84
-
85
-
86
-
87
-
88
-
89
-
90
-
91
-
92
-
93
-
94
-
95
-
 96
96 -
 97
97 -
 98
98 -
 99
99 -
 100
100 -
 101
101 -
 102
102 -
 103
103 -
 104
104 -
 105
105 -
 106
106 -
107
-
108
-
109
-
110
-
111
-
112
-
113
-
114
-
115
-
116
-
117
-
118
-
119
-
120
-
121
-
122
-
123
-
124
-
125
-
126
-
127
-
128
-
129
-
130
-
131
-
132
-
133
-
134
-
135
-
136
-
137
-
138
-
139
-
140
-
141
-
142
-
143
-
144
-
145
-
146
-
147
-
148
-
149
-
150
-
151
-
152
-
153
-
154
-
155
-
156
 |
 |
