Panasonic KX-HNC850G HomeHawk Users Guide - Page 96
Recording settings, Using night vision, Video settings, Recording with Sound]
 |
View all Panasonic KX-HNC850G manuals
Add to My Manuals
Save this manual to your list of manuals |
Page 96 highlights
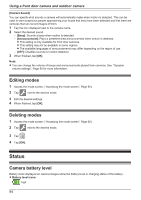
Using a front door camera and outdoor camera 2 Tap [Camera Settings] and select the desired camera. 3 Tap [Speaker Volume] ® [Motion detection volume]. 4 Adjust the volume as desired and then tap [OK]. Recording settings Recording sound You can select whether audio is recorded when recording camera images. 1 From the [HomeHawk] app home screen, tap ® [Settings]. 2 Tap [Camera Settings] and select the desired camera. 3 Tap [Recording]. 4 Slide the [Recording with Sound] switch to the desired position. R When this switch is turned off, audio is not recorded when recording camera images. Adjusting the time stamp You can change the time format and position of the time stamp that is displayed when viewing camera images or recording. You can also turn the time stamp off. 1 From the [HomeHawk] app home screen, tap ® [Settings]. 2 Tap [Camera Settings] and select the desired camera. 3 Tap [Recording] ® [Time Stamp]. 4 Select the desired setting and then tap [OK]. - [Position]: Determines the position of the time stamp. To turn the time stamp off, select [OFF]. - [24-Hour Format]: Determines whether the time stamp is displayed in 24-hour format or 12-hour format. Enable this setting to use 24-hour format time. Using night vision If there is not adequate light to illuminate the subject, such as at night, the camera switches to night vision mode depending on the settings. The following settings can be selected for the night vision. - [Color]: Lights white LEDs so that images can be displayed in color. Has shorter visibility range than [Monochrome]. - [Monochrome]: Lights infrared LEDs so that images can be seen in the dark. Has longer visibility range than [Color]. - [OFF]: Turns off night vision mode. 1 From the [HomeHawk] app home screen, tap ® [Settings]. 2 Tap [Camera Settings] and select the desired camera. 3 Tap [Night Vision]. 4 Select the desired setting and then tap [OK]. Video settings Changing the camera resolution 1 From the [HomeHawk] app home screen, tap 96 ® [Settings].
-
 1
1 -
2
-
3
-
4
-
5
-
6
-
7
-
8
-
9
-
10
-
11
-
12
-
13
-
14
-
15
-
16
-
17
-
18
-
19
-
20
-
21
-
22
-
23
-
24
-
25
-
26
-
27
-
28
-
29
-
30
-
31
-
32
-
33
-
34
-
35
-
36
-
37
-
38
-
39
-
40
-
41
-
42
-
43
-
44
-
45
-
46
-
47
-
48
-
49
-
50
-
51
-
52
-
53
-
54
-
55
-
56
-
57
-
58
-
59
-
60
-
61
-
62
-
63
-
64
-
65
-
66
-
67
-
68
-
69
-
70
-
71
-
72
-
73
-
74
-
75
-
76
-
77
-
78
-
79
-
80
-
81
-
82
-
83
-
84
-
85
-
86
-
87
-
88
-
89
-
90
-
 91
91 -
 92
92 -
 93
93 -
 94
94 -
 95
95 -
 96
96 -
 97
97 -
 98
98 -
 99
99 -
 100
100 -
 101
101 -
102
-
103
-
104
-
105
-
106
-
107
-
108
-
109
-
110
-
111
-
112
-
113
-
114
-
115
-
116
-
117
-
118
-
119
-
120
-
121
-
122
-
123
-
124
-
125
-
126
-
127
-
128
-
129
-
130
-
131
-
132
-
133
-
134
-
135
-
136
-
137
-
138
-
139
-
140
-
141
-
142
-
143
-
144
-
145
-
146
-
147
-
148
-
149
-
150
-
151
-
152
-
153
-
154
-
155
-
156
 |
 |