Panasonic KX-HNC850G HomeHawk Users Guide - Page 121
Turning smart recording scenarios on and off, Start Time]
 |
View all Panasonic KX-HNC850G manuals
Add to My Manuals
Save this manual to your list of manuals |
Page 121 highlights
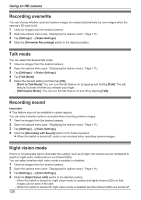
Using an HD camera 5 Tap [Schedule]. 6 Under [Timer], set each item. - [Start Time]: Determines when camera recording starts. - [Recording Duration]: Determines the length of the recording. The maximum setting is 15 minutes. 7 Under [Repeat], set each item. - [Days]: Determines the days on which the scenario can record images. 8 When finished, tap [OK]. Note: R If the conditions of this scenario (day and time) overlap with another scenario that is configured to record images from the same camera, an error is displayed. The nature of the error is also displayed on the scenario's configuration screen. Creating a scenario that uses a sensor as the trigger 1 View live images from the desired camera. 2 Open the options menu (see "Displaying the options menu", Page 111). 3 Tap [Smart Recording]. R A list of existing scenarios is displayed. 4 Tap . 5 Select the sensor that you want to use to trigger the smart recording scenario. 6 Under [Timer], set each item. - [Recording Duration]: Determines the length of the recording. The maximum setting is 15 minutes. 7 Under [Trigger Period], set each item. - [All Day]: Enables the scenario for all day, i.e., images will be recorded whenever the sensor is triggered. - [Start Time]: Determines the start time of the scenario. If the sensor is triggered before this time, images will not be recorded. - [End Time]: Determines the end time of the scenario. If the sensor is triggered after this time, images will not be recorded. 8 Under [Repeat], set each item. - [Days]: Determines the days on which the scenario can record images. 9 When finished, tap [OK]. Note: R If the conditions of this scenario (day and time) overlap with another scenario that is configured to record images from the same camera, an error is displayed. The nature of the error is also displayed on the scenario's configuration screen. Turning smart recording scenarios on and off 1 View live images from the desired camera. 2 Open the options menu (see "Displaying the options menu", Page 111). 3 Tap [Smart Recording]. R A list of existing scenarios is displayed. 121
-
 1
1 -
2
-
3
-
4
-
5
-
6
-
7
-
8
-
9
-
10
-
11
-
12
-
13
-
14
-
15
-
16
-
17
-
18
-
19
-
20
-
21
-
22
-
23
-
24
-
25
-
26
-
27
-
28
-
29
-
30
-
31
-
32
-
33
-
34
-
35
-
36
-
37
-
38
-
39
-
40
-
41
-
42
-
43
-
44
-
45
-
46
-
47
-
48
-
49
-
50
-
51
-
52
-
53
-
54
-
55
-
56
-
57
-
58
-
59
-
60
-
61
-
62
-
63
-
64
-
65
-
66
-
67
-
68
-
69
-
70
-
71
-
72
-
73
-
74
-
75
-
76
-
77
-
78
-
79
-
80
-
81
-
82
-
83
-
84
-
85
-
86
-
87
-
88
-
89
-
90
-
91
-
92
-
93
-
94
-
95
-
96
-
97
-
98
-
99
-
100
-
101
-
102
-
103
-
104
-
105
-
106
-
107
-
108
-
109
-
110
-
111
-
112
-
113
-
114
-
115
-
 116
116 -
 117
117 -
 118
118 -
 119
119 -
 120
120 -
 121
121 -
 122
122 -
 123
123 -
 124
124 -
 125
125 -
 126
126 -
127
-
128
-
129
-
130
-
131
-
132
-
133
-
134
-
135
-
136
-
137
-
138
-
139
-
140
-
141
-
142
-
143
-
144
-
145
-
146
-
147
-
148
-
149
-
150
-
151
-
152
-
153
-
154
-
155
-
156
 |
 |
