Panasonic KX-HNC850G HomeHawk Users Guide - Page 120
Smart recording features, Creating smart recording scenarios
 |
View all Panasonic KX-HNC850G manuals
Add to My Manuals
Save this manual to your list of manuals |
Page 120 highlights
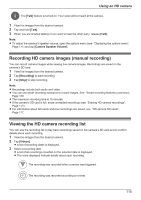
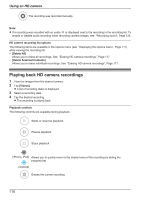
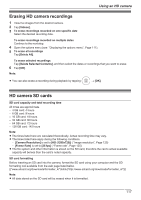
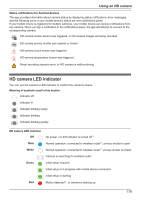
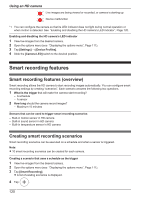
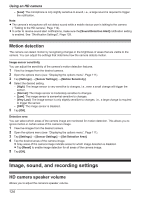
Using an HD camera Live images are being viewed or recorded, or camera is starting up Device malfunction *1 You can configure the camera so that its LED indicator does not light during normal operation or when motion is detected. See "Enabling and disabling the HD camera's LED indicator", Page 120. Enabling and disabling the HD camera's LED indicator 1 View live images from the desired camera. 2 Open the options menu (see "Displaying the options menu", Page 111). 3 Tap [Settings] ® [Device Profiles]. 4 Slide the [Camera LED] switch to the desired position. Smart recording features Smart recording features (overview) Smart recording allows the HD camera to start recording images automatically. You can configure smart recording settings by creating "scenarios". Each scenario answers the following two questions. 1 What is the trigger that will make the camera start recording? - A schedule - A sensor 2 How long should the camera record images? - Maximum 15 minutes Sensors that can be used to trigger smart recording scenarios - Built-in motion sensor in HD camera - Built-in sound sensor in HD camera - Built-in temperature sensor in HD camera Creating smart recording scenarios Smart recording scenarios can be executed on a schedule and when a sensor is triggered. Note: R 10 smart recording scenarios can be created for each camera. Creating a scenario that uses a schedule as the trigger 1 View live images from the desired camera. 2 Open the options menu (see "Displaying the options menu", Page 111). 3 Tap [Smart Recording]. R A list of existing scenarios is displayed. 4 Tap . 120
-
 1
1 -
2
-
3
-
4
-
5
-
6
-
7
-
8
-
9
-
10
-
11
-
12
-
13
-
14
-
15
-
16
-
17
-
18
-
19
-
20
-
21
-
22
-
23
-
24
-
25
-
26
-
27
-
28
-
29
-
30
-
31
-
32
-
33
-
34
-
35
-
36
-
37
-
38
-
39
-
40
-
41
-
42
-
43
-
44
-
45
-
46
-
47
-
48
-
49
-
50
-
51
-
52
-
53
-
54
-
55
-
56
-
57
-
58
-
59
-
60
-
61
-
62
-
63
-
64
-
65
-
66
-
67
-
68
-
69
-
70
-
71
-
72
-
73
-
74
-
75
-
76
-
77
-
78
-
79
-
80
-
81
-
82
-
83
-
84
-
85
-
86
-
87
-
88
-
89
-
90
-
91
-
92
-
93
-
94
-
95
-
96
-
97
-
98
-
99
-
100
-
101
-
102
-
103
-
104
-
105
-
106
-
107
-
108
-
109
-
110
-
111
-
112
-
113
-
114
-
 115
115 -
 116
116 -
 117
117 -
 118
118 -
 119
119 -
 120
120 -
 121
121 -
 122
122 -
 123
123 -
 124
124 -
 125
125 -
126
-
127
-
128
-
129
-
130
-
131
-
132
-
133
-
134
-
135
-
136
-
137
-
138
-
139
-
140
-
141
-
142
-
143
-
144
-
145
-
146
-
147
-
148
-
149
-
150
-
151
-
152
-
153
-
154
-
155
-
156
 |
 |