Panasonic KX-HNC850G HomeHawk Users Guide - Page 73
Detection area, Motion sensitivity, Bit Rate Level Icon]
 |
View all Panasonic KX-HNC850G manuals
Add to My Manuals
Save this manual to your list of manuals |
Page 73 highlights
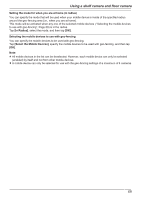
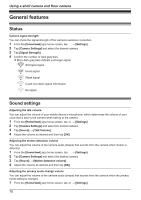
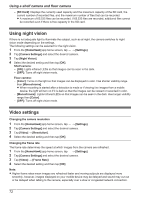
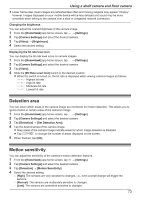
Using a shelf camera and floor camera R Lower frame rates mean images are refreshed less often and moving subjects may appear "choppy", however, images displayed on your mobile device will be less delayed and sound may be more consistent when talking to the camera over a slow or congested network connection. Changing the brightness You can adjust the overall brightness of the camera image. 1 From the [HomeHawk] app home screen, tap ® [Settings]. 2 Tap [Camera Settings] and select the desired camera. 3 Tap [Video] ® [Brightness]. 4 Select the desired setting. Displaying the bit rate level icon You can display the bit rate level icons on camera images. 1 From the [HomeHawk] app home screen, tap ® [Settings]. 2 Tap [Camera Settings] and select the desired camera. 3 Tap [Video]. 4 Slide the [Bit Rate Level Icon] switch to the desired position. R When the switch is turned on, the bit rate is displayed while viewing camera images as follows. Highest bit rate High bit rate Moderate bit rate Lowest bit rate Detection area You can select which areas of the camera image are monitored for motion detection. This allows you to ignore motion in certain areas of the camera's image. 1 From the [HomeHawk] app home screen, tap ® [Settings]. 2 Tap [Camera Settings] and select the desired camera. 3 Tap [Detection] ® [Set Detection Area]. 4 Tap the desired areas of the camera image. R Gray areas of the camera image indicate areas for which image detection is disabled. R Tap to change the number of areas displayed on the screen. 5 When finished, tap [OK]. Motion sensitivity You can adjust the sensitivity of the camera's motion detection features. 1 From the [HomeHawk] app home screen, tap ® [Settings]. 2 Tap [Camera Settings] and select the desired camera. 3 Tap [Detection] ® [Motion Sensitivity]. 4 Select the desired setting. - [High]: The sensors are very sensitive to changes, i.e., even a small change will trigger the sensors. - [Normal]: The sensors are moderately sensitive to changes. - [Low]: The sensors are somewhat sensitive to changes. 73
-
 1
1 -
2
-
3
-
4
-
5
-
6
-
7
-
8
-
9
-
10
-
11
-
12
-
13
-
14
-
15
-
16
-
17
-
18
-
19
-
20
-
21
-
22
-
23
-
24
-
25
-
26
-
27
-
28
-
29
-
30
-
31
-
32
-
33
-
34
-
35
-
36
-
37
-
38
-
39
-
40
-
41
-
42
-
43
-
44
-
45
-
46
-
47
-
48
-
49
-
50
-
51
-
52
-
53
-
54
-
55
-
56
-
57
-
58
-
59
-
60
-
61
-
62
-
63
-
64
-
65
-
66
-
67
-
 68
68 -
 69
69 -
 70
70 -
 71
71 -
 72
72 -
 73
73 -
 74
74 -
 75
75 -
 76
76 -
 77
77 -
 78
78 -
79
-
80
-
81
-
82
-
83
-
84
-
85
-
86
-
87
-
88
-
89
-
90
-
91
-
92
-
93
-
94
-
95
-
96
-
97
-
98
-
99
-
100
-
101
-
102
-
103
-
104
-
105
-
106
-
107
-
108
-
109
-
110
-
111
-
112
-
113
-
114
-
115
-
116
-
117
-
118
-
119
-
120
-
121
-
122
-
123
-
124
-
125
-
126
-
127
-
128
-
129
-
130
-
131
-
132
-
133
-
134
-
135
-
136
-
137
-
138
-
139
-
140
-
141
-
142
-
143
-
144
-
145
-
146
-
147
-
148
-
149
-
150
-
151
-
152
-
153
-
154
-
155
-
156
 |
 |