Panasonic WJHD316A WJHD309A User Guide - Page 44
Sequential Display, Press the MONITOR1/MONITOR2 button to, select the monitor. - wj hd316a network setup
 |
View all Panasonic WJHD316A manuals
Add to My Manuals
Save this manual to your list of manuals |
Page 44 highlights
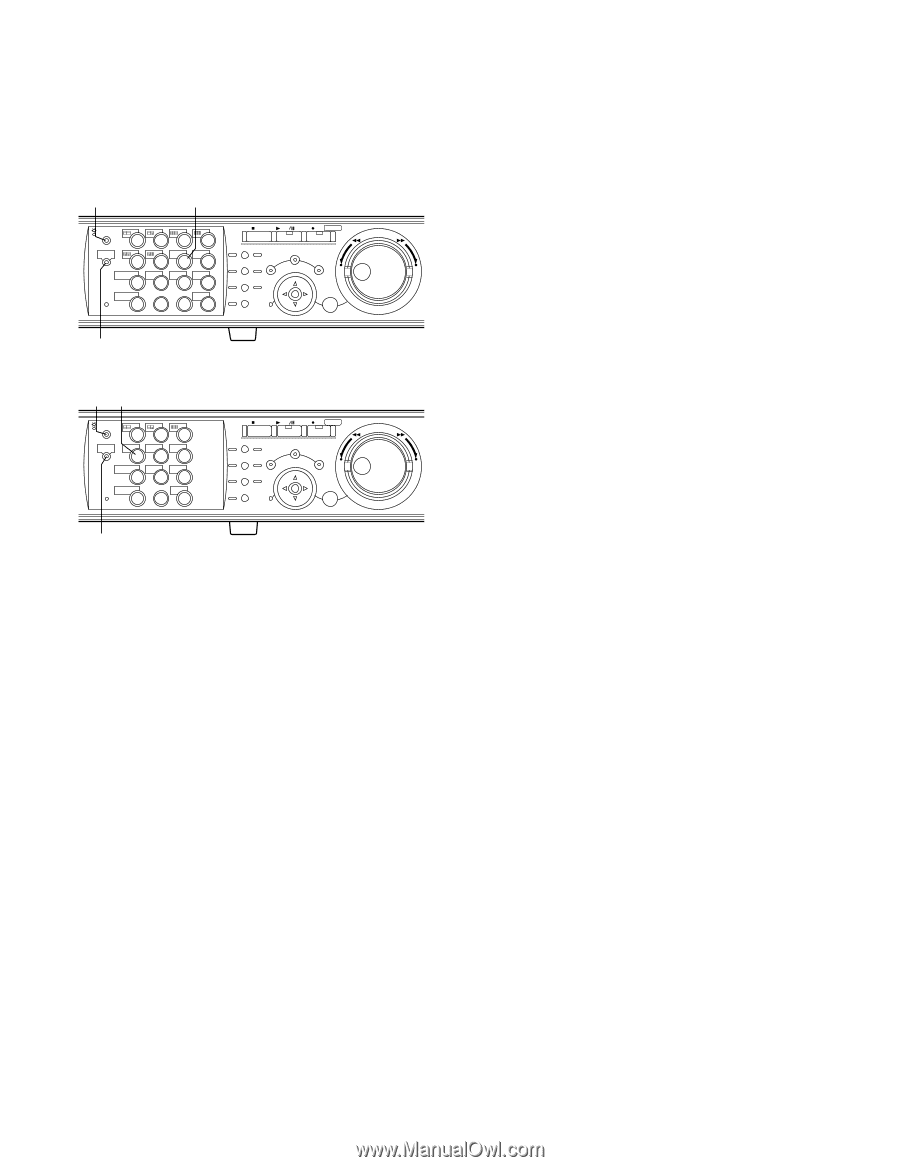
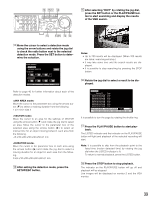
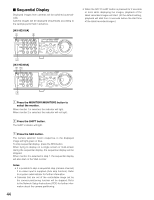
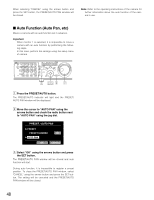
I Sequential Display Displayed images from cameras will be switched automatically. Camera images will be displayed sequentially according to the settings performed in advance. [WJ-HD316A] z c MONITOR1 MONITOR2 R 1234 STOP PLAY PAUSE REC - REC STOP REV FWD R SHIFT SEQ OSD PAN/ GOTO TILT LAST SEARCH 5 6 7 8 ZOOM/ PAN/TILT A-B SLOW SETUP /ESC FOCUS REPEAT - + DISK SELECT COPY TEXT MARK 9 10/0 11 12 IRIS LISTED EL-ZOOM LOGOUT PRESET 2 13 14 15 16 /AUTO SET BUSY x [WJ-HD309A] zc MONITOR1 MONITOR2 R 123 R SHIFT SEQ TEXT OSD 456 DISK SELECT COPY MARK 789 EL-ZOOM LOGOUT 2 0 STOP PLAY PAUSE REC - REC STOP REV FWD PAN/ GOTO TILT LAST SEARCH PAN/TILT SETUP ZOOM/ A-B SLOW /ESC FOCUS REPEAT - + IRIS LISTED PRESET /AUTO SET BUSY x z Press the MONITOR1/MONITOR2 button to select the monitor. When monitor 1 is selected, the indicator will light. When monitor 2 is selected, the indicator will not light. x Press the SHIFT button. The SHIFT indicator will light. c Press the SEQ button. The camera selection button respective to the displayed image will light green or blue. To stop sequential display, press the SEQ button. When trying to display on a single screen or multi-screen during the sequential display, the sequential display will be stopped. When monitor 2 is selected in step 1, the sequential display will also start on the VGA monitor. Notes: • It is possible to skip a sequential step (camera channel) if no video input is supplied (Auto skip function). Refer to a system administrator for further information. • Cameras that are out of the controllable range set by the camera partitioning function will be skipped. Refer to the Network Setup Instructions (PDF) for further information about the camera partitioning. 44 • When the GO TO LAST button is pressed for 2 seconds or more while displaying live images, playback of the latest recorded images will start. (At the default setting, playback will start from 5 seconds before the start time of the latest recorded images.)
-
 1
1 -
2
-
3
-
4
-
5
-
6
-
7
-
8
-
9
-
10
-
11
-
12
-
13
-
14
-
15
-
16
-
17
-
18
-
19
-
20
-
21
-
22
-
23
-
24
-
25
-
26
-
27
-
28
-
29
-
30
-
31
-
32
-
33
-
34
-
35
-
36
-
37
-
38
-
 39
39 -
 40
40 -
 41
41 -
 42
42 -
 43
43 -
 44
44 -
 45
45 -
 46
46 -
 47
47 -
 48
48 -
 49
49 -
50
-
51
-
52
-
53
-
54
-
55
-
56
-
57
-
58
-
59
-
60
-
61
-
62
-
63
-
64
-
65
-
66
-
67
-
68
-
69
-
70
-
71
-
72
-
73
-
74
-
75
-
76
-
77
-
78
-
79
-
80
-
81
-
82
-
83
-
84
-
85
-
86
-
87
-
88
-
89
-
90
-
91
-
92
-
93
-
94
-
95
-
96
-
97
-
98
-
99
-
100
-
101
-
102
-
103
-
104
-
105
-
106
-
107
-
108
-
109
-
110
-
111
-
112
-
113
-
114
-
115
-
116
-
117
-
118
-
119
-
120
-
121
-
122
-
123
-
124
-
125
-
126
-
127
-
128
-
129
-
130
-
131
-
132
-
133
-
134
-
135
-
136
-
137
-
138
-
139
-
140
-
141
-
142
-
143
-
144
-
145
-
146
-
147
-
148
-
149
-
150
-
151
-
152
-
153
-
154
-
155
-
156
-
157
-
158
-
159
-
160
-
161
-
162
-
163
-
164
-
165
-
166
-
167
-
168
-
169
-
170
-
171
-
172
-
173
-
174
-
175
-
176
-
177
-
178
-
179
-
180
-
181
-
182
 |
 |