Panasonic WJHD316A WJHD309A User Guide - Page 71
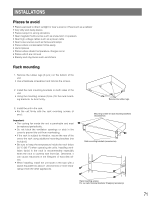
INSTALLATIONS, Places to avoid, Rack mounting
 |
View all Panasonic WJHD316A manuals
Add to My Manuals
Save this manual to your list of manuals |
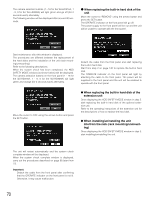
Page 71 highlights
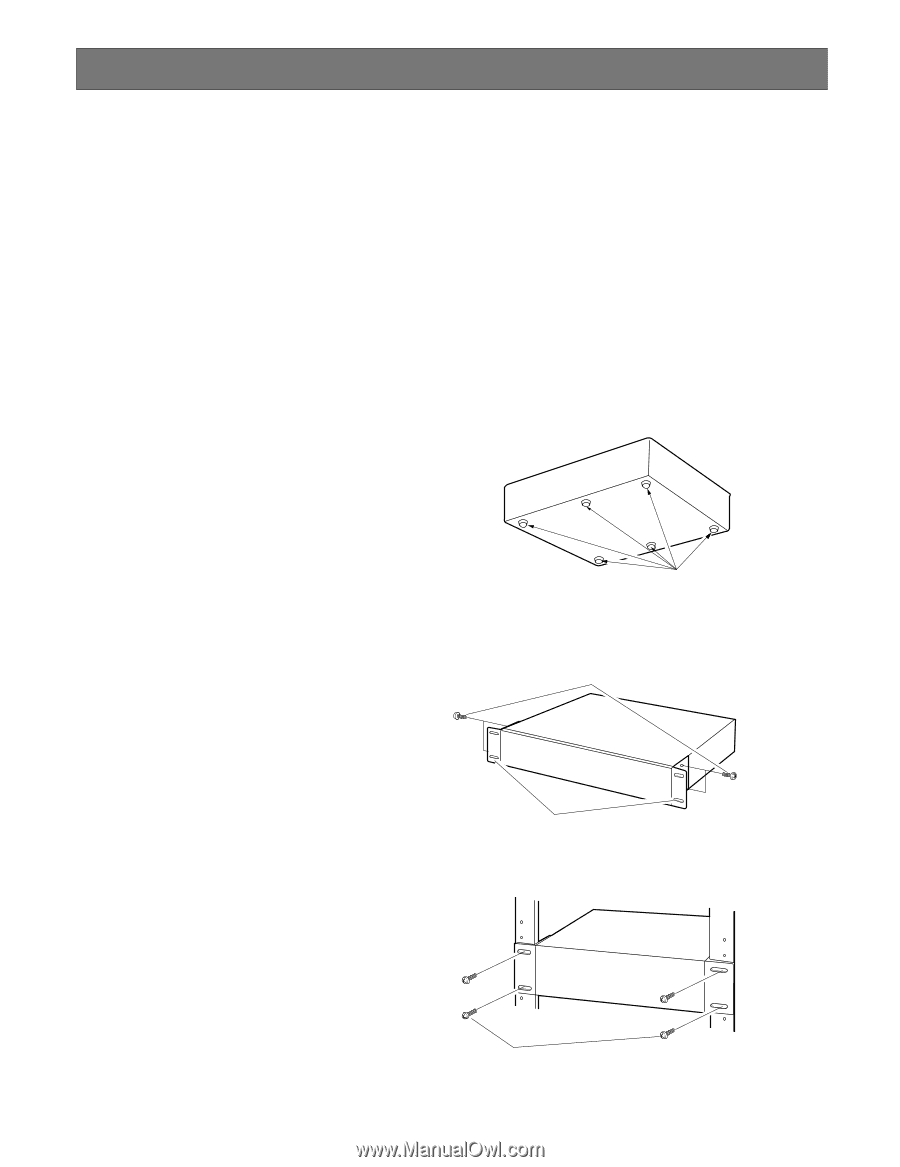
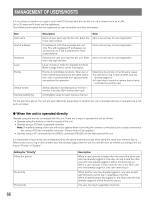
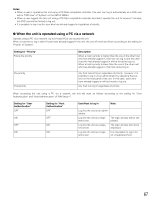
INSTALLATIONS Places to avoid • Places exposed to direct sunlight or near a source of heat such as a radiator • Very dirty and dusty places • Places subject to strong vibrations • Near magnetic field sources such as a television or speakers • Near high-voltage cables such as a power cable • Near noise sources such as fluorescent lamps • Places where condensation forms easily • Humid places • Places where drastic temperature changes occur • Places which are not level • Steamy and oily places such as kitchens Rack mounting 1. Remove the rubber legs (6 pcs.) on the bottom of the unit. • Use a flat-blade screwdriver and remove the screws. 2. Install the rack mounting brackets on both sides of the unit. • Using the mounting screws (4 pcs.) for the rack mounting brackets, fix them firmly. Remove the rubber legs. 3. Install the unit in the rack. • Fix the unit firmly with the rack mounting screws (4 pcs.). Important: • The cooling fan inside the unit is perishable and must be replaced periodically. • Do not block the ventilation openings or slots in the cover to prevent the unit from overheating. • If the rack is subject to vibration, secure the rear of the unit to the rack using additional mounting brackets (not included). • Be sure to keep the temperature inside the rack below 30 °C (86 °F) when operating the units. Installing ventilation fan(s) in the rack is recommended especially when the rack is covered with front lids. Otherwise, it can cause reductions in the lifespans of hard disk drives. • When installing, install the unit lower in the rack with a space equivalent to about 1 unit (44 mm) or more separating it from the other appliances. Mounting screws for rack mounting brackets (accessories) Rack mounting brackets (accessories) Rack mounting screws For our rack: Nominal diameter 5 tapping (accessory) 71
-
 1
1 -
2
-
3
-
4
-
5
-
6
-
7
-
8
-
9
-
10
-
11
-
12
-
13
-
14
-
15
-
16
-
17
-
18
-
19
-
20
-
21
-
22
-
23
-
24
-
25
-
26
-
27
-
28
-
29
-
30
-
31
-
32
-
33
-
34
-
35
-
36
-
37
-
38
-
39
-
40
-
41
-
42
-
43
-
44
-
45
-
46
-
47
-
48
-
49
-
50
-
51
-
52
-
53
-
54
-
55
-
56
-
57
-
58
-
59
-
60
-
61
-
62
-
63
-
64
-
65
-
 66
66 -
 67
67 -
 68
68 -
 69
69 -
 70
70 -
 71
71 -
 72
72 -
 73
73 -
 74
74 -
 75
75 -
 76
76 -
77
-
78
-
79
-
80
-
81
-
82
-
83
-
84
-
85
-
86
-
87
-
88
-
89
-
90
-
91
-
92
-
93
-
94
-
95
-
96
-
97
-
98
-
99
-
100
-
101
-
102
-
103
-
104
-
105
-
106
-
107
-
108
-
109
-
110
-
111
-
112
-
113
-
114
-
115
-
116
-
117
-
118
-
119
-
120
-
121
-
122
-
123
-
124
-
125
-
126
-
127
-
128
-
129
-
130
-
131
-
132
-
133
-
134
-
135
-
136
-
137
-
138
-
139
-
140
-
141
-
142
-
143
-
144
-
145
-
146
-
147
-
148
-
149
-
150
-
151
-
152
-
153
-
154
-
155
-
156
-
157
-
158
-
159
-
160
-
161
-
162
-
163
-
164
-
165
-
166
-
167
-
168
-
169
-
170
-
171
-
172
-
173
-
174
-
175
-
176
-
177
-
178
-
179
-
180
-
181
-
182
 |
 |