Dell PowerConnect B-RX16 Installation Guide - Page 153
Installing a new interface module, panel. This action will fully seat the module in the backplane.
 |
View all Dell PowerConnect B-RX16 manuals
Add to My Manuals
Save this manual to your list of manuals |
Page 153 highlights
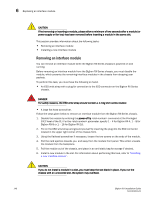
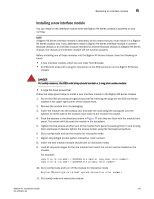
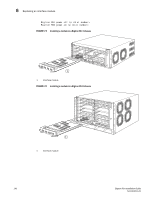
Replacing an interface module 6 Installing a new interface module You can install a new interface module while the BigIron RX Series chassis is powered on and running. NOTE A BigIron RX Series interface module is dedicated, which means that you must install it in a BigIron RX Series chassis only. If you attempt to install a BigIron RX Series interface module in another Brocade chassis or an interface module intended for another Brocade chassis in a BigIron RX Series chassis, the chassis and interface module will not function properly. Before installing one of these modules into the BigIron RX Series chassis, have the following on hand: • A new interface module, which you can order from Brocade. • An ESD wrist strap with a plug for connection to the ESD connector on the BigIron RX Series chassis. DANGER For safety reasons, the ESD wrist strap should contain a 1 meg ohm series resistor. • A large flat-head screwdriver. Follow the steps given below to install a new interface module in the BigIron RX Series chassis 1. Put on the ESD wrist strap and ground yourself by inserting the plug into the ESD connector located in the upper right corner of the chassis front. 2. Remove the module from its packaging. 3. Insert the module into the chassis slot, and slide the card along the card guide until the ejectors on either side of the module move close to the module front panel. 4. Push the ejectors in the directions shown in Figure 74 until they are flush with the module front panel. This action will fully seat the module in the backplane. 5. Tighten the two screws at either end of the module front panel by pushing them in and turning them clockwise. If desired, tighten the screws further using the flat-head screwdriver. 6. Go to config mode and set the module for interactive mode 7. BigIron RX(config)# lp boot system interactive 8. Insert the new module (module should boot to interactive mode) 9. Load all required images for the line module that match the current version loaded on the chassis For example: copy tftp lp rlb02200k.bin monitor copy-boot copy tftp lp rlp02200k.bin primary 10. Go to config mode and turn off the module for interactive mode BigIron RX(config)# no lp boot system interactive 11. Exit config mode and reboot the module BigIron RX Installation Guide 141 53-1001811-01
-
 1
1 -
2
-
3
-
4
-
5
-
6
-
7
-
8
-
9
-
10
-
11
-
12
-
13
-
14
-
15
-
16
-
17
-
18
-
19
-
20
-
21
-
22
-
23
-
24
-
25
-
26
-
27
-
28
-
29
-
30
-
31
-
32
-
33
-
34
-
35
-
36
-
37
-
38
-
39
-
40
-
41
-
42
-
43
-
44
-
45
-
46
-
47
-
48
-
49
-
50
-
51
-
52
-
53
-
54
-
55
-
56
-
57
-
58
-
59
-
60
-
61
-
62
-
63
-
64
-
65
-
66
-
67
-
68
-
69
-
70
-
71
-
72
-
73
-
74
-
75
-
76
-
77
-
78
-
79
-
80
-
81
-
82
-
83
-
84
-
85
-
86
-
87
-
88
-
89
-
90
-
91
-
92
-
93
-
94
-
95
-
96
-
97
-
98
-
99
-
100
-
101
-
102
-
103
-
104
-
105
-
106
-
107
-
108
-
109
-
110
-
111
-
112
-
113
-
114
-
115
-
116
-
117
-
118
-
119
-
120
-
121
-
122
-
123
-
124
-
125
-
126
-
127
-
128
-
129
-
130
-
131
-
132
-
133
-
134
-
135
-
136
-
137
-
138
-
139
-
140
-
141
-
142
-
143
-
144
-
145
-
146
-
147
-
 148
148 -
 149
149 -
 150
150 -
 151
151 -
 152
152 -
 153
153 -
 154
154 -
 155
155 -
 156
156 -
 157
157 -
 158
158 -
159
-
160
-
161
-
162
-
163
-
164
-
165
-
166
-
167
-
168
-
169
-
170
-
171
-
172
-
173
-
174
-
175
-
176
-
177
-
178
-
179
-
180
-
181
-
182
-
183
-
184
-
185
-
186
-
187
-
188
-
189
-
190
-
191
-
192
-
193
-
194
-
195
-
196
-
197
-
198
-
199
-
200
-
201
-
202
-
203
-
204
-
205
-
206
-
207
-
208
-
209
-
210
-
211
-
212
-
213
-
214
-
215
-
216
-
217
-
218
-
219
-
220
-
221
-
222
-
223
-
224
-
225
-
226
-
227
-
228
-
229
-
230
-
231
-
232
-
233
-
234
-
235
-
236
-
237
-
238
-
239
-
240
 |
 |