Dell PowerConnect B-RX16 Installation Guide - Page 69
Final steps, Installing a BigIron RX-32 switch, Preparing the installation site
 |
View all Dell PowerConnect B-RX16 manuals
Add to My Manuals
Save this manual to your list of manuals |
Page 69 highlights
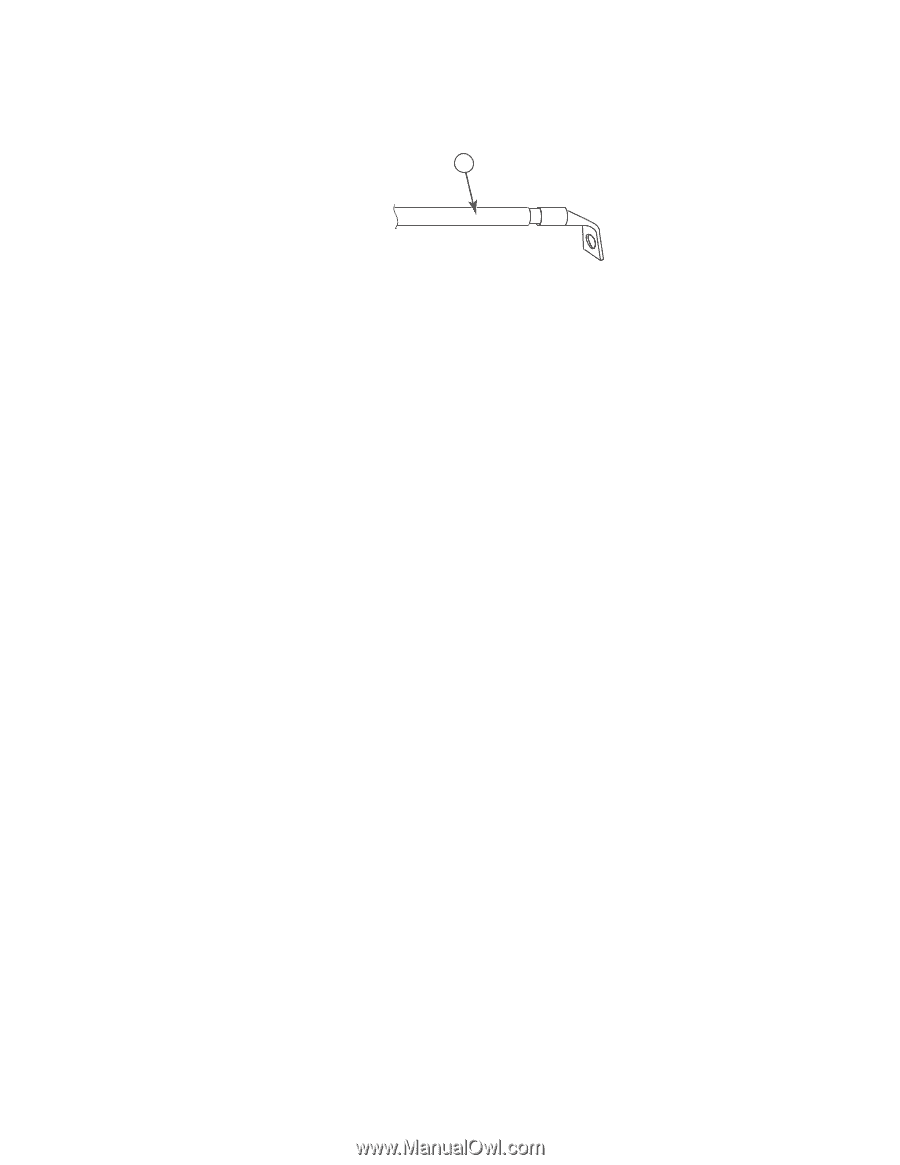
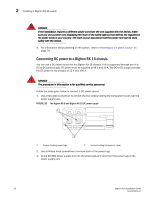
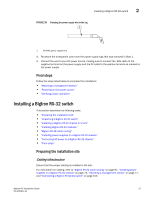
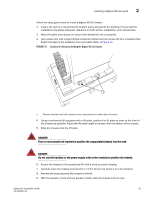
Installing a BigIron RX-32 switch 2 FIGURE 39 Crimping the power supply wire in the lug 1 1 #8 AWG power supply wire 4. Re-attach the transparent cover over the power supply lugs that was removed in Step 1. 5. Connect the wire to your DC power source, making sure to connect the -48V cable to the negative terminal on the power supply and the 0V cable to the positive terminal as marked on the power supply. Final steps Follow the steps listed below to complete the installation: • "Attaching a management station" • "Powering-on the power source" • "Verifying proper operation" Installing a BigIron RX-32 switch This section describes the following tasks: • "Preparing the installation site" • "Unpacking a BigIron RX-32 switch" • "Installing a BigIron RX-32 chassis in a rack" • "Installing BigIron RX-32 modules" • "BigIron RX-32 cable routing" • "Installing power supplies in a BigIron RX-32 chassis" • "Connecting AC power to a BigIron RX-32 chassis" • "Final steps" Preparing the installation site Cabling infrastructure Ensure that the proper cabling is installed in the site. For information on cabling, refer to "BigIron RX-32 cable routing" on page 67, "Installing power supplies in a BigIron RX-32 chassis" on page 75, "Attaching a management station" on page 77, and "Connecting a BigIron RX Series switch" on page 105. BigIron RX Installation Guide 57 53-1001811-01
-
 1
1 -
2
-
3
-
4
-
5
-
6
-
7
-
8
-
9
-
10
-
11
-
12
-
13
-
14
-
15
-
16
-
17
-
18
-
19
-
20
-
21
-
22
-
23
-
24
-
25
-
26
-
27
-
28
-
29
-
30
-
31
-
32
-
33
-
34
-
35
-
36
-
37
-
38
-
39
-
40
-
41
-
42
-
43
-
44
-
45
-
46
-
47
-
48
-
49
-
50
-
51
-
52
-
53
-
54
-
55
-
56
-
57
-
58
-
59
-
60
-
61
-
62
-
63
-
 64
64 -
 65
65 -
 66
66 -
 67
67 -
 68
68 -
 69
69 -
 70
70 -
 71
71 -
 72
72 -
 73
73 -
 74
74 -
75
-
76
-
77
-
78
-
79
-
80
-
81
-
82
-
83
-
84
-
85
-
86
-
87
-
88
-
89
-
90
-
91
-
92
-
93
-
94
-
95
-
96
-
97
-
98
-
99
-
100
-
101
-
102
-
103
-
104
-
105
-
106
-
107
-
108
-
109
-
110
-
111
-
112
-
113
-
114
-
115
-
116
-
117
-
118
-
119
-
120
-
121
-
122
-
123
-
124
-
125
-
126
-
127
-
128
-
129
-
130
-
131
-
132
-
133
-
134
-
135
-
136
-
137
-
138
-
139
-
140
-
141
-
142
-
143
-
144
-
145
-
146
-
147
-
148
-
149
-
150
-
151
-
152
-
153
-
154
-
155
-
156
-
157
-
158
-
159
-
160
-
161
-
162
-
163
-
164
-
165
-
166
-
167
-
168
-
169
-
170
-
171
-
172
-
173
-
174
-
175
-
176
-
177
-
178
-
179
-
180
-
181
-
182
-
183
-
184
-
185
-
186
-
187
-
188
-
189
-
190
-
191
-
192
-
193
-
194
-
195
-
196
-
197
-
198
-
199
-
200
-
201
-
202
-
203
-
204
-
205
-
206
-
207
-
208
-
209
-
210
-
211
-
212
-
213
-
214
-
215
-
216
-
217
-
218
-
219
-
220
-
221
-
222
-
223
-
224
-
225
-
226
-
227
-
228
-
229
-
230
-
231
-
232
-
233
-
234
-
235
-
236
-
237
-
238
-
239
-
240
 |
 |