Dell PowerConnect B-RX16 Installation Guide - Page 157
Replacing a fiber-optic transceiver
 |
View all Dell PowerConnect B-RX16 manuals
Add to My Manuals
Save this manual to your list of manuals |
Page 157 highlights
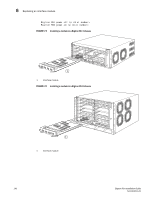
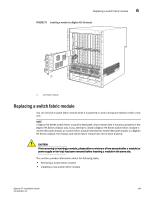
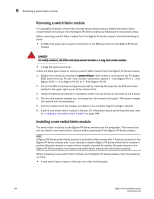
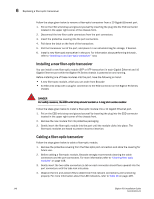
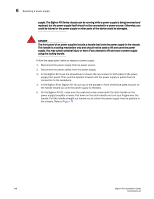
Replacing a fiber-optic transceiver 6 • An ESD wrist strap with a plug for connection to the ESD connector on the BigIron RX Series chassis DANGER For safety reasons, the ESD wrist strap should contain a 1 meg ohm series resistor. • A large flat-head screwdriver Follow the steps given below to install a new switch fabric module in a BigIron RX Series chassis. 1. Put on the ESD wrist strap and ground yourself by inserting the plug into an ESD connector located on the chassis front. 2. Remove the new module from its packaging. 3. Insert the module into the chassis slot, and slide the card along the card guide until the ejectors on either side of the module move close to the module front panel. 4. Push the ejectors even closer until they are flush with the module front panel. This action will fully seat the module in the backplane. 5. Tighten the two screws at either end of the module front panel by pushing them in and turning them clockwise. Then, tighten the screws further using the flat-head screwdriver. Replacing a fiber-optic transceiver You can remove an SFP or XFP transceiver from a port and replace it with a new one while the BigIron RX Series chassis is powered on and running. This section provides information about the following tasks: • Removing the fiber-optic transceiver • Installing a new fiber-optic transceiver • Cabling a fiber-optic transceiver Removing a fiber-optic transceiver You can remove a SFP (also called a mini-GBIC) or an XFP transceiver from a port while the BigIron RX Series chassis is powered on and running. Before removing a fiber-optic transceiver, have the following on hand: • An ESD wrist strap with a plug for connection to the ESD connector on the BigIron RX Series chassis DANGER For safety reasons, the ESD wrist strap should contain a 1 meg ohm series resistor. • The protective covering that you removed from the fiber-optic transceiver port when you initially installed the module • A small flathead screwdriver BigIron RX Installation Guide 145 53-1001811-01
-
 1
1 -
2
-
3
-
4
-
5
-
6
-
7
-
8
-
9
-
10
-
11
-
12
-
13
-
14
-
15
-
16
-
17
-
18
-
19
-
20
-
21
-
22
-
23
-
24
-
25
-
26
-
27
-
28
-
29
-
30
-
31
-
32
-
33
-
34
-
35
-
36
-
37
-
38
-
39
-
40
-
41
-
42
-
43
-
44
-
45
-
46
-
47
-
48
-
49
-
50
-
51
-
52
-
53
-
54
-
55
-
56
-
57
-
58
-
59
-
60
-
61
-
62
-
63
-
64
-
65
-
66
-
67
-
68
-
69
-
70
-
71
-
72
-
73
-
74
-
75
-
76
-
77
-
78
-
79
-
80
-
81
-
82
-
83
-
84
-
85
-
86
-
87
-
88
-
89
-
90
-
91
-
92
-
93
-
94
-
95
-
96
-
97
-
98
-
99
-
100
-
101
-
102
-
103
-
104
-
105
-
106
-
107
-
108
-
109
-
110
-
111
-
112
-
113
-
114
-
115
-
116
-
117
-
118
-
119
-
120
-
121
-
122
-
123
-
124
-
125
-
126
-
127
-
128
-
129
-
130
-
131
-
132
-
133
-
134
-
135
-
136
-
137
-
138
-
139
-
140
-
141
-
142
-
143
-
144
-
145
-
146
-
147
-
148
-
149
-
150
-
151
-
 152
152 -
 153
153 -
 154
154 -
 155
155 -
 156
156 -
 157
157 -
 158
158 -
 159
159 -
 160
160 -
 161
161 -
 162
162 -
163
-
164
-
165
-
166
-
167
-
168
-
169
-
170
-
171
-
172
-
173
-
174
-
175
-
176
-
177
-
178
-
179
-
180
-
181
-
182
-
183
-
184
-
185
-
186
-
187
-
188
-
189
-
190
-
191
-
192
-
193
-
194
-
195
-
196
-
197
-
198
-
199
-
200
-
201
-
202
-
203
-
204
-
205
-
206
-
207
-
208
-
209
-
210
-
211
-
212
-
213
-
214
-
215
-
216
-
217
-
218
-
219
-
220
-
221
-
222
-
223
-
224
-
225
-
226
-
227
-
228
-
229
-
230
-
231
-
232
-
233
-
234
-
235
-
236
-
237
-
238
-
239
-
240
 |
 |
