HTC Verizon Wireless XV6900 User Manual - Page 117
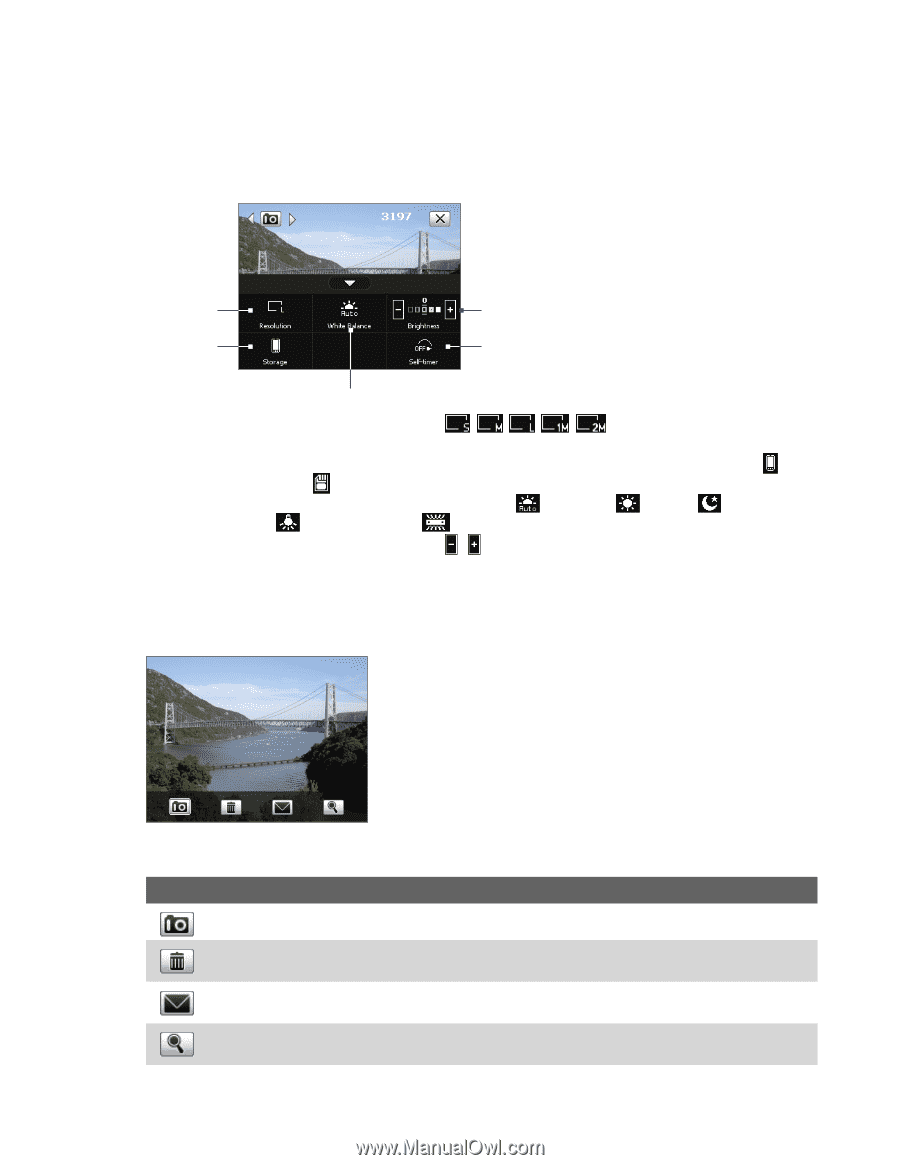
Quick Settings Panel, The Review screen, Resolution, Storage, White Balance, Brightness, Self-timer
 |
View all HTC Verizon Wireless XV6900 manuals
Add to My Manuals
Save this manual to your list of manuals |
Page 117 highlights
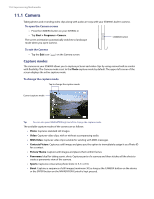
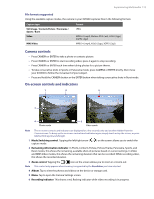
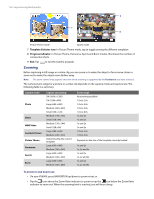
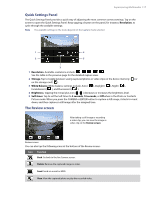
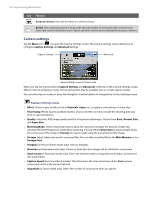
Experiencing Multimedia 117 Quick Settings Panel The Quick Settings Panel provides a quick way of adjusting the most common camera settings. Tap on the screen to open the Quick Settings Panel. Keep tapping a button on the panel, for instance, Resolution, to cycle through the available settings. Note The available settings on the menu depend on the Capture mode selected. 1 4 2 5 3 1 Resolution. Available resolutions include: . See the table in the previous page for the detailed capture sizes. 2 Storage. Tap to toggle between saving captured photos or video clips on the device memory ( ) or on the storage card ( ). 3 White Balance. White balance settings include: Auto ( ), Daylight ( ), Night ( ), Incandescent ( ), and Fluorescent ( ). 4 Brightness. Tapping the minus/plus icon ( / ) decreases or increases the brightness level. 5 Self-timer. Tap to set the Self-timer to 2 seconds, 10 seconds, or Off when in the Photo or Contacts Picture mode. When you press the CAMERA or ENTER button to capture a still image, it starts to count down, and then captures a still image after the assigned time. The Review screen After taking a still image or recording a video clip, you can view the image or video clip on the Review screen. Review screen You can also tap the following icons at the bottom of the Review screen: Icon Function Back: Go back to the live Camera screen. Delete: Remove the captured image or video. Send: Send via e-mail or MMS. View: View the captured photo or play the recorded video.
-
 1
1 -
2
-
3
-
4
-
5
-
6
-
7
-
8
-
9
-
10
-
11
-
12
-
13
-
14
-
15
-
16
-
17
-
18
-
19
-
20
-
21
-
22
-
23
-
24
-
25
-
26
-
27
-
28
-
29
-
30
-
31
-
32
-
33
-
34
-
35
-
36
-
37
-
38
-
39
-
40
-
41
-
42
-
43
-
44
-
45
-
46
-
47
-
48
-
49
-
50
-
51
-
52
-
53
-
54
-
55
-
56
-
57
-
58
-
59
-
60
-
61
-
62
-
63
-
64
-
65
-
66
-
67
-
68
-
69
-
70
-
71
-
72
-
73
-
74
-
75
-
76
-
77
-
78
-
79
-
80
-
81
-
82
-
83
-
84
-
85
-
86
-
87
-
88
-
89
-
90
-
91
-
92
-
93
-
94
-
95
-
96
-
97
-
98
-
99
-
100
-
101
-
102
-
103
-
104
-
105
-
106
-
107
-
108
-
109
-
110
-
111
-
 112
112 -
 113
113 -
 114
114 -
 115
115 -
 116
116 -
 117
117 -
 118
118 -
 119
119 -
 120
120 -
 121
121 -
 122
122 -
123
-
124
-
125
-
126
-
127
-
128
-
129
-
130
-
131
-
132
-
133
-
134
-
135
-
136
-
137
-
138
-
139
-
140
-
141
-
142
-
143
-
144
-
145
-
146
-
147
-
148
-
149
-
150
-
151
-
152
-
153
-
154
 |
 |