Singer 2010 Superb Instruction Manual 2 - Page 101
Adjusting, Buttonhole, Reglage, boutonniere, d'essai, Ajuste, prueba
 |
View all Singer 2010 Superb manuals
Add to My Manuals
Save this manual to your list of manuals |
Page 101 highlights
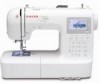
Adjusting the Test Buttonhole If the test buttonhole is not to your liking, or does not suit your fabric for the reasons illustrated below, the following procedures show you how to correct the appearance. A. Adjusting Buttonhole Cutting Space Use stitch width to adjust the cutting space of your buttonhole. The stitch width control is located in the Fine Tuning section of the stitch selection panel. The cutting space of the programmed buttonhole on your machine is equal to a stitch width of 6. To change the programmed cutting space, first fine tune your stitch width to 6, then adjust the buttonhole cutting space from that setting. For a wider cutting space turn dial toward 9. For a smaller cutting space turn dial toward 0. B. Changing Stitch Density If you want the stitches closer together or farther apart on both sides of the buttonhole, adjust stitch length. The stitch length control is located in the Fine Tuning section of the stitch selection panel. The stitch density of the programmed buttonhole on your machine is equal to a stitch length of 8. To change the programmed stitch density, first fine tune the stitch length to 8, then adjust the density from that setting. Additional information on Fine Tuning is located on page 39. C. Button Will Not Pass Through Test Buttonhole Easily The length of button opening is controlled by button carrier clamp. If the button will not pass through the button opening of your test buttonhole, slide the clamp forward to obtain the extra length you require. Remove button from carrier and stitch buttonhole without a button. Reglage de la boutonniere d'essai Si vous n'etes pas satisfaite de votre boutonnière d'essai, ou si elle ne convient pas au tissu pour les raisons mentionnees cidessous, les instructions qui suivent indiquent comment en modifier l'apparence. A. Comment modifier l'ouverture de la boutonniere La largeur du point sert a modifier l'ouverture de la boutonniere. Le regle-point de largeur est situe dans la section des reglages de precision au tableau de points-motifs. L'ouverture de la boutonniere programmee equivaut a une largeur de point de 6. Pour modifier la programmation de cette ouverture, reglez tout d'abord la largeur du point a 6, et changez ensuite l'ouverture de la boutonnière a partir de ce reglage. Pour elargir ouverture, tournez le cadran vers 9; pour la retrecir, tournez vers 0. B. Comment changer la densite du point Si vous desirez que les points soient plus rapproches ou plus ecartes les uns des autres sur les deux cotes de la boutonnière, reglez la longueur du point. Le regle-point de longueur est situe dans la section des reglages de precision au tableau des points-motifs. La densite du point de la boutonniere programmee equivaut a une longueur de point de 8. Pour modifier la programmation de densite du point, reglez tout d'abord la Iongueur du point a 8 et changez-la ensuite a partir de ce reglage. Pour de plus amples renseignemerits sur les reglages de precision, consultez la page 39. C. Lorsque le bouton ne passe pas facilement dans la boutonniere d'essai Le serre-bouton regle la longueur de l'ouverture pour le bouton. Si le bouton ne passe pas dans l'ouverture de la boutonniere d'essai, glissez le serre-bouton vers l'avant afin d'obtenir le surplus de longueur necessaire. Retirez le bouton du porte-bouton et cousez la boutonniere sans bouton. Ajuste del ojal de prueba Si no le gusta el ojal de prueba o si no corresponde a la tela por las razones indicadas abajo, los siguientes procedimientos le ensenaran c6mo corregir la apariencia. A. Ajuste de la incision del ojal Use el ancho del punto para ajustar la incisiOn de su ojal. El mando del ancho se encuentra en la secci6n del Ajuste fino en el panel de seleccien de puntos. La incision del ojal programada en su maquina corresponde a un ancho de punto 6. Para cambiar la incision, ajuste el ancho a 6, despues ajuste la incisiOn desde este punto. Para una incision mas ancha, gire el disco hacia 9. Para una incision mas pequena, gire el disco hacia 0. Cambiar is densidad del punto Si Usted quiere puntos mas apretados o mas abiertos en ambos lados del ojal, ajuste la longitud del punto. El mando de la longitud se encuentra en la secciOn del Ajuste fino en el panel de selecciOn de puntos. La densidad del punto del ojal programado en su maquina corresponde a la longitud del punto 8. Para cambiar la densidad, primer() ajuste la longitud del punto a 8, despues ajuste la densidad desde este punto. Para detalles adicionales sobre el Ajuste fino, vease la pagina 39. C. El bot®n n. pasa tacii ente por el ojal de prueba La longitud del ojal se controla mediante la grampa del portabotOn. Si el baton no pasa por la abertura de su ojal de prueba, deslice la grampa hacia delante para obtener la longitud adicional requerida. Saque el bot6n del portabotOn y haga la costura del ojal sin el boten 99
-
 1
1 -
2
-
3
-
4
-
5
-
6
-
7
-
8
-
9
-
10
-
11
-
12
-
13
-
14
-
15
-
16
-
17
-
18
-
19
-
20
-
21
-
22
-
23
-
24
-
25
-
26
-
27
-
28
-
29
-
30
-
31
-
32
-
33
-
34
-
35
-
36
-
37
-
38
-
39
-
40
-
41
-
42
-
43
-
44
-
45
-
46
-
47
-
48
-
49
-
50
-
51
-
52
-
53
-
54
-
55
-
56
-
57
-
58
-
59
-
60
-
61
-
62
-
63
-
64
-
65
-
66
-
67
-
68
-
69
-
70
-
71
-
72
-
73
-
74
-
75
-
76
-
77
-
78
-
79
-
80
-
81
-
82
-
83
-
84
-
85
-
86
-
87
-
88
-
89
-
90
-
91
-
92
-
93
-
94
-
95
-
 96
96 -
 97
97 -
 98
98 -
 99
99 -
 100
100 -
 101
101 -
 102
102 -
 103
103 -
 104
104 -
 105
105 -
 106
106 -
107
-
108
-
109
-
110
-
111
-
112
-
113
-
114
-
115
-
116
 |
 |
