HTC EVO View 4G User Manual (Gingerbread) - Page 59
Setting Up My Contact Card, Adding a New People Entry, Using the Details Screen - case
 |
View all HTC EVO View 4G manuals
Add to My Manuals
Save this manual to your list of manuals |
Page 59 highlights
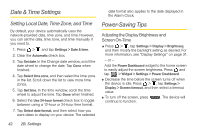
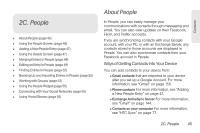
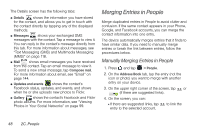
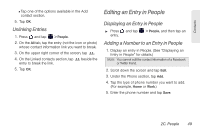
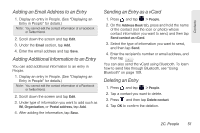
Contacts Setting Up My Contact Card My contact card provides a convenient way to store your personal contact information so that you can easily send it using MMS, email, or Bluetooth. To set up My contact card: 1. On the Address Book tab of the People screen, tap Me. Tip: If you are logged in to your Facebook account through Facebook for HTC Sense, instead of Me, you will see the name you use in Facebook. 2. Enter your name and contact details. 3. Tap Save. Adding a New People Entry 1. On the Address Book tab, tap at the top of the screen. Note: If you have set up a Google Account or an Exchange ActiveSync email account, the Contact type option appears to determine which account the contact will sync with. 2. Tap the Name box, enter the first and last name of the contact. 3. Enter the contact information in the boxes provided. 4. Tap Save. After saving the number, your device displays the new entry in the contacts list. Tip: ICE - In Case of Emergency To make it easier for emergency personnel to identify important contacts, you can list your local emergency contacts under "ICE" in your device's Address book. For example, if your mother is your primary emergency contact, list her as "ICE-Mom" in your Address book. To list more than one emergency contact, use "ICE1-___," "ICE2-___," etc. Using the Details Screen When you tap a contact on the People screen, the Details screen opens, showing you the information stored for that contact, exchanged messages with that contact, Facebook notifications, and more. 2C. People 47
-
 1
1 -
2
-
3
-
4
-
5
-
6
-
7
-
8
-
9
-
10
-
11
-
12
-
13
-
14
-
15
-
16
-
17
-
18
-
19
-
20
-
21
-
22
-
23
-
24
-
25
-
26
-
27
-
28
-
29
-
30
-
31
-
32
-
33
-
34
-
35
-
36
-
37
-
38
-
39
-
40
-
41
-
42
-
43
-
44
-
45
-
46
-
47
-
48
-
49
-
50
-
51
-
52
-
53
-
 54
54 -
 55
55 -
 56
56 -
 57
57 -
 58
58 -
 59
59 -
 60
60 -
 61
61 -
 62
62 -
 63
63 -
 64
64 -
65
-
66
-
67
-
68
-
69
-
70
-
71
-
72
-
73
-
74
-
75
-
76
-
77
-
78
-
79
-
80
-
81
-
82
-
83
-
84
-
85
-
86
-
87
-
88
-
89
-
90
-
91
-
92
-
93
-
94
-
95
-
96
-
97
-
98
-
99
-
100
-
101
-
102
-
103
-
104
-
105
-
106
-
107
-
108
-
109
-
110
-
111
-
112
-
113
-
114
-
115
-
116
-
117
-
118
-
119
-
120
-
121
-
122
-
123
-
124
-
125
-
126
-
127
-
128
-
129
-
130
-
131
-
132
-
133
-
134
-
135
-
136
-
137
-
138
-
139
-
140
-
141
-
142
-
143
-
144
-
145
-
146
-
147
-
148
-
149
-
150
-
151
-
152
-
153
-
154
-
155
-
156
-
157
-
158
-
159
-
160
-
161
-
162
-
163
-
164
-
165
-
166
-
167
-
168
-
169
-
170
-
171
-
172
-
173
-
174
-
175
-
176
-
177
-
178
-
179
-
180
-
181
-
182
-
183
-
184
-
185
-
186
-
187
-
188
-
189
-
190
-
191
-
192
-
193
-
194
-
195
-
196
-
197
-
198
-
199
-
200
-
201
-
202
-
203
-
204
-
205
-
206
-
207
-
208
-
209
-
210
-
211
-
212
-
213
-
214
-
215
-
216
-
217
-
218
-
219
-
220
-
221
-
222
-
223
-
224
-
225
-
226
-
227
-
228
-
229
-
230
-
231
-
232
-
233
-
234
-
235
-
236
-
237
 |
 |
