HTC EVO View 4G User Manual (Gingerbread) - Page 79
Alarm Clock, Setting an Alarm
 |
View all HTC EVO View 4G manuals
Add to My Manuals
Save this manual to your list of manuals |
Page 79 highlights
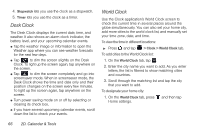
Calendar & Tools 2. Enter your home city's name. As you enter letters, the list is filtered to show matching cities and countries. 3. Scroll through the list and tap your home city. To delete a city on the World Clock list: 1. On the World Clock tab, press > Edit. 2. Tap X to the left of the cities you want to remove and tap Delete. To manually set the time zone, date, and time: To set the time zone, date, and time manually, you need to turn off auto time sync first. 1. On the World Clock tab, press Local time settings. and then tap 2. Clear the Automatic check box, and then set the time zone, date, and time as required. 3. Tap Select time zone. Scroll through the list and then tap the time zone that you want. 4. To change the date, tap Set date. Adjust the date by sliding your finger up or down on the day, month, and year, and then tap OK. 5. To change the time, tap Set time. Adjust the time by sliding your finger up or down on the hour and minute, and then tap OK. 6. Tap the Use 24-hour format check box to switch between using a 12-hour or a 24-hour time format. 7. Tap Select date format then select how you want dates to be displayed. (The selected date format also applies to the date displayed in the alarm clock.) Alarm Clock Your device comes with a built-in alarm clock that has multiple alarm capabilities. Setting an Alarm 1. Press and tap > Clock > Set alarm tab. 2. Tap one of the default alarms on the screen. 3. Under Set alarms, drag your finger up or down to roll the time scroll wheels and set the alarm time. 4. Choose from the available options. You can: Ⅲ Enter the alarm Description and choose the Alarm sound to use. 2D. Calendar & Tools 67
-
 1
1 -
2
-
3
-
4
-
5
-
6
-
7
-
8
-
9
-
10
-
11
-
12
-
13
-
14
-
15
-
16
-
17
-
18
-
19
-
20
-
21
-
22
-
23
-
24
-
25
-
26
-
27
-
28
-
29
-
30
-
31
-
32
-
33
-
34
-
35
-
36
-
37
-
38
-
39
-
40
-
41
-
42
-
43
-
44
-
45
-
46
-
47
-
48
-
49
-
50
-
51
-
52
-
53
-
54
-
55
-
56
-
57
-
58
-
59
-
60
-
61
-
62
-
63
-
64
-
65
-
66
-
67
-
68
-
69
-
70
-
71
-
72
-
73
-
 74
74 -
 75
75 -
 76
76 -
 77
77 -
 78
78 -
 79
79 -
 80
80 -
 81
81 -
 82
82 -
 83
83 -
 84
84 -
85
-
86
-
87
-
88
-
89
-
90
-
91
-
92
-
93
-
94
-
95
-
96
-
97
-
98
-
99
-
100
-
101
-
102
-
103
-
104
-
105
-
106
-
107
-
108
-
109
-
110
-
111
-
112
-
113
-
114
-
115
-
116
-
117
-
118
-
119
-
120
-
121
-
122
-
123
-
124
-
125
-
126
-
127
-
128
-
129
-
130
-
131
-
132
-
133
-
134
-
135
-
136
-
137
-
138
-
139
-
140
-
141
-
142
-
143
-
144
-
145
-
146
-
147
-
148
-
149
-
150
-
151
-
152
-
153
-
154
-
155
-
156
-
157
-
158
-
159
-
160
-
161
-
162
-
163
-
164
-
165
-
166
-
167
-
168
-
169
-
170
-
171
-
172
-
173
-
174
-
175
-
176
-
177
-
178
-
179
-
180
-
181
-
182
-
183
-
184
-
185
-
186
-
187
-
188
-
189
-
190
-
191
-
192
-
193
-
194
-
195
-
196
-
197
-
198
-
199
-
200
-
201
-
202
-
203
-
204
-
205
-
206
-
207
-
208
-
209
-
210
-
211
-
212
-
213
-
214
-
215
-
216
-
217
-
218
-
219
-
220
-
221
-
222
-
223
-
224
-
225
-
226
-
227
-
228
-
229
-
230
-
231
-
232
-
233
-
234
-
235
-
236
-
237
 |
 |