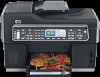
HP Officejet Pro L7600 User Guide - Page 5

Contents - driver

Page 5 highlights

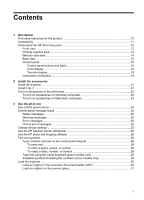
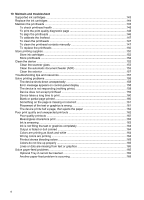
Contents 1 Get started Find other resources for the product 10 Accessibility ...11 Understand the HP All-in-One parts 12 Front view ...13 Printing supplies area ...14 Memory card slots ...14 Back view ...15 Control panel ...15 Control panel buttons and lights 16 Color display ...18 Two-line display ...19 Connection information ...19 2 Install the accessories Install the duplexer ...21 Install Tray 2 ...21 Turn on accessories in the print driver 22 To turn on accessories on Windows computers 23 To turn on accessories on Macintosh computers 23 3 Use the all-in-one Use control panel menus ...24 Control-panel message types 25 Status messages ...25 Warning messages ...25 Error messages ...25 Critical error messages ...25 Change device settings ...25 Use the HP Solution Center (Windows 26 Use the HP photo and imaging software 26 Text and symbols ...28 Type numbers and text on the control-panel keypad 28 To enter text ...28 To enter a space, pause, or symbol 28 To erase a letter, number, or symbol 28 Type text using the visual keyboard (some models only 29 Available symbols for dialing fax numbers (some models only 30 Load the originals ...30 Load an original in the automatic document feeder (ADF 30 Load an original on the scanner glass 31 1

  • 1
  • 2
  • 3
  • 4
  • 5
  • 6
  • 7
  • 8
  • 9
  • 10
  • 11
  • 12
  • 13
  • 14
  • 15
  • 16
  • 17
  • 18
  • 19
  • 20
  • 21
  • 22
  • 23
  • 24
  • 25
  • 26
  • 27
  • 28
  • 29
  • 30
  • 31
  • 32
  • 33
  • 34
  • 35
  • 36
  • 37
  • 38
  • 39
  • 40
  • 41
  • 42
  • 43
  • 44
  • 45
  • 46
  • 47
  • 48
  • 49
  • 50
  • 51
  • 52
  • 53
  • 54
  • 55
  • 56
  • 57
  • 58
  • 59
  • 60
  • 61
  • 62
  • 63
  • 64
  • 65
  • 66
  • 67
  • 68
  • 69
  • 70
  • 71
  • 72
  • 73
  • 74
  • 75
  • 76
  • 77
  • 78
  • 79
  • 80
  • 81
  • 82
  • 83
  • 84
  • 85
  • 86
  • 87
  • 88
  • 89
  • 90
  • 91
  • 92
  • 93
  • 94
  • 95
  • 96
  • 97
  • 98
  • 99
  • 100
  • 101
  • 102
  • 103
  • 104
  • 105
  • 106
  • 107
  • 108
  • 109
  • 110
  • 111
  • 112
  • 113
  • 114
  • 115
  • 116
  • 117
  • 118
  • 119
  • 120
  • 121
  • 122
  • 123
  • 124
  • 125
  • 126
  • 127
  • 128
  • 129
  • 130
  • 131
  • 132
  • 133
  • 134
  • 135
  • 136
  • 137
  • 138
  • 139
  • 140
  • 141
  • 142
  • 143
  • 144
  • 145
  • 146
  • 147
  • 148
  • 149
  • 150
  • 151
  • 152
  • 153
  • 154
  • 155
  • 156
  • 157
  • 158
  • 159
  • 160
  • 161
  • 162
  • 163
  • 164
  • 165
  • 166
  • 167
  • 168
  • 169
  • 170
  • 171
  • 172
  • 173
  • 174
  • 175
  • 176
  • 177
  • 178
  • 179
  • 180
  • 181
  • 182
  • 183
  • 184
  • 185
  • 186
  • 187
  • 188
  • 189
  • 190
  • 191
  • 192
  • 193
  • 194
  • 195
  • 196
  • 197
  • 198
  • 199
  • 200
  • 201
  • 202
  • 203
  • 204
  • 205
  • 206
  • 207
  • 208
  • 209
  • 210
  • 211
  • 212
  • 213
  • 214
  • 215
  • 216
  • 217
  • 218
  • 219
  • 220
  • 221
  • 222
  • 223
  • 224
  • 225
  • 226
  • 227
  • 228
  • 229
  • 230
  • 231
  • 232
  • 233
  • 234
  • 235
  • 236
  • 237
  • 238
  • 239
  • 240
  • 241
  • 242
  • 243
  • 244
  • 245

Contents
1
Get started
Find other resources for the product
.......................................................................................
10
Accessibility
............................................................................................................................
11
Understand the HP All-in-One parts
.......................................................................................
12
Front view
.........................................................................................................................
13
Printing supplies area
.......................................................................................................
14
Memory card slots
............................................................................................................
14
Back view
.........................................................................................................................
15
Control panel
....................................................................................................................
15
Control panel buttons and lights
.................................................................................
16
Color display
...............................................................................................................
18
Two-line display
..........................................................................................................
19
Connection information
.....................................................................................................
19
2
Install the accessories
Install the duplexer
.................................................................................................................
21
Install Tray 2
...........................................................................................................................
21
Turn on accessories in the print driver
....................................................................................
22
To turn on accessories on Windows computers
...............................................................
23
To turn on accessories on Macintosh computers
..............................................................
23
3
Use the all-in-one
Use control panel menus
........................................................................................................
24
Control-panel message types
.................................................................................................
25
Status messages
..............................................................................................................
25
Warning messages
...........................................................................................................
25
Error messages
................................................................................................................
25
Critical error messages
.....................................................................................................
25
Change device settings
..........................................................................................................
25
Use the HP Solution Center (Windows)
..................................................................................
26
Use the HP photo and imaging software
................................................................................
26
Text and symbols
...................................................................................................................
28
Type numbers and text on the control-panel keypad
........................................................
28
To enter text
................................................................................................................
28
To enter a space, pause, or symbol
............................................................................
28
To erase a letter, number, or symbol
..........................................................................
28
Type text using the visual keyboard (some models only)
.................................................
29
Available symbols for dialing fax numbers (some models only)
........................................
30
Load the originals
...................................................................................................................
30
Load an original in the automatic document feeder (ADF)
................................................
30
Load an original on the scanner glass
..............................................................................
31
1