JVC GZ-EX310 User Guide - Page 109
Preparing a USB External Hard Disk Drive, Copying All Files
 |
View all JVC GZ-EX310 manuals
Add to My Manuals
Save this manual to your list of manuals |
Page 109 highlights
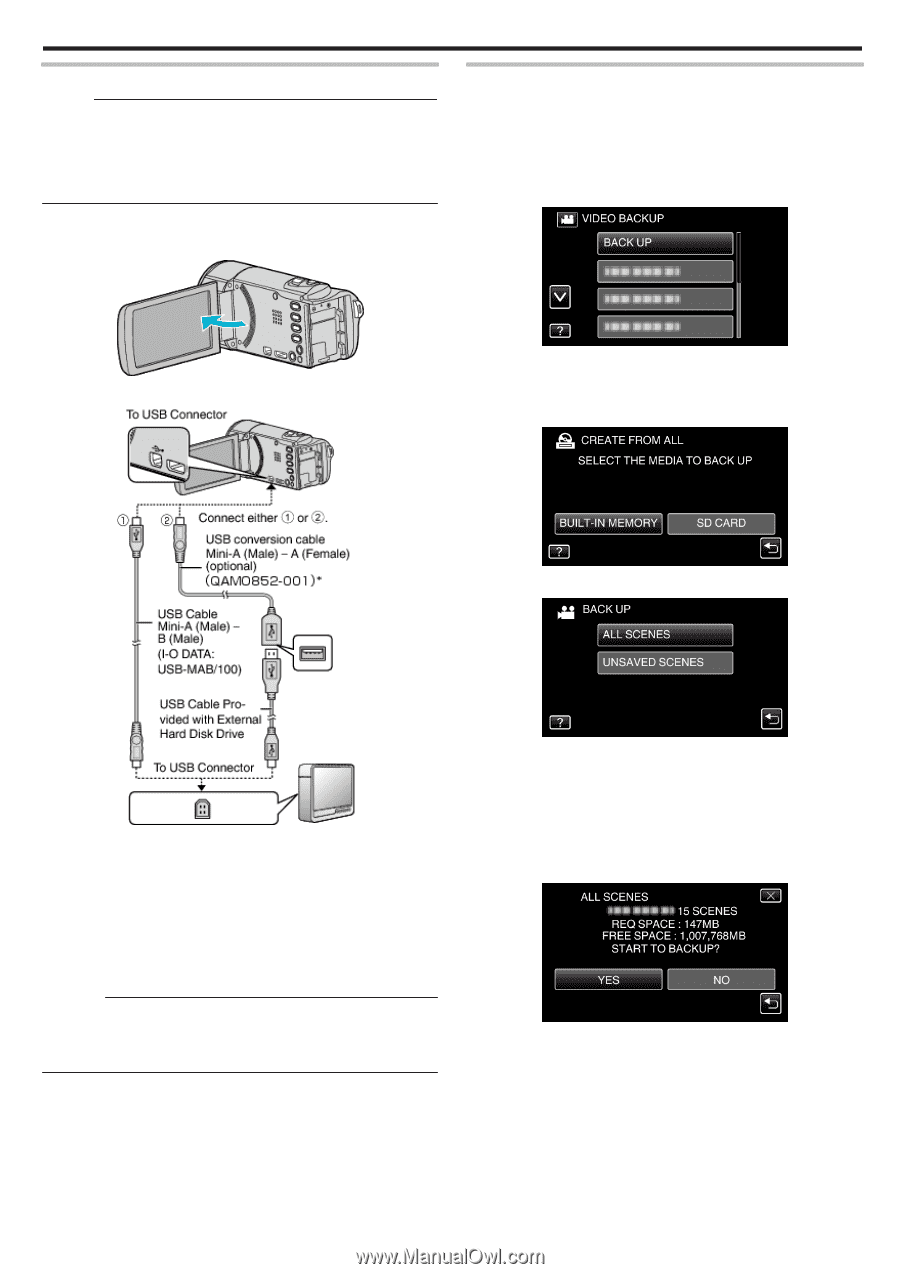
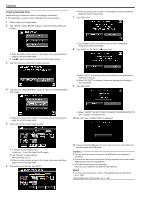
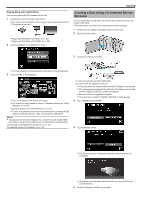
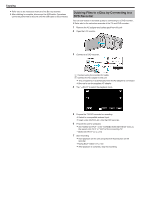
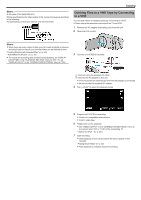
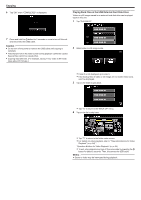
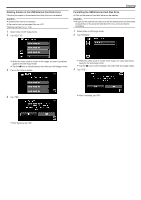
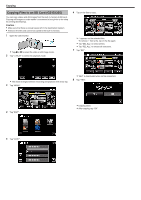
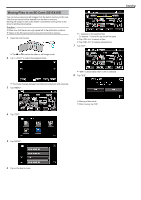
Preparing a USB External Hard Disk Drive Memo : 0 When connecting to the external hard disk drive, use a USB cable indicated below. The USB cable provided with this unit cannot be used. 0 To use the USB cable provided with the USB external hard disk drive, purchase the following USB conversion cable. (Part number: QAM0852-001) * Mini-A (Male) - A (Female) *Consult your nearest service center. 1 Remove the AC adapter and battery pack from this unit. 2 Open the LCD monitor. Copying Copying All Files All videos or still images recorded on this unit will be copied. You can also select and copy only the videos or still images that have never been copied. 0 The following is a screen of the model with the built-in memory. 1 Select video or still image mode. 2 Tap "BACK UP". 3 Connect the USB cable and the AC adapter. 0 While the video mode is shown in the image, the same operations apply for the still image mode. 0 Tap the A icon to switch between the video and still image modes. 3 Tap the media you would like to make a backup. .. . . . . 4 Tap the desired method. *Consult your nearest service center. A Connect the USB cable with the USB external hard disk drive. B Connect the AC adapter of the USB external hard disk drive. 0 Turn on the external hard disk drive. C Connect the AC adapter to this unit. 0 This unit turns on and the "BACK-UP" menu appears. 0 While the USB cable is connected, the "BACK-UP" menu is displayed. 0 Refer also to the instruction manual of the external hard disk drive. Caution : 0 Be sure to turn off the power when connecting the devices. Otherwise, electric shocks or malfunctions may occur. 0 Do not connect a USB hub between this unit and the USB external hard disk drive. 0 "ALL SCENES" (video)/"ALL IMAGES" (still image): All videos or still images in this unit are copied. 0 "UNSAVED SCENES" (video)/"UNSAVED IMAGES" (still image): Videos or still images that have never been copied are automatically selected and copied. 5 Check that there is sufficient remaining space on the hard disk drive and tap "YES". 0 Backup starts when "YES" is tapped. 109
-
 1
1 -
2
-
3
-
4
-
5
-
6
-
7
-
8
-
9
-
10
-
11
-
12
-
13
-
14
-
15
-
16
-
17
-
18
-
19
-
20
-
21
-
22
-
23
-
24
-
25
-
26
-
27
-
28
-
29
-
30
-
31
-
32
-
33
-
34
-
35
-
36
-
37
-
38
-
39
-
40
-
41
-
42
-
43
-
44
-
45
-
46
-
47
-
48
-
49
-
50
-
51
-
52
-
53
-
54
-
55
-
56
-
57
-
58
-
59
-
60
-
61
-
62
-
63
-
64
-
65
-
66
-
67
-
68
-
69
-
70
-
71
-
72
-
73
-
74
-
75
-
76
-
77
-
78
-
79
-
80
-
81
-
82
-
83
-
84
-
85
-
86
-
87
-
88
-
89
-
90
-
91
-
92
-
93
-
94
-
95
-
96
-
97
-
98
-
99
-
100
-
101
-
102
-
103
-
 104
104 -
 105
105 -
 106
106 -
 107
107 -
 108
108 -
 109
109 -
 110
110 -
 111
111 -
 112
112 -
 113
113 -
 114
114 -
115
-
116
-
117
-
118
-
119
-
120
-
121
-
122
-
123
-
124
-
125
-
126
-
127
-
128
-
129
-
130
-
131
-
132
-
133
-
134
-
135
-
136
-
137
-
138
-
139
-
140
-
141
-
142
-
143
-
144
-
145
-
146
-
147
-
148
-
149
-
150
-
151
-
152
-
153
-
154
-
155
-
156
-
157
-
158
-
159
-
160
-
161
-
162
-
163
-
164
-
165
-
166
-
167
-
168
-
169
-
170
-
171
-
172
-
173
-
174
-
175
-
176
-
177
-
178
-
179
-
180
-
181
-
182
-
183
-
184
-
185
-
186
-
187
-
188
-
189
-
190
-
191
-
192
-
193
-
194
-
195
-
196
-
197
-
198
-
199
-
200
-
201
-
202
-
203
-
204
-
205
-
206
-
207
-
208
-
209
-
210
-
211
-
212
-
213
-
214
-
215
-
216
-
217
-
218
-
219
-
220
-
221
-
222
-
223
-
224
-
225
-
226
-
227
-
228
-
229
-
230
-
231
-
232
-
233
-
234
-
235
-
236
-
237
-
238
-
239
-
240
-
241
-
242
-
243
-
244
-
245
-
246
-
247
-
248
-
249
-
250
-
251
-
252
-
253
-
254
-
255
-
256
-
257
-
258
-
259
-
260
-
261
 |
 |