JVC GZ-EX310 User Guide - Page 214
Regular Operation, Sending a Notification Mail
 |
View all JVC GZ-EX310 manuals
Add to My Manuals
Save this manual to your list of manuals |
Page 214 highlights
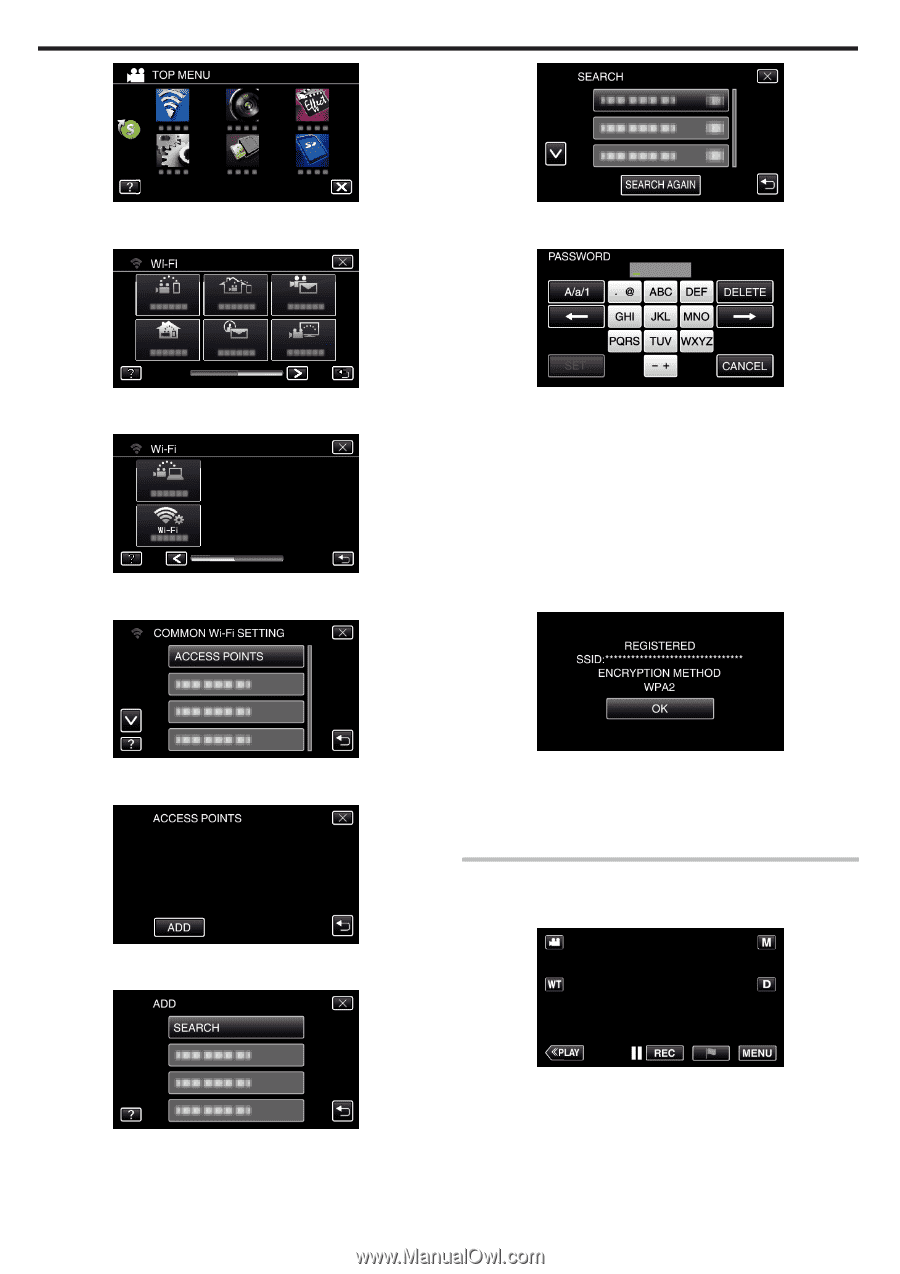
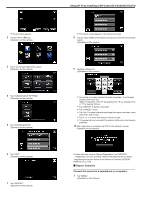
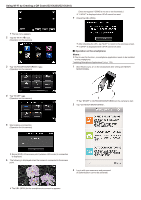
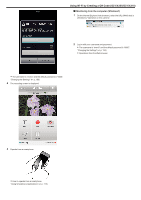
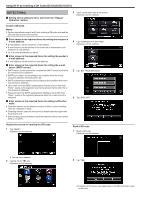
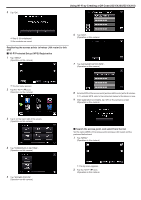
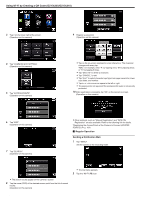
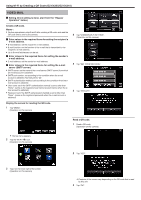
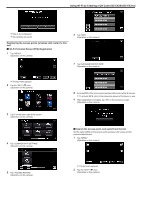
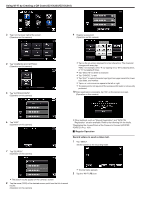
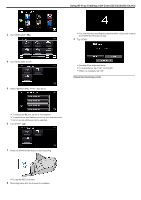
Using Wi-Fi by Creating a QR Code (GZ-EX355/GZ-EX310) 3 Tap 1 on the lower right of the screen. (Operation on this camera) 9 Register a password. (Operation on this camera) 4 Tap "COMMON Wi-Fi SETTING". (Operation on this camera) 5 Tap "ACCESS POINTS". (Operation on this camera) 0 Tap on the on-screen keyboard to enter characters. The character changes with every tap. "ABC", for example, enter "A" by tapping once, "B" by tapping twice, or "C" by tapping 3 times. 0 Tap "DELETE" to delete a character. 0 Tap "CANCEL" to exit. 0 Tap "A/a/1" to select character input type from upper case letter, lower case letter, and number. 0 Tap E or F to move one space to the left or right. 0 The password is not required if the wireless LAN router is not security protected. 10 After registration is complete, tap "OK" on the camera's screen. (Operation on this camera) 6 Tap "ADD". (Operation on this camera) 7 Tap "SEARCH". (Operation on this camera) 0 Other methods, such as "Manual Registration" and "WPS PIN Registration" are also available. Refer to the following link for details. "Registering the Access Points of the Camera to Connect (ACCESS POINTS)" (A p. 164) o Regular Operation Sending a Notification Mail. 1 Tap "MENU". Set the camera to the recording mode. 0 The search results appear on the camera's screen. 8 Tap the name (SSID) of the desired access point from the list of search results. (Operation on this camera) 214 0 The top menu appears. 2 Tap the "Wi-Fi" (Q) icon.
-
 1
1 -
2
-
3
-
4
-
5
-
6
-
7
-
8
-
9
-
10
-
11
-
12
-
13
-
14
-
15
-
16
-
17
-
18
-
19
-
20
-
21
-
22
-
23
-
24
-
25
-
26
-
27
-
28
-
29
-
30
-
31
-
32
-
33
-
34
-
35
-
36
-
37
-
38
-
39
-
40
-
41
-
42
-
43
-
44
-
45
-
46
-
47
-
48
-
49
-
50
-
51
-
52
-
53
-
54
-
55
-
56
-
57
-
58
-
59
-
60
-
61
-
62
-
63
-
64
-
65
-
66
-
67
-
68
-
69
-
70
-
71
-
72
-
73
-
74
-
75
-
76
-
77
-
78
-
79
-
80
-
81
-
82
-
83
-
84
-
85
-
86
-
87
-
88
-
89
-
90
-
91
-
92
-
93
-
94
-
95
-
96
-
97
-
98
-
99
-
100
-
101
-
102
-
103
-
104
-
105
-
106
-
107
-
108
-
109
-
110
-
111
-
112
-
113
-
114
-
115
-
116
-
117
-
118
-
119
-
120
-
121
-
122
-
123
-
124
-
125
-
126
-
127
-
128
-
129
-
130
-
131
-
132
-
133
-
134
-
135
-
136
-
137
-
138
-
139
-
140
-
141
-
142
-
143
-
144
-
145
-
146
-
147
-
148
-
149
-
150
-
151
-
152
-
153
-
154
-
155
-
156
-
157
-
158
-
159
-
160
-
161
-
162
-
163
-
164
-
165
-
166
-
167
-
168
-
169
-
170
-
171
-
172
-
173
-
174
-
175
-
176
-
177
-
178
-
179
-
180
-
181
-
182
-
183
-
184
-
185
-
186
-
187
-
188
-
189
-
190
-
191
-
192
-
193
-
194
-
195
-
196
-
197
-
198
-
199
-
200
-
201
-
202
-
203
-
204
-
205
-
206
-
207
-
208
-
 209
209 -
 210
210 -
 211
211 -
 212
212 -
 213
213 -
 214
214 -
 215
215 -
 216
216 -
 217
217 -
 218
218 -
 219
219 -
220
-
221
-
222
-
223
-
224
-
225
-
226
-
227
-
228
-
229
-
230
-
231
-
232
-
233
-
234
-
235
-
236
-
237
-
238
-
239
-
240
-
241
-
242
-
243
-
244
-
245
-
246
-
247
-
248
-
249
-
250
-
251
-
252
-
253
-
254
-
255
-
256
-
257
-
258
-
259
-
260
-
261
 |
 |