JVC GZ-EX310 User Guide - Page 147
Recording the Location Information, What You Need, Settings Required in Advance
 |
View all JVC GZ-EX310 manuals
Add to My Manuals
Save this manual to your list of manuals |
Page 147 highlights
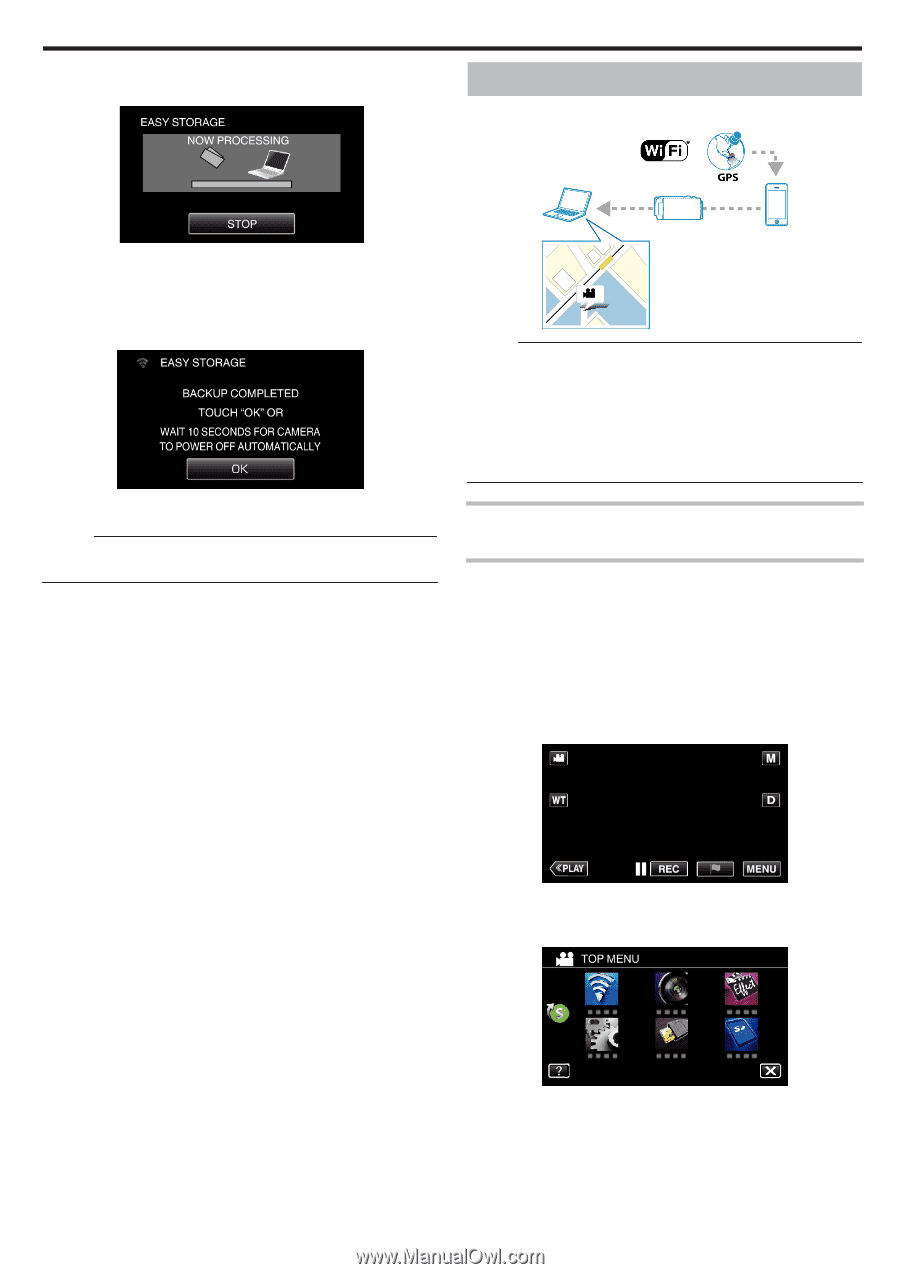
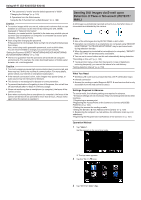
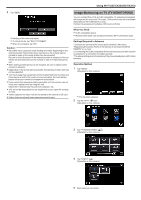
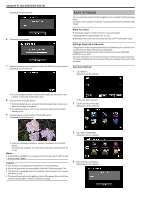
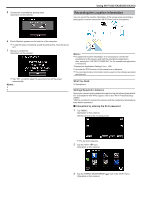
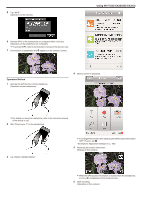
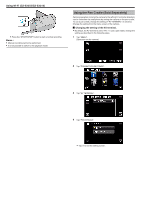
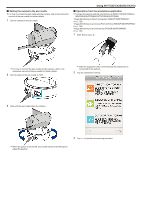
. . . .. 5 Connection is established; backup starts. (Operation on this camera) Using Wi-Fi (GZ-EX355/GZ-EX310) Recording the Location Information You can record the location information of the venue where recording is taking place via direct connection (Wi-Fi Direct) with a smartphone. 6 Everio Watcher appears on the task bar of the computer. 0 To see the status of backing up and remaining time, move the arrow to it. 7 Backup is completed. (Operation on this camera) 0 Tap "OK", or wait for about 10 seconds to turn off the power automatically. Memo : 0 0 Memo : 0 To obtain the location information, it is necessary to connect the smartphone to the camera and start the smartphone application. Also, setting the "LOC INFO TRANS INT" for the smartphone application is necessary. "Smartphone Application Settings" (A p. 186) 0 Activate the GPS function of the smartphone in advance. 0 The recorded location information can be used on the software provided with this unit. What You Need 0 Smartphone Settings Required in Advance Set up your camera and smartphone by performing the following operations. For a smartphone with WPS support, refer to the "Wi-Fi Protected Setup (WPS)". *WPS is a method to connect the camera and the smartphone wirelessly by easy button operations. o Connection by entering the Wi-Fi password 1 Tap "MENU". (Operation on this camera) Set the camera to the recording mode. 0 The top menu appears. 2 Tap the "Wi-Fi" (Q) icon. (Operation on this camera) 3 Tap the "DIRECT MONITORING" (N) icon in the "Wi-Fi" menu. (Operation on this camera) 147
-
 1
1 -
2
-
3
-
4
-
5
-
6
-
7
-
8
-
9
-
10
-
11
-
12
-
13
-
14
-
15
-
16
-
17
-
18
-
19
-
20
-
21
-
22
-
23
-
24
-
25
-
26
-
27
-
28
-
29
-
30
-
31
-
32
-
33
-
34
-
35
-
36
-
37
-
38
-
39
-
40
-
41
-
42
-
43
-
44
-
45
-
46
-
47
-
48
-
49
-
50
-
51
-
52
-
53
-
54
-
55
-
56
-
57
-
58
-
59
-
60
-
61
-
62
-
63
-
64
-
65
-
66
-
67
-
68
-
69
-
70
-
71
-
72
-
73
-
74
-
75
-
76
-
77
-
78
-
79
-
80
-
81
-
82
-
83
-
84
-
85
-
86
-
87
-
88
-
89
-
90
-
91
-
92
-
93
-
94
-
95
-
96
-
97
-
98
-
99
-
100
-
101
-
102
-
103
-
104
-
105
-
106
-
107
-
108
-
109
-
110
-
111
-
112
-
113
-
114
-
115
-
116
-
117
-
118
-
119
-
120
-
121
-
122
-
123
-
124
-
125
-
126
-
127
-
128
-
129
-
130
-
131
-
132
-
133
-
134
-
135
-
136
-
137
-
138
-
139
-
140
-
141
-
 142
142 -
 143
143 -
 144
144 -
 145
145 -
 146
146 -
 147
147 -
 148
148 -
 149
149 -
 150
150 -
 151
151 -
 152
152 -
153
-
154
-
155
-
156
-
157
-
158
-
159
-
160
-
161
-
162
-
163
-
164
-
165
-
166
-
167
-
168
-
169
-
170
-
171
-
172
-
173
-
174
-
175
-
176
-
177
-
178
-
179
-
180
-
181
-
182
-
183
-
184
-
185
-
186
-
187
-
188
-
189
-
190
-
191
-
192
-
193
-
194
-
195
-
196
-
197
-
198
-
199
-
200
-
201
-
202
-
203
-
204
-
205
-
206
-
207
-
208
-
209
-
210
-
211
-
212
-
213
-
214
-
215
-
216
-
217
-
218
-
219
-
220
-
221
-
222
-
223
-
224
-
225
-
226
-
227
-
228
-
229
-
230
-
231
-
232
-
233
-
234
-
235
-
236
-
237
-
238
-
239
-
240
-
241
-
242
-
243
-
244
-
245
-
246
-
247
-
248
-
249
-
250
-
251
-
252
-
253
-
254
-
255
-
256
-
257
-
258
-
259
-
260
-
261
 |
 |