JVC GZ-EX310 User Guide - Page 30
Zooming, Manual Recording
 |
View all JVC GZ-EX310 manuals
Add to My Manuals
Save this manual to your list of manuals |
Page 30 highlights
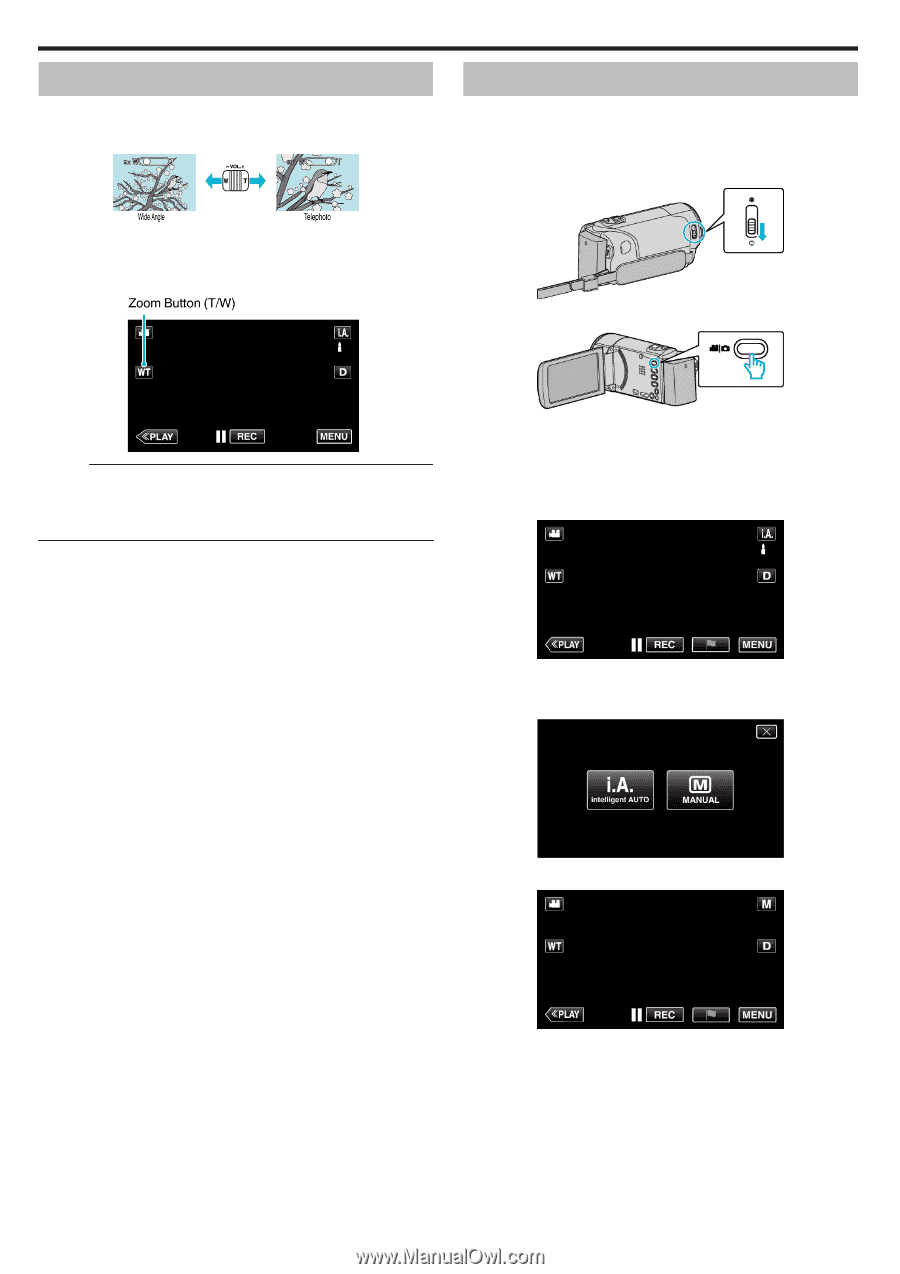
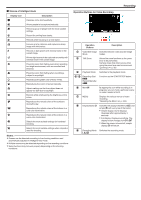
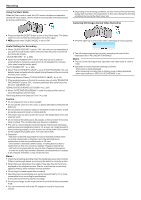
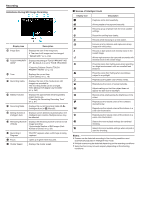
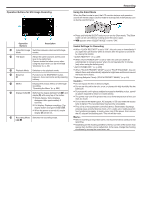
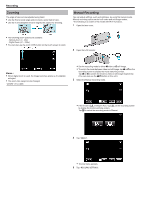
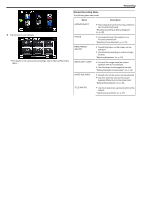
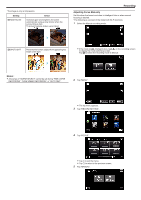
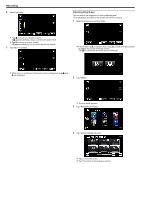
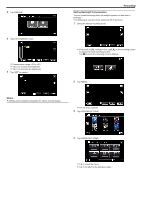
. . .. . . . Recording Zooming The angle of view can be adjusted using zoom. 0 Use the W end (wide angle end) to shoot a wider field of view. 0 Use the T end (telephoto end) to magnify the subject for shooting. Manual Recording You can adjust settings, such as brightness, by using the manual mode. Manual recording can be set for both video and still image modes. *The following is a screen of the model with Wi-Fi functions. 1 Open the lens cover. 0 The following zoom options are available: - Optical Zoom (1 - 40x) - Digital Zoom (41 - 200x) 0 You can also use the zoom (T/W) button on the touch screen to zoom. 2 Open the LCD monitor. Memo : 0 When digital zoom is used, the image becomes grainy as it is digitally enlarged. 0 The zoom ratio range can be changed. " ZOOM " (A p. 228) 0 Set the recording mode to either A video or B still image. 0 To switch the mode between video and still image, tap A or B on the recording screen to display the mode switching screen. Tap A or B to switch the mode to video or still image respectively. (You can also use the A/B button on this unit.) 3 Select the Manual recording mode. 0 If the mode is P Intelligent Auto, tap P on the recording screen to display the mode switching screen. Tap H to switch the recording mode to Manual. 4 Tap "MENU". 0 The top menu appears. 5 Tap "RECORD SETTING". 30
-
 1
1 -
2
-
3
-
4
-
5
-
6
-
7
-
8
-
9
-
10
-
11
-
12
-
13
-
14
-
15
-
16
-
17
-
18
-
19
-
20
-
21
-
22
-
23
-
24
-
 25
25 -
 26
26 -
 27
27 -
 28
28 -
 29
29 -
 30
30 -
 31
31 -
 32
32 -
 33
33 -
 34
34 -
 35
35 -
36
-
37
-
38
-
39
-
40
-
41
-
42
-
43
-
44
-
45
-
46
-
47
-
48
-
49
-
50
-
51
-
52
-
53
-
54
-
55
-
56
-
57
-
58
-
59
-
60
-
61
-
62
-
63
-
64
-
65
-
66
-
67
-
68
-
69
-
70
-
71
-
72
-
73
-
74
-
75
-
76
-
77
-
78
-
79
-
80
-
81
-
82
-
83
-
84
-
85
-
86
-
87
-
88
-
89
-
90
-
91
-
92
-
93
-
94
-
95
-
96
-
97
-
98
-
99
-
100
-
101
-
102
-
103
-
104
-
105
-
106
-
107
-
108
-
109
-
110
-
111
-
112
-
113
-
114
-
115
-
116
-
117
-
118
-
119
-
120
-
121
-
122
-
123
-
124
-
125
-
126
-
127
-
128
-
129
-
130
-
131
-
132
-
133
-
134
-
135
-
136
-
137
-
138
-
139
-
140
-
141
-
142
-
143
-
144
-
145
-
146
-
147
-
148
-
149
-
150
-
151
-
152
-
153
-
154
-
155
-
156
-
157
-
158
-
159
-
160
-
161
-
162
-
163
-
164
-
165
-
166
-
167
-
168
-
169
-
170
-
171
-
172
-
173
-
174
-
175
-
176
-
177
-
178
-
179
-
180
-
181
-
182
-
183
-
184
-
185
-
186
-
187
-
188
-
189
-
190
-
191
-
192
-
193
-
194
-
195
-
196
-
197
-
198
-
199
-
200
-
201
-
202
-
203
-
204
-
205
-
206
-
207
-
208
-
209
-
210
-
211
-
212
-
213
-
214
-
215
-
216
-
217
-
218
-
219
-
220
-
221
-
222
-
223
-
224
-
225
-
226
-
227
-
228
-
229
-
230
-
231
-
232
-
233
-
234
-
235
-
236
-
237
-
238
-
239
-
240
-
241
-
242
-
243
-
244
-
245
-
246
-
247
-
248
-
249
-
250
-
251
-
252
-
253
-
254
-
255
-
256
-
257
-
258
-
259
-
260
-
261
 |
 |