JVC GZ-EX310 User Guide - Page 169
Editing LAN Settings of Access Points Wireless LAN Router, OFF: Settings of IP ADDRESS, SUBNET
 |
View all JVC GZ-EX310 manuals
Add to My Manuals
Save this manual to your list of manuals |
Page 169 highlights
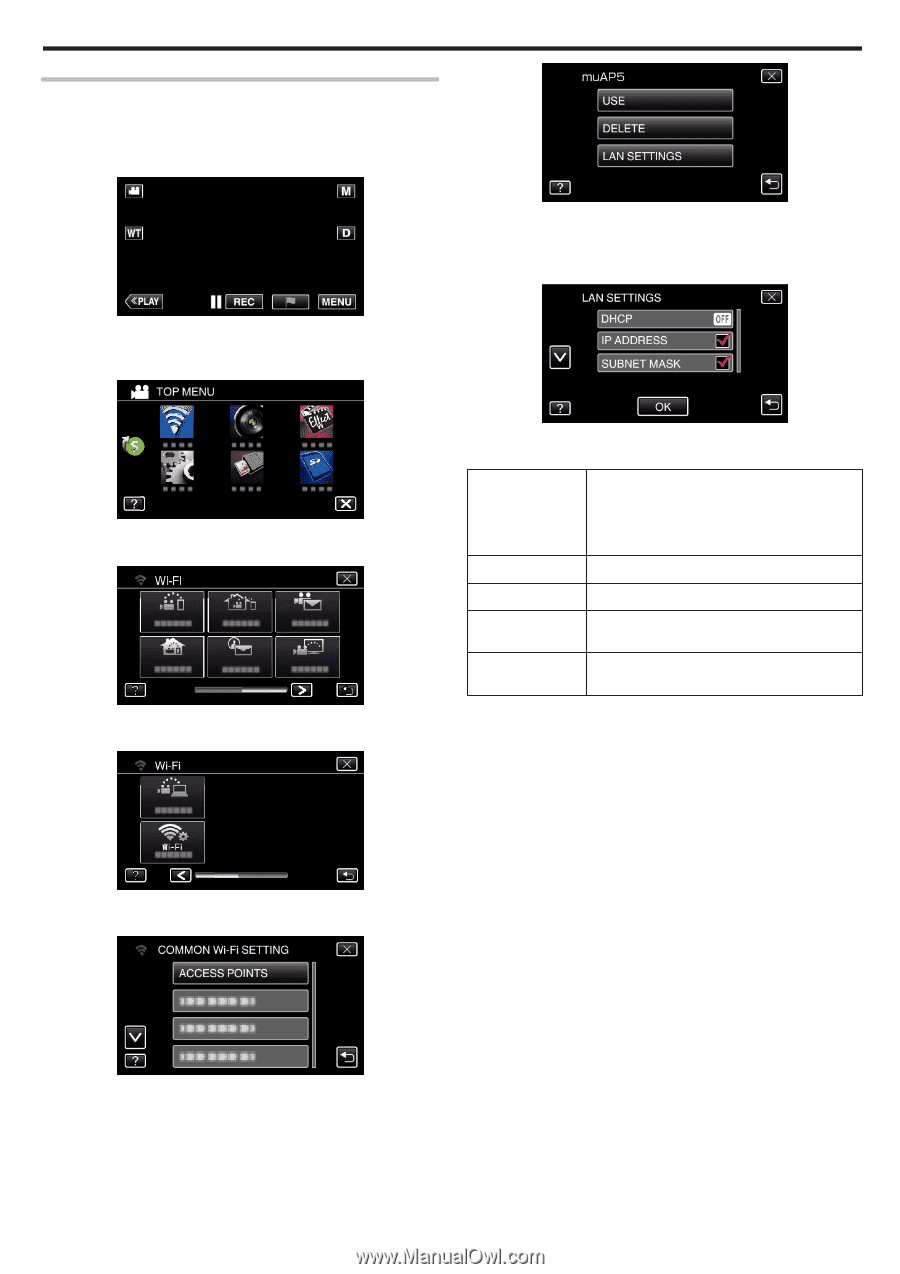
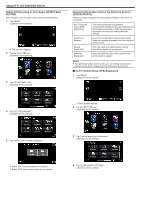
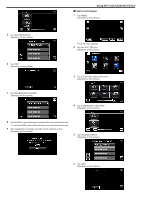
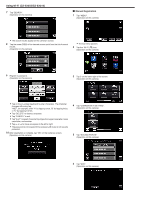
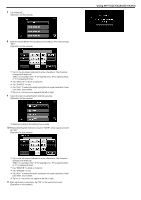
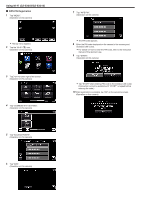
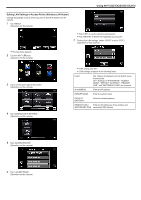
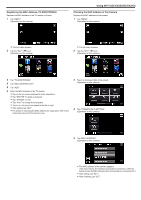
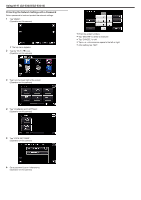
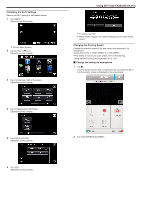
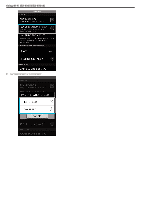
.. . ... . Using Wi-Fi (GZ-EX355/GZ-EX310) Editing LAN Settings of Access Points (Wireless LAN Router) Change accordingly such as when you want to fix the IP address for the camera. 1 Tap "MENU". (Operation on this camera) 0 Tap "USE" to use the selected access point. 0 Tap "DELETE" to delete the registered access point. 7 Perform the LAN settings. (when "DHCP" is set to "OFF") (Operation on this camera) 0 The top menu appears. 2 Tap the "Wi-Fi" (Q) icon. (Operation on this camera) 3 Tap 1 on the lower right of the screen. (Operation on this camera) 4 Tap "COMMON Wi-Fi SETTING". (Operation on this camera) 0 After setting, tap "OK". 0 LAN settings comprise of the following items. DHCP ON: Obtains IP address from the DHCP server automatically. OFF: Settings of "IP ADDRESS", "SUBNET MASK", "DEFAULT GATEWAY", "PRIMARY DNS", and "SECONDARY DNS" are required. IP ADDRESS Enter the IP address. SUBNET MASK Enter the subnet mask. DEFAULT GATEWAY Enter the default gateway. PRIMARY DNS / Enter the IP addresses of the primary and SECONDARY DNS secondary DNS servers. 5 Tap "ACCESS POINTS". (Operation on this camera) 6 Tap "LAN SETTINGS". (Operation on this camera) 169
-
 1
1 -
2
-
3
-
4
-
5
-
6
-
7
-
8
-
9
-
10
-
11
-
12
-
13
-
14
-
15
-
16
-
17
-
18
-
19
-
20
-
21
-
22
-
23
-
24
-
25
-
26
-
27
-
28
-
29
-
30
-
31
-
32
-
33
-
34
-
35
-
36
-
37
-
38
-
39
-
40
-
41
-
42
-
43
-
44
-
45
-
46
-
47
-
48
-
49
-
50
-
51
-
52
-
53
-
54
-
55
-
56
-
57
-
58
-
59
-
60
-
61
-
62
-
63
-
64
-
65
-
66
-
67
-
68
-
69
-
70
-
71
-
72
-
73
-
74
-
75
-
76
-
77
-
78
-
79
-
80
-
81
-
82
-
83
-
84
-
85
-
86
-
87
-
88
-
89
-
90
-
91
-
92
-
93
-
94
-
95
-
96
-
97
-
98
-
99
-
100
-
101
-
102
-
103
-
104
-
105
-
106
-
107
-
108
-
109
-
110
-
111
-
112
-
113
-
114
-
115
-
116
-
117
-
118
-
119
-
120
-
121
-
122
-
123
-
124
-
125
-
126
-
127
-
128
-
129
-
130
-
131
-
132
-
133
-
134
-
135
-
136
-
137
-
138
-
139
-
140
-
141
-
142
-
143
-
144
-
145
-
146
-
147
-
148
-
149
-
150
-
151
-
152
-
153
-
154
-
155
-
156
-
157
-
158
-
159
-
160
-
161
-
162
-
163
-
 164
164 -
 165
165 -
 166
166 -
 167
167 -
 168
168 -
 169
169 -
 170
170 -
 171
171 -
 172
172 -
 173
173 -
 174
174 -
175
-
176
-
177
-
178
-
179
-
180
-
181
-
182
-
183
-
184
-
185
-
186
-
187
-
188
-
189
-
190
-
191
-
192
-
193
-
194
-
195
-
196
-
197
-
198
-
199
-
200
-
201
-
202
-
203
-
204
-
205
-
206
-
207
-
208
-
209
-
210
-
211
-
212
-
213
-
214
-
215
-
216
-
217
-
218
-
219
-
220
-
221
-
222
-
223
-
224
-
225
-
226
-
227
-
228
-
229
-
230
-
231
-
232
-
233
-
234
-
235
-
236
-
237
-
238
-
239
-
240
-
241
-
242
-
243
-
244
-
245
-
246
-
247
-
248
-
249
-
250
-
251
-
252
-
253
-
254
-
255
-
256
-
257
-
258
-
259
-
260
-
261
 |
 |