JVC GZ-EX310 User Guide - Page 57
Recording Automatically by Sensing Movements (AUTO REC), Tap AUTO REC.
 |
View all JVC GZ-EX310 manuals
Add to My Manuals
Save this manual to your list of manuals |
Page 57 highlights
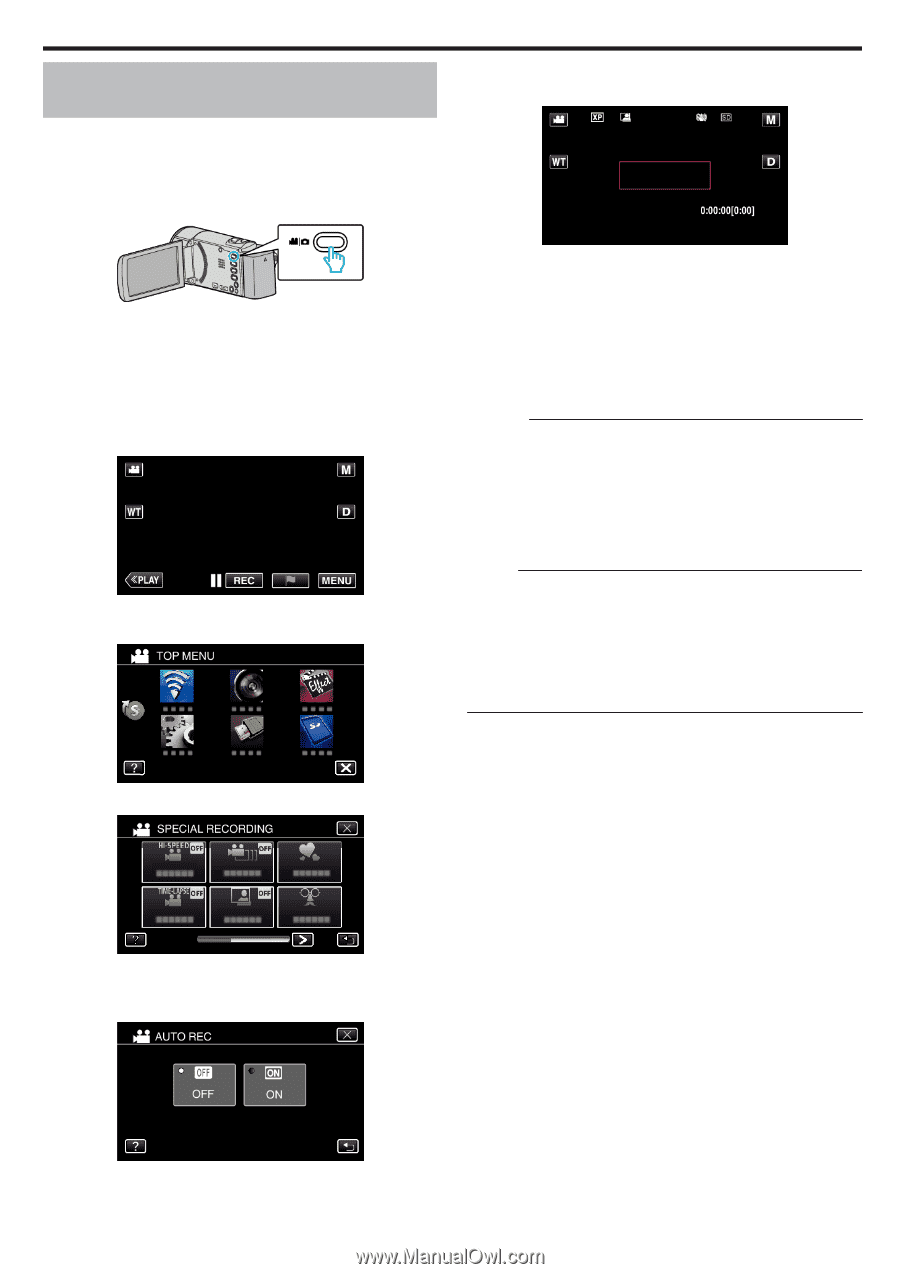
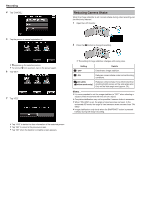
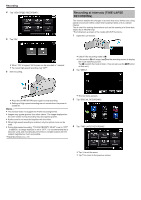
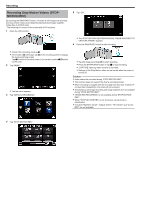
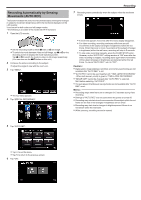
. . . . .. Recording Recording Automatically by Sensing Movements (AUTO REC) This function enables the unit to record automatically by sensing the changes in subject's movement (brightness) within the red frame displayed on the LCD monitor. It can be set for both video and still image modes. *The following is a screen of the model with Wi-Fi functions. 1 Open the LCD monitor. 7 Recording starts automatically when the subject within the red frame moves. 0 Set the recording mode to either A video or B still image. 0 To switch the mode between video and still image, tap A or B on the recording screen to display the mode switching screen. Tap A or B to switch the mode to video or still image respectively. (You can also use the A/B button on this unit.) 2 Compose the picture according to the subject. 0 Adjust the angle of view with the zoom, etc. 3 Tap "MENU". 0 The top menu appears. 4 Tap "SPECIAL RECORDING". 0 A red frame appears 2 seconds after the menu display disappears. 0 For video recording, recording continues while there are still movements of the subject (changes in brightness) within the red frame. When there are no more movements of the subject (changes in brightness) within the red frame, recording will stop in 5 seconds. 0 To stop video recording manually, press the START/STOP button. However, as the "AUTO REC" setting remains at "ON" even after the video recording is stopped, recording starts again when movements of the subject (changes in brightness) are detected within the red frame. To cancel "AUTO REC", set it to "OFF". Caution : 0 Digital zoom, image stabilizer, self-timer, and continuous shooting are not available after "AUTO REC" is set. 0 "AUTO REC" cannot be used together with "TIME-LAPSE RECORDING" . When both are set, priority is given to "TIME-LAPSE RECORDING". 0 "IMAGE SIZE" cannot be changed after "AUTO REC" is selected. Set it before selecting "AUTO REC". 0 The auto power off and power-saving modes are not available after "AUTO REC" is set. Memo : 0 Recording stops when there are no changes for 5 seconds during video recording. 0 Settings of "AUTO REC" are not saved when the power is turned off. 0 Recording may not start when the movements of the subject within the red frame are too fast or the changes in brightness are too small. 0 Recording may start due to changes in brightness even if there is no movement within the red frame. 0 While zooming, recording cannot be started. 5 Tap "AUTO REC". 0 Tap L to exit the menu. 0 Tap J to return to the previous screen. 6 Tap "ON". 57
-
 1
1 -
2
-
3
-
4
-
5
-
6
-
7
-
8
-
9
-
10
-
11
-
12
-
13
-
14
-
15
-
16
-
17
-
18
-
19
-
20
-
21
-
22
-
23
-
24
-
25
-
26
-
27
-
28
-
29
-
30
-
31
-
32
-
33
-
34
-
35
-
36
-
37
-
38
-
39
-
40
-
41
-
42
-
43
-
44
-
45
-
46
-
47
-
48
-
49
-
50
-
51
-
 52
52 -
 53
53 -
 54
54 -
 55
55 -
 56
56 -
 57
57 -
 58
58 -
 59
59 -
 60
60 -
 61
61 -
 62
62 -
63
-
64
-
65
-
66
-
67
-
68
-
69
-
70
-
71
-
72
-
73
-
74
-
75
-
76
-
77
-
78
-
79
-
80
-
81
-
82
-
83
-
84
-
85
-
86
-
87
-
88
-
89
-
90
-
91
-
92
-
93
-
94
-
95
-
96
-
97
-
98
-
99
-
100
-
101
-
102
-
103
-
104
-
105
-
106
-
107
-
108
-
109
-
110
-
111
-
112
-
113
-
114
-
115
-
116
-
117
-
118
-
119
-
120
-
121
-
122
-
123
-
124
-
125
-
126
-
127
-
128
-
129
-
130
-
131
-
132
-
133
-
134
-
135
-
136
-
137
-
138
-
139
-
140
-
141
-
142
-
143
-
144
-
145
-
146
-
147
-
148
-
149
-
150
-
151
-
152
-
153
-
154
-
155
-
156
-
157
-
158
-
159
-
160
-
161
-
162
-
163
-
164
-
165
-
166
-
167
-
168
-
169
-
170
-
171
-
172
-
173
-
174
-
175
-
176
-
177
-
178
-
179
-
180
-
181
-
182
-
183
-
184
-
185
-
186
-
187
-
188
-
189
-
190
-
191
-
192
-
193
-
194
-
195
-
196
-
197
-
198
-
199
-
200
-
201
-
202
-
203
-
204
-
205
-
206
-
207
-
208
-
209
-
210
-
211
-
212
-
213
-
214
-
215
-
216
-
217
-
218
-
219
-
220
-
221
-
222
-
223
-
224
-
225
-
226
-
227
-
228
-
229
-
230
-
231
-
232
-
233
-
234
-
235
-
236
-
237
-
238
-
239
-
240
-
241
-
242
-
243
-
244
-
245
-
246
-
247
-
248
-
249
-
250
-
251
-
252
-
253
-
254
-
255
-
256
-
257
-
258
-
259
-
260
-
261
 |
 |