JVC GZ-EX310 User Guide - Page 51
Editing the Registered Face Information
 |
View all JVC GZ-EX310 manuals
Add to My Manuals
Save this manual to your list of manuals |
Page 51 highlights
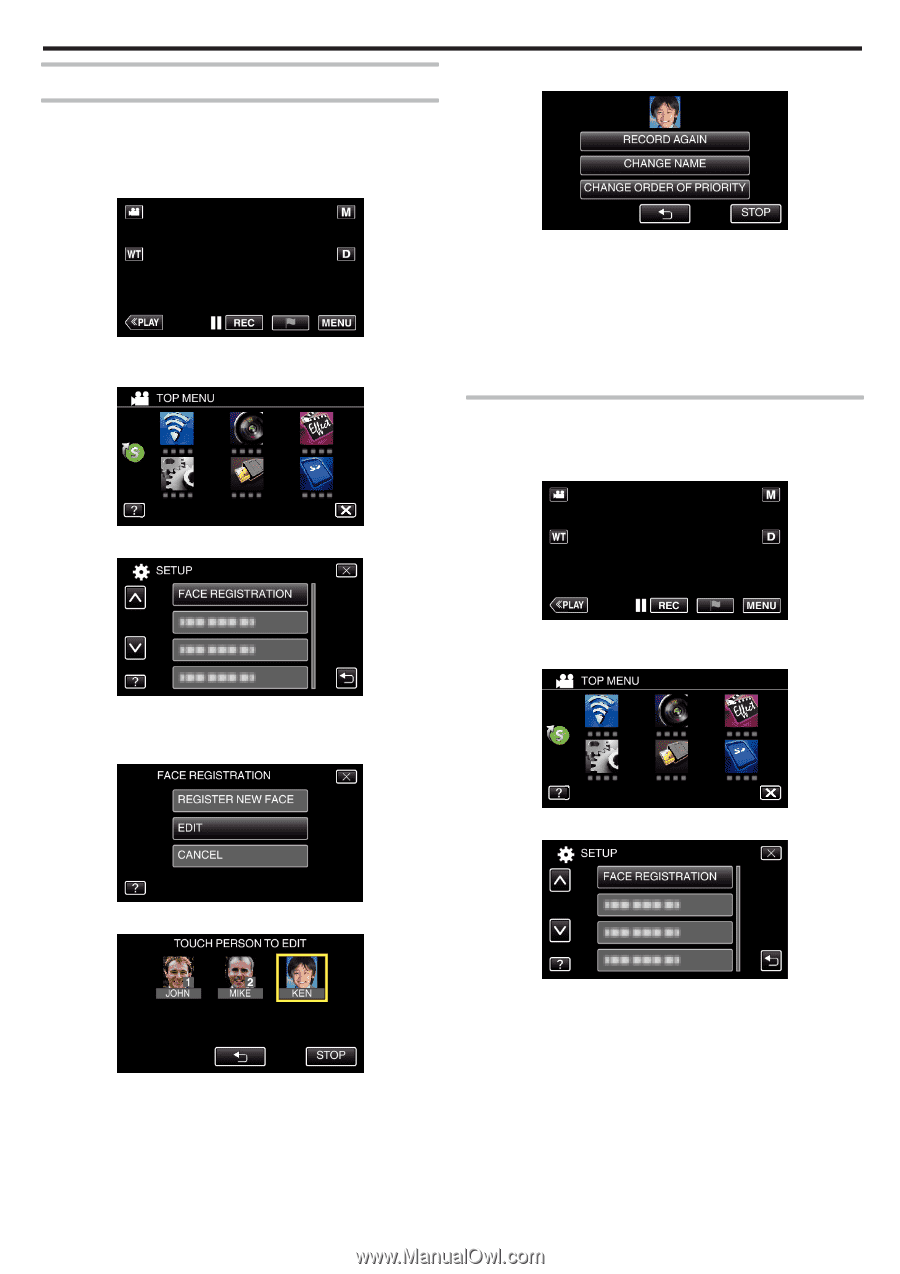
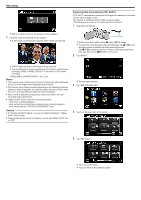
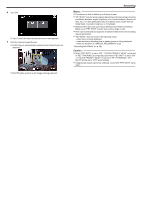
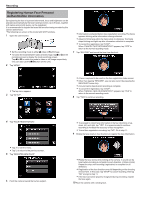
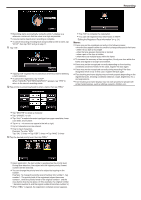
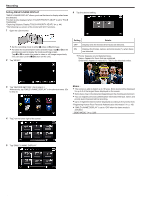
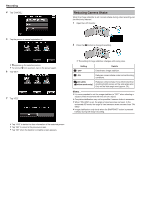
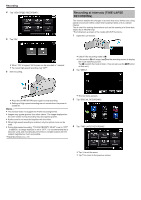
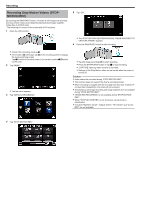
Editing the Registered Face Information Editing the Registered Face Information You can change the name, priority level, and face information that are registered. *The following is a screen of the model with Wi-Fi functions. 1 Tap "MENU". 0 The top menu appears. 2 Tap "SETUP". 6 Tap the item to edit. Recording 0 If you select "RECORD AGAIN", proceed to step 6 in ""Registering Human Face Personal Authentication Information" (A p. 48) ". 0 If you select "CHANGE NAME", proceed to step 12 in ""Registering Human Face Personal Authentication Information" (A p. 49) ". 0 If you select "CHANGE ORDER OF PRIORITY", proceed to step 13 in ""Registering Human Face Personal Authentication Information" (A p. 49) ". "Registering Human Face Personal Authentication Information" (A p. 48) Canceling (Deleting) the Registered Face Information You can cancel (delete) the face information that is registered. *The following is a screen of the model with Wi-Fi functions. 1 Tap "MENU". 3 Tap "FACE REGISTRATION". 0 Tap L to exit the menu. 0 Tap J to return to the previous screen. 4 Tap "EDIT". 0 The top menu appears. 2 Tap "SETUP". 3 Tap "FACE REGISTRATION". 5 Tap the person to edit. 0 Tap L to exit the menu. 0 Tap J to return to the previous screen. 51
-
 1
1 -
2
-
3
-
4
-
5
-
6
-
7
-
8
-
9
-
10
-
11
-
12
-
13
-
14
-
15
-
16
-
17
-
18
-
19
-
20
-
21
-
22
-
23
-
24
-
25
-
26
-
27
-
28
-
29
-
30
-
31
-
32
-
33
-
34
-
35
-
36
-
37
-
38
-
39
-
40
-
41
-
42
-
43
-
44
-
45
-
 46
46 -
 47
47 -
 48
48 -
 49
49 -
 50
50 -
 51
51 -
 52
52 -
 53
53 -
 54
54 -
 55
55 -
 56
56 -
57
-
58
-
59
-
60
-
61
-
62
-
63
-
64
-
65
-
66
-
67
-
68
-
69
-
70
-
71
-
72
-
73
-
74
-
75
-
76
-
77
-
78
-
79
-
80
-
81
-
82
-
83
-
84
-
85
-
86
-
87
-
88
-
89
-
90
-
91
-
92
-
93
-
94
-
95
-
96
-
97
-
98
-
99
-
100
-
101
-
102
-
103
-
104
-
105
-
106
-
107
-
108
-
109
-
110
-
111
-
112
-
113
-
114
-
115
-
116
-
117
-
118
-
119
-
120
-
121
-
122
-
123
-
124
-
125
-
126
-
127
-
128
-
129
-
130
-
131
-
132
-
133
-
134
-
135
-
136
-
137
-
138
-
139
-
140
-
141
-
142
-
143
-
144
-
145
-
146
-
147
-
148
-
149
-
150
-
151
-
152
-
153
-
154
-
155
-
156
-
157
-
158
-
159
-
160
-
161
-
162
-
163
-
164
-
165
-
166
-
167
-
168
-
169
-
170
-
171
-
172
-
173
-
174
-
175
-
176
-
177
-
178
-
179
-
180
-
181
-
182
-
183
-
184
-
185
-
186
-
187
-
188
-
189
-
190
-
191
-
192
-
193
-
194
-
195
-
196
-
197
-
198
-
199
-
200
-
201
-
202
-
203
-
204
-
205
-
206
-
207
-
208
-
209
-
210
-
211
-
212
-
213
-
214
-
215
-
216
-
217
-
218
-
219
-
220
-
221
-
222
-
223
-
224
-
225
-
226
-
227
-
228
-
229
-
230
-
231
-
232
-
233
-
234
-
235
-
236
-
237
-
238
-
239
-
240
-
241
-
242
-
243
-
244
-
245
-
246
-
247
-
248
-
249
-
250
-
251
-
252
-
253
-
254
-
255
-
256
-
257
-
258
-
259
-
260
-
261
 |
 |