JVC GZ-EX310 User Guide - Page 140
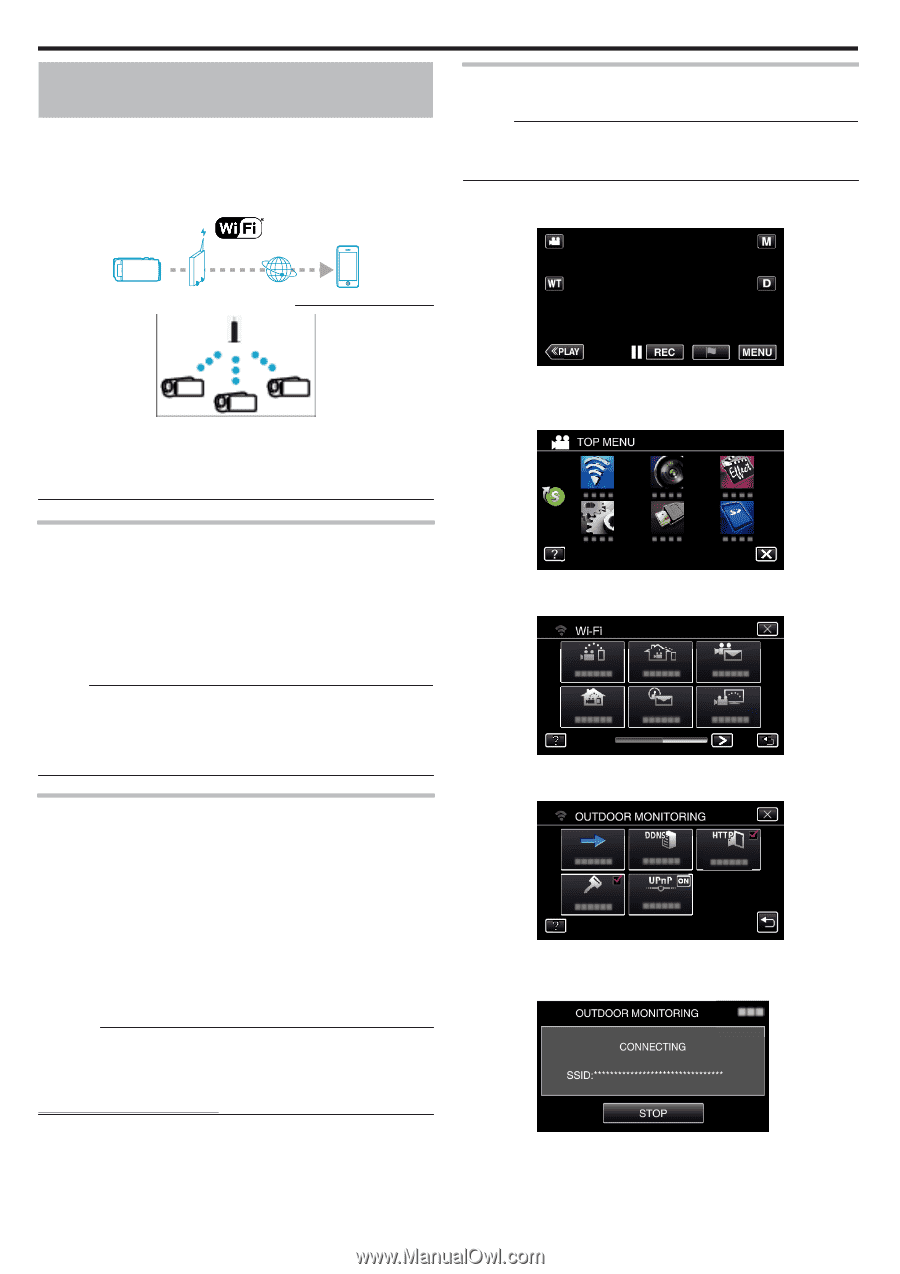
Image Monitoring via the Internet (OUTDOOR MONITORING), What You Need, Settings Required in Advance
 |
View all JVC GZ-EX310 manuals
Add to My Manuals
Save this manual to your list of manuals |
Page 140 highlights
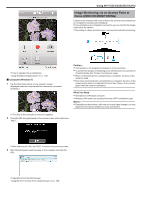
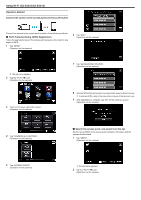
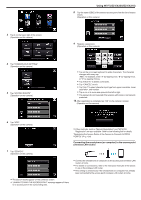
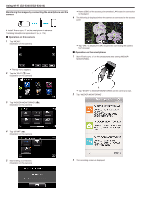
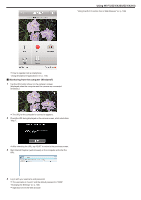
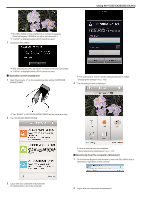
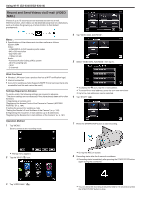
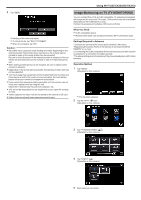
Using Wi-Fi (GZ-EX355/GZ-EX310) Image Monitoring via the Internet (OUTDOOR MONITORING) You can check the image on the camera via internet connection with a smartphone (or computer). * To use this function, it is necessary to prepare for an UPnP (Universal Plug and Play) compatible wireless LAN router, and an internet connection from which the global IP address can be obtained. 0 Recording of videos and still images may be performed while monitoring. Operation Method o Operation on this camera Memo : 0 Prior to use this function, a smartphone application needs to be installed on the smartphone. "Installing Smartphone Applications" (A p. 175) 1 Tap "MENU". (Operation on this camera) .. . . . . . Setting Multiple Cameras in the Same Network: 0 To set up multiple cameras, you need to fix the HTTP ports for each of the cameras. "Changing the HTTP Port (DIRECT MONITORING/INDOOR MONITORING/OUTDOOR MONITORING)" (A p. 155) 0 The top menu appears. 2 Tap the "Wi-Fi" (Q) icon. (Operation on this camera) What You Need 0 Smartphone or Windows computer 0 Wireless LAN router that supports UPnP (use a product that has a Wi-Fi certification logo) To check whether UPnP is supported, please refer to the instruction manual of the wireless LAN router in use. 0 Internet connection with an obtainable global IP address * Global IP address is an IP address that is specific in all over the internet. For more information, contact your internet service provider. Memo : 0 Depending on the wireless LAN router in use and signal strength, you may experience connection problems or slow connections. 0 When the zoom or pan cradle is operated by using the smartphone or computer, it may take longer for responses as compared to the manual operations. Settings Required in Advance To operate, it is necessary to connect the camera to the internet via an access point (UPnP compatible wireless LAN router) in the house. As such, the following 3 settings are required. *The above settings are not necessary if they have already been set for other functions. 1 Registering an access point "Registering the Access Points of the Camera to Connect (ACCESS POINTS)" (A p. 164) 2 Obtaining a dynamic DNS account "Obtaining a Dynamic DNS (DDNS) Account" (A p. 157) 3 Setting the account on this camera "Setting Dynamic DNS on this Camera (OUTDOOR MONITORING)" (A p. 158) Caution : 0 Even if registration is done correctly to the camera, access may be temporarily unavailable such as when the dynamic DNS server is down. To check whether the dynamic DNS server is working properly, access and check the DDNS server with a computer, etc. https://dd3.jvckenwood.com/user/ 140 3 Tap "OUTDOOR MONITORING" (M). (Operation on this camera) 4 Tap "START" (I). (Operation on this camera) 5 Start making a connection. (Operation on this camera) 0 Name (SSID) of the access point (wireless LAN router) in connection is displayed. 6 The following is displayed when the camera is connected to the access point.
-
 1
1 -
2
-
3
-
4
-
5
-
6
-
7
-
8
-
9
-
10
-
11
-
12
-
13
-
14
-
15
-
16
-
17
-
18
-
19
-
20
-
21
-
22
-
23
-
24
-
25
-
26
-
27
-
28
-
29
-
30
-
31
-
32
-
33
-
34
-
35
-
36
-
37
-
38
-
39
-
40
-
41
-
42
-
43
-
44
-
45
-
46
-
47
-
48
-
49
-
50
-
51
-
52
-
53
-
54
-
55
-
56
-
57
-
58
-
59
-
60
-
61
-
62
-
63
-
64
-
65
-
66
-
67
-
68
-
69
-
70
-
71
-
72
-
73
-
74
-
75
-
76
-
77
-
78
-
79
-
80
-
81
-
82
-
83
-
84
-
85
-
86
-
87
-
88
-
89
-
90
-
91
-
92
-
93
-
94
-
95
-
96
-
97
-
98
-
99
-
100
-
101
-
102
-
103
-
104
-
105
-
106
-
107
-
108
-
109
-
110
-
111
-
112
-
113
-
114
-
115
-
116
-
117
-
118
-
119
-
120
-
121
-
122
-
123
-
124
-
125
-
126
-
127
-
128
-
129
-
130
-
131
-
132
-
133
-
134
-
 135
135 -
 136
136 -
 137
137 -
 138
138 -
 139
139 -
 140
140 -
 141
141 -
 142
142 -
 143
143 -
 144
144 -
 145
145 -
146
-
147
-
148
-
149
-
150
-
151
-
152
-
153
-
154
-
155
-
156
-
157
-
158
-
159
-
160
-
161
-
162
-
163
-
164
-
165
-
166
-
167
-
168
-
169
-
170
-
171
-
172
-
173
-
174
-
175
-
176
-
177
-
178
-
179
-
180
-
181
-
182
-
183
-
184
-
185
-
186
-
187
-
188
-
189
-
190
-
191
-
192
-
193
-
194
-
195
-
196
-
197
-
198
-
199
-
200
-
201
-
202
-
203
-
204
-
205
-
206
-
207
-
208
-
209
-
210
-
211
-
212
-
213
-
214
-
215
-
216
-
217
-
218
-
219
-
220
-
221
-
222
-
223
-
224
-
225
-
226
-
227
-
228
-
229
-
230
-
231
-
232
-
233
-
234
-
235
-
236
-
237
-
238
-
239
-
240
-
241
-
242
-
243
-
244
-
245
-
246
-
247
-
248
-
249
-
250
-
251
-
252
-
253
-
254
-
255
-
256
-
257
-
258
-
259
-
260
-
261
 |
 |