Kyocera FS-C8500DN FS-C8500DN Operation Guide
Kyocera FS-C8500DN Manual
 |
View all Kyocera FS-C8500DN manuals
Add to My Manuals
Save this manual to your list of manuals |
Kyocera FS-C8500DN manual content summary:
- Kyocera FS-C8500DN | FS-C8500DN Operation Guide - Page 1
FS-C8500DN OPERATION GUIDE Please read this Operation Guide before using this machine. Keep it close to the machine for easy reference. - Kyocera FS-C8500DN | FS-C8500DN Operation Guide - Page 2
Introduction Thank you for your purchase of FS-C8500DN. This Operation Guide is intended to help you operate the machine correctly, perform routine maintenance and take a simple troubleshooting action as necessary, so that you can always use the machine in good condition. Please read this Operation - Kyocera FS-C8500DN | FS-C8500DN Operation Guide - Page 3
/Maint. (Adjust/Maintenance selection/setting) ........ 4-105 5 Maintenance General Information 5-2 Toner Container Replacement 5-2 Replacing the Waste Toner Box 5-6 Cleaning the Printer 5-8 6 Troubleshooting General Guidelines 6-2 Print Quality Problems 6-3 Error Messages 6-5 Clearing Paper - Kyocera FS-C8500DN | FS-C8500DN Operation Guide - Page 4
Appendix Interface A-2 USB Interface A-2 Network Interface A-3 About the Options A-5 Expansion Memory Modules A-6 General Description of Options A-9 Specifications A-10 Glossary Index iv - Kyocera FS-C8500DN | FS-C8500DN Operation Guide - Page 5
or typographical errors in the present edition. No responsibility is assumed if accidents occur while the user is following the instructions in this guide. No responsibility is assumed for defects in the printer's firmware (contents of its read-only memory). This guide, any copyrightable - Kyocera FS-C8500DN | FS-C8500DN Operation Guide - Page 6
reproduce and display weights, styles and printers. If you need to have access to the fonts on more than three printers, you need to acquire a multi-user Imagingpublished specifications, and errors and omissions. 8 THE PARTIES AGREE THAT ALL OTHER WARRANTIES, EXPRESSED OR IMPLIED, INCLUDING WARRANTIES - Kyocera FS-C8500DN | FS-C8500DN Operation Guide - Page 7
REPRESENTATIVES OF EACH PARTY. BY OPENING THIS DISKETTE PACKAGE, YOU AGREE TO ACCEPT THE TERMS AND CONDITIONS OF THIS AGREEMENT. GPL Firmware of this machine is using in part the GPL applied codes (www.fsf.org/copyleft/gpl.html). Please access "http:// www.kyoceramita.com/gpl" for more information - Kyocera FS-C8500DN | FS-C8500DN Operation Guide - Page 8
OR IMPLIED WARRANTIES, INCLUDING, BUT NOT LIMITED TO, THE IMPLIED WARRANTIES OF MERCHANTABILITY AND LIMITED TO, PROCUREMENT OF SUBSTITUTE GOODS OR SERVICES; LOSS OF USE, DATA, OR PROFITS; author of the parts of the library used. This can be in the form of a textual message at program startup - Kyocera FS-C8500DN | FS-C8500DN Operation Guide - Page 9
include any Windows specific code (or a derivative thereof) from the apps directory (application code) you must include an acknowledgement: "This product includes software written by Tim Hudson ([email protected])" THIS SOFTWARE IS PROVIDED BY ERIC YOUNG "AS IS" AND ANY EXPRESS OR IMPLIED WARRANTIES - Kyocera FS-C8500DN | FS-C8500DN Operation Guide - Page 10
tested and found to comply with the limits for a Class B digital device, pursuant to Part compliance could void the user's authority to operate the equipment. This device complies with Part 15 of FCC Rules static electricity discharge to the printer's internal electronics through the interface - Kyocera FS-C8500DN | FS-C8500DN Operation Guide - Page 11
covers, the laser beam cannot escape from the printer during any phase of user operation. Laser Notice This printer is certified in the U.S. to conform to the We, the manufacturer (Kyocera Mita Corporation) hereby declare that this equipment (page printer), model FS-C8500DN is in compliance with - Kyocera FS-C8500DN | FS-C8500DN Operation Guide - Page 12
there is a danger of getting burned. Label inside the printer (Laser radiation warning) High temperature inside. Do not touch parts in this area, because there is a danger of getting burned. Do not incinerate toner and toner container. Dangerous sparks may cause burn. High temperature inside - Kyocera FS-C8500DN | FS-C8500DN Operation Guide - Page 13
recommend you not to install the printer in a confined area where ventilation is blocked. Safety Instructions Regarding the Disconnection of Power Caution this declaration relates is in conformity with the following specifications. EN55024 EN55022 Class B EN61000-3-2 EN61000-3-3 EN60950-1 EN60825 - Kyocera FS-C8500DN | FS-C8500DN Operation Guide - Page 14
. Disclaimer Kyocera Mita will not be liable to customers or any other person or entity for any loss or damage caused or alleged to be caused directly or indirectly by equipment sold or furnished by us, including but not limited to, any interruption of service user, in this manual may - Kyocera FS-C8500DN | FS-C8500DN Operation Guide - Page 15
equipped with an energy saving control function for switching to a Sleep Mode where power consumption is automatically reduced to a minimum after a certain Recycling This device supports the recycled paper which reduces the load on the environment. Your sales or service representative can provide - Kyocera FS-C8500DN | FS-C8500DN Operation Guide - Page 16
avoid the danger of fire. To keep the printer cool and facilitate changing of parts and maintenance, allow access space as shown below. Leave the printer under optimum conditions, adjust the temperature and the humidity of your room if the message is displayed. - Avoid locations near a window or - Kyocera FS-C8500DN | FS-C8500DN Operation Guide - Page 17
of fire or electrical shock in case of an electric short. If an earth connection is not possible, contact your service representative. Other Precautions Connect the power plug to the closest outlet possible to the printer. Handling of Plastic Bags WARNING Keep the plastic bags that are used with the - Kyocera FS-C8500DN | FS-C8500DN Operation Guide - Page 18
or electrical shock. • Never attempt to repair or disassemble the printer or its parts as there is a danger of fire, electrical shock or damage danger of electrical shock. • Always contact your service representative for maintenance or repair of internal parts. • Do not pull the power cord when - Kyocera FS-C8500DN | FS-C8500DN Operation Guide - Page 19
performing cleaning operations. • If dust accumulates within the printer, there is a danger of fire or other trouble. It is therefore recommended that you consult with your service representative in regard to cleaning of internal parts. This is particularly effective if accomplished prior to seasons - Kyocera FS-C8500DN | FS-C8500DN Operation Guide - Page 20
This chapter explains how to handle printer problems that may occur, such as paper jams. Chapter 5 - Maintenance This chapter lists the printer's specifications. Chapter 6 - Troubleshooting This chapter explains how to handle error messages, paper jams and other problems. Appendix Lists the fonts - Kyocera FS-C8500DN | FS-C8500DN Operation Guide - Page 21
functions. Try to be familiar with the names and functions of these parts for correct use and optimal performance. This chapter contains explanations on the following topics: Components at the Front of the Printer 1-2 Components at the Left of the Printer 1-2 Components at the Right of the - Kyocera FS-C8500DN | FS-C8500DN Operation Guide - Page 22
Components at the Front of the Printer 6 7 1 2 8 3 4 5 1 Operation Panel 2 USB Memory Slot 3 Front Cover 4 Paper Cassette 1 5 Paper Cassette 2 6 Top Cover 7 Top Tray 8 Paper Stopper Components at the Left of the Printer 9 10 11 12 13 14 15 9 Left Cover 1 10 Left Cover 1 Indicator 11 Left - Kyocera FS-C8500DN | FS-C8500DN Operation Guide - Page 23
Components at the Right of the Printer 16 17 18 21 19 20 22 16 USB Port (A2) 17 Network Interface Connector 18 USB Interface Connector (B1) 19 Power Switch 20 Multi Purpose Tray 21 Paper Width Guide 22 Handles Machine Parts 1-3 - Kyocera FS-C8500DN | FS-C8500DN Operation Guide - Page 24
29 Magenta Toner Container (M) 30 Magenta Toner Container (M) Release Lever 31 Cleaning Brush 32 Waste Toner Box 33 Waste Toner Tray 34 Release button 36 35 37 38 39 35 Paper Feed Unit Cover 36 Paper Feed Unit 37 Green Knob 38 Paper Width Adjusting Tab 39 Paper Length Guide 1-4 Machine Parts - Kyocera FS-C8500DN | FS-C8500DN Operation Guide - Page 25
Operation Panel 40 41 42 43 44 45 46 48 49 47 50 51 40 Ready Indicator 41 Data Indicator 42 Attention Indicator 43 Message Display 44 [Left Select] Key 45 [Right Select] Key 46 [MENU] Key 47 [Back] Key 48 [Stop] Key 49 [OK] Key 50 USB Memory Slot 51 Arrow Keys Machine Parts 1-5 - Kyocera FS-C8500DN | FS-C8500DN Operation Guide - Page 26
1-6 Machine Parts - Kyocera FS-C8500DN | FS-C8500DN Operation Guide - Page 27
Operation This chapter contains explanations on the following topics: Changing Network Interface Parameters Printing a Status Page Installing the Printer Driver Printing from Application Software Status Monitor Uninstalling Software (Windows PC) 2-2 2-3 2-4 2-9 2-10 2-13 Printing Operation 2-1 - Kyocera FS-C8500DN | FS-C8500DN Operation Guide - Page 28
printer supports TCP/IP, TCP/IP (IPv6), NetWare, AppleTalk, IPP, SSL Server and the IPSec protocols and Security Level. The table below shows the items required for each of the settings. Configure the printer IP address Subnet Mask IP address Default Gateway IP address IPv6 Setting Bonjour On - Kyocera FS-C8500DN | FS-C8500DN Operation Guide - Page 29
Printing a Status Page After completing the network settings, print a status page. The status page allows you to confirm a range of information, including network addresses and network protocols. To print a status page, select Status Page from the Report Print menu. Refer to Report Print on page 4- - Kyocera FS-C8500DN | FS-C8500DN Operation Guide - Page 30
the printer driver. The example shows you how to connect your printer to a Windows Vista PC. Note In Windows 7, Windows Server 2008, Windows Vista, Windows Server 2003, Windows XP and Windows 2000, you must be logged on with administrator privileges. You can use either Express Mode or Custom Mode to - Kyocera FS-C8500DN | FS-C8500DN Operation Guide - Page 31
is connected via a USB. 4 A window appears in which you can check the settings. Check the settings carefully and then click Install. Note If the Windows security window appears, click Install this driver software anyway. 5 A message appears saying that the printer has been installed successfully - Kyocera FS-C8500DN | FS-C8500DN Operation Guide - Page 32
in the utility tab. 1 Select Custom Mode. 2 Following the instructions in the install wizard window, select the software packages to be installed and the specify the port, etc. For details, refer to Custom Installation in the printer driver operation manual on the CD-ROM. Installation on a Macintosh - Kyocera FS-C8500DN | FS-C8500DN Operation Guide - Page 33
, Installation Type and then install the printer driver as directed by the instructions in the installation software. Note In addition Authenticate screen, enter the name and password used to log in to the operating system. This completes the printer driver installation. Next, specify the print - Kyocera FS-C8500DN | FS-C8500DN Operation Guide - Page 34
an AppleTalk connection and then enter the IP address and printer name. 11 Select the installed printer driver and click Add. 12 Select the options available for the printer and click Continue. 13 The selected printer is added. This completes the printer setup procedure. 2-8 Printing Operation - Kyocera FS-C8500DN | FS-C8500DN Operation Guide - Page 35
The Print dialog box displays. 3 Click the drop down list of printer names. All the printers installed in Windows are listed. printer settings for the Default tray. 3 4 5 To start printing, click OK. Note For information on how to use the printer driver software, refer to Printer Driver User Guide - Kyocera FS-C8500DN | FS-C8500DN Operation Guide - Page 36
startup is requested from multiple printers, Status Monitors are launched for each printer that issues the request. • Launch from the KX driver properties: Click the Status Monitor button in the Advanced tab. Then click Open Status Monitor button in the Status Monitor dialog box to launch the Status - Kyocera FS-C8500DN | FS-C8500DN Operation Guide - Page 37
the Status Monitor icon. Configure... If the printer is connected to a TCP/IP network and Guide. Preferences... Specify the Sound Notification and Appearance settings for the Status Monitor. For details, refer to Status Monitor Settings on page 2-12. www.kyoceramita.com Accesses the Kyocera Mita - Kyocera FS-C8500DN | FS-C8500DN Operation Guide - Page 38
. Click Browse to search for the sound file. Use Text to speech Select this check box to enter text you would like to hear played for events. Although a sound file is unnecessary, this function is applicable for Windows XP or later. To use this function, follow these steps. 1 Select Enables Event - Kyocera FS-C8500DN | FS-C8500DN Operation Guide - Page 39
to install the printer driver, click Remove Software. The Software Remove wizard appears. 4 Select the software package to remove. 5 Click Uninstall. Note In Windows 7, Windows Server 2008 and Windows Vista, the Remove Driver and Package screen appears. Select Remove driver and driver package, and - Kyocera FS-C8500DN | FS-C8500DN Operation Guide - Page 40
2-14 Printing Operation - Kyocera FS-C8500DN | FS-C8500DN Operation Guide - Page 41
3 Handling Paper This chapter contains explanations on the following topics: General Guidelines Selecting the Right Paper Special Paper Paper Type Loading Paper 3-2 3-4 3-7 3-12 3-13 Handling Paper 3-1 - Kyocera FS-C8500DN | FS-C8500DN Operation Guide - Page 42
and paper waste, and in efficient, trouble-free priced paper is not economical in the long run if it causes printing problems. Paper in each grade is available in a range of basis weights (defined later). The traditional standard weights are 60 to 163 g/m² (16 to 44 pounds). Paper Specifications - Kyocera FS-C8500DN | FS-C8500DN Operation Guide - Page 43
Paper Size 297 mm 11-11/16 inches 297 mm 11-11/16 inches Recommended Paper The following products are recommended for use with the printer for optimum performance. Size Letter, Legal A4 Product Hammermill LASER PRINT NEUSIEDLER COLOR COPY Weight 90 g/m² (24 lb) 90 g/m² Handling Paper 3-3 - Kyocera FS-C8500DN | FS-C8500DN Operation Guide - Page 44
Selecting the Right Paper This section describes the guidelines for selecting paper. Condition Avoid using paper that is bent at the edges, curled, dirty, torn, embossed, or contaminated with lint, clay, or paper shreds. Use of paper in these conditions can lead to illegible printing and paper jams - Kyocera FS-C8500DN | FS-C8500DN Operation Guide - Page 45
too light may cause feed errors or paper jams as well as premature wear of the product. Uneven weight of paper, namely uneven paper thickness may cause multiple-sheet feeding or print quality problems such as blurring because of poor toner fusing. The recommended basis weight is between 60 and 163 - Kyocera FS-C8500DN | FS-C8500DN Operation Guide - Page 46
the paper's appearance, feed ability, curl, electrostatic properties, and toner fusing characteristics. The moisture content of the paper varies with the parallel to the width (short grain). Short grain paper can cause feeding problems in the machine. All paper used in the machine should be long - Kyocera FS-C8500DN | FS-C8500DN Operation Guide - Page 47
quality paper supplier should take considerable care to ensure that these problems do not occur. Packaging: Paper should be packed in a COLOR PREPUNCHED LETTERHEAD ENVELOPE COATED THICK HIGH QUALITY CUSTOM 1~8 Use paper that is sold specifically for use with copiers or printers trouble during 3-7 - Kyocera FS-C8500DN | FS-C8500DN Operation Guide - Page 48
type of special paper, test a sample on the machine and check that printing quality is satisfactory Specification Must tolerate at least 190 °C (374 °F) 0.100 to 0.110 mm (3.9 to 4.3 mils) Polyester ±0.7 mm (±0.0276 inches) 90° ±0.2° To prevent printing problems, feed transparencies into the printer - Kyocera FS-C8500DN | FS-C8500DN Operation Guide - Page 49
any part of the machine. Adhesive paper sticking to the drum or off, causing serious paper jam problems. Some label paper is manufactured specifications for adhesive label paper. Item Weight of top sheet Composite weight Thickness of top sheet Composite thickness Moisture content Specification - Kyocera FS-C8500DN | FS-C8500DN Operation Guide - Page 50
Grain on page 3-6. This direction can easily cause wrinkles and creases when envelopes pass through the printer. Before purchasing envelopes, make a test print to check whether the printer accepts the envelope. • Do not use envelopes that have an encapsulated liquid adhesive. • Avoid a long printing - Kyocera FS-C8500DN | FS-C8500DN Operation Guide - Page 51
shown in the illustration. Colored Paper Colored paper should satisfy the same conditions as white bond paper, refer to Paper Specifications on page 3-2. In to Paper Specifications on page 3-2. Note Before purchasing recycled paper, test a sample on the machine and check that the printer. 3-11 - Kyocera FS-C8500DN | FS-C8500DN Operation Guide - Page 52
printer's operation panel will cause the printer to automatically select the paper source and print in the mode Paper Feeder Paper Weight Duplex Path PLAIN Yes Yes No COLOR Yes Yes PREPUNCHED type defined and registered by the user. Up to eight types of user settings may be defined. For - Kyocera FS-C8500DN | FS-C8500DN Operation Guide - Page 53
the paper cassette out toward you until it stops. Note Do not pull out more than one paper cassette at a time. 3 Adjust the paper length guide to the length of the paper. When loading A4 or smaller paper into paper cassette 1, raise the paper length - Kyocera FS-C8500DN | FS-C8500DN Operation Guide - Page 54
B sizes), follow the steps below to change the setting of the size switch. 1 Grasp the paper width adjustment knob and move the paper width guides to a position other than that of the size of the paper. 2 Turn size switch A 90°. 3 Move size lever B up (C) or down (I). C: Metric sizes (centimeters - Kyocera FS-C8500DN | FS-C8500DN Operation Guide - Page 55
. 2 Open the MP tray. 3 When loading paper sizes from A3 to B4 or Ledger to Legal, pull out the MP extension. 4 Adjust the paper width guides to the width of the paper. Paper sizes are indicated on the MP tray. Handling Paper 3-15 - Kyocera FS-C8500DN | FS-C8500DN Operation Guide - Page 56
5 Insert the paper along the paper width guides into the tray until it stops. IMPORTANT Make sure paper, and then load in the tray. Correct Incorrect 6 Set the MP tray paper size on the printer's operation panel. Refer to Paper Settings on page 4-46. Paper stopper When using A3 or Ledger paper, open - Kyocera FS-C8500DN | FS-C8500DN Operation Guide - Page 57
System 4-8 Setting a Mode Selection Menu 4-10 Report Print 4-11 USB Memory (USB memory selection) 4-16 Custom Box 4-22 Job Box 4-28 Job Log 4- 94 Administrator (Administrator settings) 4-102 Adjust/Maint. (Adjust/Maintenance selection/setting) 4-105 Using the Operation Panel 4-1 - Kyocera FS-C8500DN | FS-C8500DN Operation Guide - Page 58
Information This chapter provides the information you need to configure the Ecosys Color printer. In general you need to use the operation panel only to make default settings. You can make most changes to the printer settings using the printer driver through the application software. Note Changes to - Kyocera FS-C8500DN | FS-C8500DN Operation Guide - Page 59
display on the operation panel shows: • Status information, the ten messages listed below which are displayed during normal operation. • For information on error code and errors where the printer requires the operator's attention, refer to Troubleshooting on page 6-1. Using the Operation Panel 4-3 - Kyocera FS-C8500DN | FS-C8500DN Operation Guide - Page 60
. This message may be displayed during continuous printing of a large volume of pages which require a large amount of toner such as with photographs, etc. The color calibration function is being performed automatically as you powered on the printer. You can also execute this function manually on the - Kyocera FS-C8500DN | FS-C8500DN Operation Guide - Page 61
for some reason (e.g. there is no paper in the cassette). Check the message display and carry out the required action. For details, refer to Error Messages on page 6-5. On. The printer cannot print due to an error. Check the message display and carry out the required action. For details, refer to - Kyocera FS-C8500DN | FS-C8500DN Operation Guide - Page 62
and continue printing. When you cancel a job, Canceling... appears on the message display and printing stops after the page currently printing has been fed out. the menu system to change the setup and printing environment of the printer. Arrow Keys • The four arrow keys are used in the menu system - Kyocera FS-C8500DN | FS-C8500DN Operation Guide - Page 63
and returns to the menu for the previous step. Print. Are you sure? z Q Data01 [ Yes ] [ No ] • These keys only function when the paper jam message has appeared on the message display. A help message will then appear to facilitate jam clearing in the location. Using the Operation Panel 4-7 - Kyocera FS-C8500DN | FS-C8500DN Operation Guide - Page 64
the printer driver will take priority over settings made in the operation panel. Entering the Mode Selection Menu Press [MENU] when Ready to print. is indicated on the printer message display. The mode selection menu is displayed. Scroll line Menu: a b 1 Report Print 2 USB Memory 3 Custom Box - Kyocera FS-C8500DN | FS-C8500DN Operation Guide - Page 65
Memory 3 Custom Box [ Exit ] Detail: P b File Name: 1/ 4 ABCDEFGHIJKLMNOPQRSTN [ Detail ] Media Type: a b *1***P*l*a**i*n 2 Preprinted 3 Bond Selecting a Menu The mode menu is selected, the message display returns to Ready to print. or Sleeping.. Using the Operation Panel 4-9 - Kyocera FS-C8500DN | FS-C8500DN Operation Guide - Page 66
menu item in the mode selection menu. 1 While the printer displays Ready to print., Please wait., Sleeping. and Processing., press [MENU]. The Mode Selection Menu is displayed. 2 Each time you press U or V, the selection changes. • Report Print • USB Memory • Custom Box • Job Box • Job Log • Counter - Kyocera FS-C8500DN | FS-C8500DN Operation Guide - Page 67
printer's status page) • Font List (Printing a list of the printer's fonts) • HDD File List (Printing a list of the files on the hard disk) • MemCard FileList (Printing a list of the files on a memory message is displayed. 3 Press [Yes] ([Left Select]). The message Accepted. appears and the printer - Kyocera FS-C8500DN | FS-C8500DN Operation Guide - Page 68
Menu Map Sample Menu Map Printer FS-C8500DN Firmware version 4-12 Using the Operation Panel - Kyocera FS-C8500DN | FS-C8500DN Operation Guide - Page 69
may vary depending on the printer's firmware version. Status Page Printer FS-C8500DN Firmware version 1 Paper Settings Interface Block 5 2 Group Settings Memory 6 Emulation Print Settings 7 Device Common Settings Counters Option Status 3 8 Network 4 Toner Gauges 9 Using the - Kyocera FS-C8500DN | FS-C8500DN Operation Guide - Page 70
the printer: - Paper Feeder - Finisher - Mail Box 4 Network Status This item shows the IP address, subnet mask address, and default gateway address for the network interface card in the printer. 5 Interface Information This information shows the block status for items including the USB memory slot - Kyocera FS-C8500DN | FS-C8500DN Operation Guide - Page 71
file list. MemCard FileList (Printing a list of the files on a memory card) This allows you to print a list of the files on a memory card. IMPORTANT This message will be displayed only when the memory card is installed in the printer and properly formatted. 1 In the Report Print menu, press U or - Kyocera FS-C8500DN | FS-C8500DN Operation Guide - Page 72
j 02 File4.pdf [ Detail ] USB Memory (USB memory selection) This specifies the settings for removing the USB memory and printing USB memory content. IMPORTANT available in the USB Memory menu are as follows: • Print File List (Printing and checking the files in the USB memory) Print File (Prints - Kyocera FS-C8500DN | FS-C8500DN Operation Guide - Page 73
memory. 1 Use the procedure described in Print File List (Printing and checking the files in the USB memory) appears. Press [Yes] ([Left Select]). The message Accepted. appears and printing begins. Press [No (Setting the duplex printing) • Encrypted PDF (PDF password entry) • TIFF/JPEG Size (Adjusting - Kyocera FS-C8500DN | FS-C8500DN Operation Guide - Page 74
Finisher is installed. Function: a b 1 Paper Output 2 Duplex 3 Encrypted PDF 4 Press U or V to select the desired output location. 5 Press duplex printing modes. 4 Press U or V to select the desired duplex printing mode. The message display toggles through the following: Off (default) Bind - Kyocera FS-C8500DN | FS-C8500DN Operation Guide - Page 75
PDF Encrypted PDF (PDF password entry) The password of a PDF file can be entered. 1 In the Copies menu or the Paper Selection menu, press [Function] ([Right Select]). The Function menu appears. Password : Paper Size (default) Images are resized so mode is enabled. Using the Operation Panel 4-19 - Kyocera FS-C8500DN | FS-C8500DN Operation Guide - Page 76
mode is enabled. 5 Press [OK]. The XPS FitTo Page setting is set and the Function menu reappears. Detail (Shows the details of the selected file) Use this to view detailed information on the files and folders in the USB memory. 1 Use the procedure described in Print File List (Printing and checking - Kyocera FS-C8500DN | FS-C8500DN Operation Guide - Page 77
device, the data may be corrupted or the device may be damaged. 1 In the USB Memory menu, press U or V to select Remove Memory. 2 Press [OK]. The printer is now ready for the USB memory to be removed and the Mode Selection menu screen appears. IMPORTANT If the screen on the left appears, the USB - Kyocera FS-C8500DN | FS-C8500DN Operation Guide - Page 78
Driver User Guide. Use the printer's operation panel to print the print data stored in a Custom Box. The options available in Custom Box are as follows: • Box Password (input of the password) • Box number/Box name (Select a File) • Select/Deselect All Files • Print a File • Delete a File • Check - Kyocera FS-C8500DN | FS-C8500DN Operation Guide - Page 79
has been entered, press [Enter] ([Right Select]). Note After the password is input, collation is done. Password error is displayed for the incorrect password, and it returns to the input screen. Try to input be a correct password. Box number/Box name (Select a File) To print/delete a file in the - Kyocera FS-C8500DN | FS-C8500DN Operation Guide - Page 80
Print 2 Delete Print a File Print the file(s) selected in the Custom Box. 1 In the file list screen, select an item other than All Press [OK]. A confirmation screen appears. 7 Press [Yes] ([Left Select]). The message Accepted. appears and printing begins. Press [No] ([Right Select]) to return to - Kyocera FS-C8500DN | FS-C8500DN Operation Guide - Page 81
3 Press [OK]. The Duplex screen appears showing the list of available duplex printing modes. 4 Press U or V to select the desired duplex printing mode. The message display toggles through the following: Off (default) Bind Long Edge Bind Short Edge Selecting Off disables duplex printing. Using the - Kyocera FS-C8500DN | FS-C8500DN Operation Guide - Page 82
[OK]. The duplex printing mode is set and the Function . Delete a File Delete the file(s) selected in the Custom Box. 1 In the file list screen, select an item other No ] Completed. 4 Press [Yes] ([Left Select]). The message Completed. appears and the selected file(s) are deleted. Pressing [No] - Kyocera FS-C8500DN | FS-C8500DN Operation Guide - Page 83
list screen, press [Menu] ([Left Select]). b Detail: ABC box 2 Press U or V to select Box Detail. 3 Press [OK]. Details for the displayed Custom Box appear. b Menu: 1 Box Detail 2 File Detail 4 Pressing [OK] returns you to the file list screen. Check File Details Details for the file that is - Kyocera FS-C8500DN | FS-C8500DN Operation Guide - Page 84
Job Box is a print function that makes the Job Retention function possible. The settings are specified from the printer driver. Refer to Printer Driver User Guide for the driver settings. Job Retention Job Retention has four modes as summarized below. These modes are selected from the printer driver - Kyocera FS-C8500DN | FS-C8500DN Operation Guide - Page 85
. To print a job as a quick copy job, refer to Printer Driver User Guide. The default number of print jobs that can be stored on the hard disk is 32. This value can be increased to up to 50. For details, refer to Job Box Settings (Job Box Configuration) on page 4-40. When the number of jobs reaches - Kyocera FS-C8500DN | FS-C8500DN Operation Guide - Page 86
All Files. 2 Press [Check] ([Right Select]). When there is a file not checked in the Custom Box, all files will be checkmarked. When all files in the Custom Box are checked, all checkmarked files are is printed. 4 Press [OK]. A confirmation message is displayed. 4-30 Using the Operation Panel - Kyocera FS-C8500DN | FS-C8500DN Operation Guide - Page 87
1 In the Job Box menu, press U or V to select Quick Copy. 2 Press [OK]. The Quick Copy screen appears listing the user names for stored jobs. l User01: a b All Files Q Data01 T Q Data02 T [ Select ] 3 Press U or V to select the user name you entered in the printer driver. 4 Press [OK]. The - Kyocera FS-C8500DN | FS-C8500DN Operation Guide - Page 88
b Delete a File Delete the file(s) selected in the Job Box. 1 In the file list screen, select an item other than Press [OK]. A confirmation message appears. [ Yes ] [ No ] Completed. 4 Press [Yes] ([Left Select]). The message Completed. appears and the printer deletes the selected job. Pressing - Kyocera FS-C8500DN | FS-C8500DN Operation Guide - Page 89
is turned off, all stored jobs will be deleted. Note Refer to Printer Driver User Guide for the driver settings. Quick Copy: l User01 l User02 l User03 a b Printing Remaining Copies of a Proof-and-Hold Job 1 In the Job Box menu, press U or V to select Quick Copy. 2 Press [OK]. The Quick Copy - Kyocera FS-C8500DN | FS-C8500DN Operation Guide - Page 90
access code is set to the document selected in the check box, ID error is displayed for the disagreement. 4 Press [OK]. A confirmation message is displayed. 5 Press [Yes] ([Left Select]). The message Accepted. appears and the printer prints the selected job. Pressing [No] ([Right Select]) returns - Kyocera FS-C8500DN | FS-C8500DN Operation Guide - Page 91
4-30. a b Delete a File Delete the file(s) selected in the Job Box. 1 In the file list screen, select an item other than All Files OK]. A confirmation message appears. [ Yes ] [ No ] Completed. 4 Press [Yes] ([Left Select]). The message Completed. appears and the printer deletes the selected - Kyocera FS-C8500DN | FS-C8500DN Operation Guide - Page 92
job. In the stored job mode, access codes are not mandatory, but can be set on the printer driver if printing with PIN security is Refer to Printer Driver User Guide for the driver settings. Private/Stored: a b l User01 l User02 l User03 Printing a Private/Stored Job 1 In the Job Box menu, press - Kyocera FS-C8500DN | FS-C8500DN Operation Guide - Page 93
job mode, the number of direct copies is displayed. 4 Enter the access code entered in the printer driver. Use set to the document selected in the check box, ID error is displayed for the disagreement. 5 message is displayed. 7 Press [Yes] ([Left Select]). The message Accepted. appears and the printer - Kyocera FS-C8500DN | FS-C8500DN Operation Guide - Page 94
[ Select ] 3 Press U or V to select the user name you entered in the printer driver. 4 Press [OK]. The printer displays a list of the jobs stored under the selected user name. 5 Press U or V to select the name of the job to be printed. When [Check] ([Right Select]) is pressed, the file is selected - Kyocera FS-C8500DN | FS-C8500DN Operation Guide - Page 95
4 Enter the access code entered in the printer driver. Use the Y and Z to select a number and then document selected in the check box, ID error is displayed for the disagreement. [ Yes ] [ No ] Completed. 6 Press [Yes] ([Left Select]). Complete. appears and the printer deletes the selected job. - Kyocera FS-C8500DN | FS-C8500DN Operation Guide - Page 96
Quick Copy jobs This changes maximum number of Quick Copy jobs to a value between 0 and 50. The default is 32. 1 In the Job Box menu, press U or V to select Job Box Settings. 2 Press [OK]. The Job Box Settings screen appears. 3 Select Quick Copy Jobs and press [OK]. The Quick Copy Jobs menu screen - Kyocera FS-C8500DN | FS-C8500DN Operation Guide - Page 97
1 hour) 4 hours (deleted in 4 hours) 1 day (deleted on the next day) 1 week (deleted after one week) 5 Press [OK]. The setting is stored and the Job Box Settings menu reappears. Using the Operation Panel 4-41 - Kyocera FS-C8500DN | FS-C8500DN Operation Guide - Page 98
Job Name Result Job Type User Name Accepted Time End Time Printed Pages Color/B & W Content Job name Job status Job type Results Displayed Display Icon Job name OK u Error v Cancel t Printer n Report j USB Y E-mail p Box i Printed user name User name Job reception time Year - Kyocera FS-C8500DN | FS-C8500DN Operation Guide - Page 99
0006 Detail: a b Job Name: 1/6 ABCDEFGHIJKLMNOPQRSTN [ Detail ] 0006 Detail: a b Job Name: 1/6 ABCDEFGHIJKLMNOPQRSTN [ Detail ] Detail: a b ABCDEFGHIJKLMNOPQRSTU VWXYZabcdefghijklmnop qrstuvwxyz1234567890 5 Press [Detail] ([Right Select]). The Job Log details screen appears. The - Kyocera FS-C8500DN | FS-C8500DN Operation Guide - Page 100
]. The Total screen appears showing the total number of pages printed. Color: Total A3 A4 O b 17000 2000 1000 Color (Displaying the color printed pages) This allows you to check the total number of color pages printed and the number of color pages printed in each of the 12 paper sizes. You cannot - Kyocera FS-C8500DN | FS-C8500DN Operation Guide - Page 101
Black & White: Total A3 A4 O b 17000 2000 1000 Black & White (Displaying the monochrome printed pages) This allows you to check the total number of monochrome pages printed and the number of monochrome pages printed in each of the 12 paper sizes. You cannot change the - Kyocera FS-C8500DN | FS-C8500DN Operation Guide - Page 102
the paper size that can be supplied from the MP tray. The default setting is Letter size for the U.S. and Canada and A4 for more information about the paper sizes that you can feed from the MP tray, refer to Paper Specifications on page 3-2. 1 In the Paper Settings menu, press U or V to select MP - Kyocera FS-C8500DN | FS-C8500DN Operation Guide - Page 103
Paper Size: a b 1 *Auto(Metric) 2 Auto(Inch) 3 Envelope Monarch 4 Press [OK]. The Paper Size screen appears listing the paper sizes that can be supplied from the MP tray. The available paper sizes are as follows: Auto(Metric) Auto(Inch) Envelope Monarch Envelope #10 Envelope DL Envelope C5 - Kyocera FS-C8500DN | FS-C8500DN Operation Guide - Page 104
tray. The default setting is PLAIN. For more information about paper types that you can feed from the MP tray, refer to Paper Specifications on page Plain Transparency Preprinted Labels Bond Recycled Vellum Rough Letterhead Color Prepunched Envelope Cardstock Coated Thick HighQuality CUSTOM1 to 8 - Kyocera FS-C8500DN | FS-C8500DN Operation Guide - Page 105
2 Media Type [ Exit ] Paper Size: a b 1 *Auto(Metric) 2 Auto(Inch) 3 Letter R Cassette (1 to 4) Set. (Settings for the cassettes) When loading paper in the printer's paper cassette, follow the steps below to set the paper size and paper type. If the optional paper feeder is installed, use the - Kyocera FS-C8500DN | FS-C8500DN Operation Guide - Page 106
cassette according to the paper type you command on the printer driver. The default setting is plain paper for all paper cassettes. For more information about paper types that you can feed from the paper cassette, refer to Paper Specifications on page 3-2. 1 In the Paper Settings menu, press U or - Kyocera FS-C8500DN | FS-C8500DN Operation Guide - Page 107
optimum print result is obtained. The default setting for each media type is shown below. Media Type Plain Transparency Preprinted Labels Bond Recycled Rough Vellum Letterhead Color Prepunched Envelope Cardstock Coated Thick HighQuality CUSTOM1 to 8 Paper Weight Normal 2 Extra Heavy Normal 2 Heavy - Kyocera FS-C8500DN | FS-C8500DN Operation Guide - Page 108
: a b 1 Normal 3 2 *Normal 2 3 Normal 1 5 Press U or V to select Paper Weight. 6 Press [OK]. The Paper Weight screen appears listing the paper weights that can used with the printer. Media Type Set.: a b 1 Plain 2 Transparency 3 Preprinted [ Exit ] 7 Press U or V to select the desired paper - Kyocera FS-C8500DN | FS-C8500DN Operation Guide - Page 109
the selected media is displayed. 5 Press U or V to select Duplex. 6 Press [OK]. The Duplex screen appears listing the paper weights that can used with the printer. Using the Operation Panel 7 Press U or V to specify whether duplex printing is permitted. 8 Press [OK]. The duplex printing permission - Kyocera FS-C8500DN | FS-C8500DN Operation Guide - Page 110
Reset Type Adjust. Are you sure? Reset Type Adj. (Resets customized settings) This resets all the settings specified in Media Type Set. (Paper type settings) on page 4-50. 1 In the Paper Settings menu, press U or V to select Reset Type Adj.. 2 Press [OK]. A confirmation screen appears. [ Yes ] [ - Kyocera FS-C8500DN | FS-C8500DN Operation Guide - Page 111
mode, duplex printing, override A4/LTR, emulation mode, color mode, print quality, and setting pagination. • Paper Source (Selecting the paper feed source) • Paper Feed Mode the printer feeds paper as the default. If an optional paper feeder(s) is installed, it can also be set the default paper - Kyocera FS-C8500DN | FS-C8500DN Operation Guide - Page 112
Mismatch (Detection settings for paper size/type errors when the paper source is fixed) on page 4-80. The default setting is Auto. To change the settings, Feed Mode is set to Fixed, if the paper in the cassette runs out during printing, Add paper in cassette 1. is displayed and the printer stands - Kyocera FS-C8500DN | FS-C8500DN Operation Guide - Page 113
. The duplexer is mounted underneath the printer. Duplex printing is only available for types: PLAIN PREPRINTED BOND RECYCLED ROUGH LETTERHEAD COLOR COATED PREPUNCHED HIGH QUALITY Note Duplex printing cassette, a paper jam may occur. Binding Modes Binding refers to the manner in which printed - Kyocera FS-C8500DN | FS-C8500DN Operation Guide - Page 114
printing modes. 3 Press U or V to select the desired duplex printing mode. The message display toggles through the following: Off (default) Bind jobs are output to the top tray of the printer, or to the optional document finisher or mail box. Note The screen varies depending on the installed - Kyocera FS-C8500DN | FS-C8500DN Operation Guide - Page 115
* *Tray of optional mail box Document Finisher installed TopTray FaceDown printer ignores the difference between A4 and Letter paper sizes. Printing is performed without an error message even if the actual paper size in the current cassette differs from the paper size formatting the job. By default - Kyocera FS-C8500DN | FS-C8500DN Operation Guide - Page 116
The emulation is set and the Print Settings menu reappears. Error Report (Printing KPDL errors) The printer can print error descriptions when printing error occurs during KPDL emulation. The default is On - the printer does not print KPDL errors. IMPORTANT This setting only appears when KPDL or KPDL - Kyocera FS-C8500DN | FS-C8500DN Operation Guide - Page 117
White Color Mode (Selecting color or black & white printing) When executing printing at the printer, you can select Color mode or Black & White mode. By default, the printer is set to print in color mode. 1 In the Print Settings menu, press U or V to select Color Mode. 2 Press [OK]. The Color Mode - Kyocera FS-C8500DN | FS-C8500DN Operation Guide - Page 118
Page Setting: a b 1 Copies 2 Orientation 3 Wide A4 [ Exit ] Copies: a b (1 - 999) /255-copies M Page Setting (Setting pagination) You can use the Page Setting menu to set the number of copies, the page orientation and other pagination settings. The options available in Page Setting are as - Kyocera FS-C8500DN | FS-C8500DN Operation Guide - Page 119
select Wide A4. 2 Press [OK]. The Wide A4 screen appears. XPS FitTo Page: a b 1 *Off 2 On 3 Press U or V to select whether Wide A4 mode is enabled. 4 Press [OK]. The wide mode setting is set and the Page Setting menu reappears. XPS FitTo Page (Adjusting the XPS file print out size) Select On in - Kyocera FS-C8500DN | FS-C8500DN Operation Guide - Page 120
The options available in TIFF/JPEG Size are as follows: Paper Size (default) Images are resized so that they fill the paper size when printed. Image Resolution 1 inch x 1/2 inch. 3 Press U or V to select whether TIFF/JPEG Size mode is enabled. 4 Press [OK]. The TIFF/JPEG Size setting is set and the Page - Kyocera FS-C8500DN | FS-C8500DN Operation Guide - Page 121
settings) This printer supports TCP/IP and TCP/IP (IPv6) protocols. IP is an abbreviation for Internet Protocol. This printer routinely uses the IP IPv4 settings) • IPv6 Setting (TCP/IP IPv6 settings) Note Check with your network administrator when selecting the network setting. After all network - Kyocera FS-C8500DN | FS-C8500DN Operation Guide - Page 122
are as follows: • DHCP (DHCP setting) • Auto-IP (Auto-IP setting) • IP Address (IP address setting) • Subnet Mask (Subnet mask setting) • Default Gateway (Gateway setting) • Bonjour (Bonjour setting) IMPORTANT The DHCP, IP address, subnet mask, gateway and Bonjour menu options for TCP/IP (IPv4 - Kyocera FS-C8500DN | FS-C8500DN Operation Guide - Page 123
). This information includes the IP address of the local node and the default router (the router in the host's own network system) and the DNS packets). (IP addresses can be either destination addresses or source addresses.) Specifically, an IP address is a bit string consisting of a host address - Kyocera FS-C8500DN | FS-C8500DN Operation Guide - Page 124
.2.0/24". In this way, "133.210.2.0/24" denotes the IP address "133.210.2.0" with a 24-bit prefix (network section). This new network address section (originally part of the host address) made possible by the subnet mask is referred to as the subnet address. Note When you enter the subnet mask, be - Kyocera FS-C8500DN | FS-C8500DN Operation Guide - Page 125
port 5353. If a firewall is enabled, the user must check that UDP port 5353 is left open so that check the firewall settings and ensure that Bonjour is registered on the exceptions list and that Bonjour packets are accepted. If you install Bonjour on Windows XP Service Pack 2 or later, the Windows - Kyocera FS-C8500DN | FS-C8500DN Operation Guide - Page 126
Internet protocol, TCP/IP (IPv4). IPv6 is the next-generation Internet protocol and expands the available address space, which resolves the problem of the lack of addresses under IPv4, while also introducing other improvements such as additional security functionality and the capacity to prioritize - Kyocera FS-C8500DN | FS-C8500DN Operation Guide - Page 127
Message Protocol, and is a IPv6 standard defined in the RFC 2463 "Internet Control Message Protocol (ICMPv6) for the Internet Protocol Version 6 (IPv6) Specification -generation of the Internet's Dynamic Host Configuration Protocol and supports IPv6. It extends the BOOTP startup protocol that defines - Kyocera FS-C8500DN | FS-C8500DN Operation Guide - Page 128
as follows: • Language (Selecting the message language) • Date Setting (Date and time settings) • Buzzer (Alarm (Buzzer) setting) • Display Bright. (Display brightness setting) • Error Handling (Error detection setting) • ColorToner Empty (Setting when color toner runs out) • Timer Setting 1 Press - Kyocera FS-C8500DN | FS-C8500DN Operation Guide - Page 129
a b Year Month Day /2009- / 01 / 01 M [ Exit ] Optional language Czech Hungarian Finnish Hebrew Arabic Swedish Danish Norwegian Romanian Portuguese (Portugal) Message display Magyar Suomi Svenska Dansk Norsk Português If you are using one of the optional languages, it is displayed in place of - Kyocera FS-C8500DN | FS-C8500DN Operation Guide - Page 130
Time: a b Hour Min. Second /11- : 45 : 50 M [ Exit ] Date Format: a b 1 *Month/Day/Year 2 Day/Month/Year 3 Year/Month/Day [ Exit ] Press U or V to increase or decrease, respectively, the value at the blinking cursor. 4 Press [OK]. The date is set and the Date Setting menu reappears. Time - Kyocera FS-C8500DN | FS-C8500DN Operation Guide - Page 131
printer is located some distance from the user. The options available in Buzzer are as follows: • Key Confirmation (Key confirmation tone setting) • Job Finish (Job completed tone setting) • Ready (Preparation completed tone setting) • Error (Error when printing ends. The default setting is Off. 1 - Kyocera FS-C8500DN | FS-C8500DN Operation Guide - Page 132
preparation completed tone setting is set and the Buzzer menu reappears. Error (Error tone setting) When On is selected in this setting, a tone sounds when a problem such as running out of paper or a paper jam occurs during printing. The default setting is On. 1 In the Buzzer menu screen, press U or - Kyocera FS-C8500DN | FS-C8500DN Operation Guide - Page 133
limit) • Punch Waste Full (Setting when the punch waste box is full) • Paper Mismatch (Detection settings for paper size/type errors when the paper source disabled error message will be displayed and printing will stop. Display • To print onto one-side of the paper only when this Error message is - Kyocera FS-C8500DN | FS-C8500DN Operation Guide - Page 134
displayed and printing stops. Error Ignore • A message is not displayed and printing continues without finishing. 1 In the Error Handling menu, press U or V to select Finishing Error. 2 Press [OK]. The Finishing Error screen appears. No Staple Error: a b 1 *Ignore 2 Display Error 3 Press U or V to - Kyocera FS-C8500DN | FS-C8500DN Operation Guide - Page 135
the setting when the punch waste box becomes full and the message Empty the punch waste box. is displayed during punching. Display • A message is displayed and printing stops. Printing Error automatically resumes when the punch waste is discarded and the punch waste box is replaced in the punch - Kyocera FS-C8500DN | FS-C8500DN Operation Guide - Page 136
setting to On if you want the error displayed when the MP tray is configured as the default paper source, and there is no paper and the Error Handling menu screen reappears. ColorToner Empty (Setting when color toner runs out) You can select whether or not the message Replace the toner. Newly added - Kyocera FS-C8500DN | FS-C8500DN Operation Guide - Page 137
when color toner runs out is set and the Device Common menu reappears. Timer Setting This specifies timer-related settings such as the automatic form-feed timeout and the timeout settings for Auto Sleep. The options available in Timer Setting are as follows: • Err. Clear Timer (Setting the error - Kyocera FS-C8500DN | FS-C8500DN Operation Guide - Page 138
is opened. The default time is 15 minutes. Note Color calibration is automatically executed before the printer reverts to normal operation mode. 1 In the the time until the panel is automatically reset after the user stops using the panel. The default setting is 90 seconds. 1 In the Timer Setting - Kyocera FS-C8500DN | FS-C8500DN Operation Guide - Page 139
shared over a network as a network printer and one person causes one of the above errors, after the set period of time elapses, the data sent from the next person is printed. The default setting is Off (Auto Error Clear disabled). The auto clear errors are: • Memory is full. • Print overrun. • KPDL - Kyocera FS-C8500DN | FS-C8500DN Operation Guide - Page 140
a sleep timer that is used to conserve power when the printer is not printing, processing, or receiving data. The default setting is On. Refer to Sleep Timer (sleep timer setting) above to set the time until the printer switches to Auto Sleep mode. 1 In the Timer Setting menu, press U or V to select - Kyocera FS-C8500DN | FS-C8500DN Operation Guide - Page 141
printer operation and the print data. IMPORTANT To specify the Security function settings, you must enter an administrator ID and password. Data Security menu is used with the optional Data Security Kit (E). For details, refer to Data Security Kit (E) Operation Guide. 1 Press [MENU]. 2 Press U or V - Kyocera FS-C8500DN | FS-C8500DN Operation Guide - Page 142
security settings for each of the network protocols used. IMPORTANT Check with your network administrator when selecting network settings. The also supports TCP/IP. The feature of the NetWare OS is that it is specifically for servers, unlike general-purpose operating systems such as Windows NT - Kyocera FS-C8500DN | FS-C8500DN Operation Guide - Page 143
. Frame Type (Frame Type setting) Sets the NetWare frame type. Frame is a term referring to a set of data that flows through the network. The default setting is Auto. IMPORTANT This setting only appears when On is selected for the NetWare operation setting. 1 In the NetWare menu, press U or V to - Kyocera FS-C8500DN | FS-C8500DN Operation Guide - Page 144
used primarily on Macintosh computers and also refers to the Mac OS network functions. AppleTalk assigns 24-bit network addresses (a printers in remote locations. It also supports the HTTP authentication mechanisms along with SSL server and client authentication as well as encryption. The default - Kyocera FS-C8500DN | FS-C8500DN Operation Guide - Page 145
V to select SSL. 2 Press [OK]. The SSL menu screen appears. Off/On (SSL operation setting) Select whether or not to use the SSL server. The default setting is Off. 1 In the SSL menu, press U or V to select Off/On. 2 Press [OK]. The Off/On screen appears. 3 Press U or V to select whether - Kyocera FS-C8500DN | FS-C8500DN Operation Guide - Page 146
Encryption: a b 1 AES g 2 DES T 3 3DES T [Complete ] Encryption (Encryption setting) Select the encryption method used on the SSL server. 1 In the SSL menu, press U or V to select Encryption. 2 Press [OK]. The Encryption screen appears. 3 Press U or V to move the cursor to the encryption - Kyocera FS-C8500DN | FS-C8500DN Operation Guide - Page 147
SSL for communications between users and servers in network printing. To use IPP over SSL, both server and client must support the protocol. The default setting is Off. 1 Secure) is a protocol that adds SSL data encryption, message authentication and a digital signature function to the HTTP protocol - Kyocera FS-C8500DN | FS-C8500DN Operation Guide - Page 148
, press U or V to select I/F Block Set.. 2 Press [OK]. The I/F Block Set. menu screen appears. USB Host (USB memory slot setting) This locks and protects the USB memory slot (USB Host). The default setting is Unblock. 1 In the I/F Block Set. menu, press U or V to select USB Host. 2 Press [OK]. The - Kyocera FS-C8500DN | FS-C8500DN Operation Guide - Page 149
card (NIC) setting) This locks and protects the network interface card (NIC). The default setting is Unblock. Note Optional I/F is displayed only when the optional network interface is installed on the printer. 1 In the I/F Block Set. menu, press U or V to select Option I/F. 2 Press [OK]. The - Kyocera FS-C8500DN | FS-C8500DN Operation Guide - Page 150
. Refer to Administrator (administrator settings) for the procedure for setting the administrator ID and password. Job accounting on this machine offers the following features: • Support for up to 100 departments • Account IDs up to 8 digits long from 1 to 99999999 • Collective print management - Kyocera FS-C8500DN | FS-C8500DN Operation Guide - Page 151
appears. Press [Yes] ([Left Select]). Accepted. appears and the printer prints the job accounting list. Pressing [No] ([Right Select]) returns the currently selected accounts. This enables you to check the following numbers for printed pages: • Total • Color • Black & White (Monochrome) • Combine( - Kyocera FS-C8500DN | FS-C8500DN Operation Guide - Page 152
press [OK]. The Printed Pages/Counter Reset menu screen appears. Printed Pages: Total Color Black & White a b 300000 200000 100000 4 Press U or V to select a b k 341736 k 00923022 k 12345678 6 Press U or V to check the required counter display. 7 Press [OK]. The Printed Pages/Counter Reset menu - Kyocera FS-C8500DN | FS-C8500DN Operation Guide - Page 153
selection options appears. This account ID is already registered. This message appears if the account ID has already been registered. Detail/Edit (Checking/editing registered account ID settings) This procedure allows you to check or edit registered accounts. 1 In the Job Account.Set. selection - Kyocera FS-C8500DN | FS-C8500DN Operation Guide - Page 154
account to check or edit and then press [OK]. A list of selection options appears. Detail/Edit: a b 1 Account ID 2 Restrict.(Total) 3 Restrict.(Color) 4 This message appears if the account ID has already been registered. Detail/Edit: a b 1 Account ID 2 Restrict.(Total) 3 Restrict.(Color) - Kyocera FS-C8500DN | FS-C8500DN Operation Guide - Page 155
pages that can be printed using this account. Press U or V to select Limit(Color) and then press [OK]. The Limit(Color)screen appears. IMPORTANT Limit(Color) is displayed when Counter Limit is set for Restrict.(Color). 15 Enter the color printing limit you want to set for this account. Use Y or Z to - Kyocera FS-C8500DN | FS-C8500DN Operation Guide - Page 156
Account. List: a b k 1228 k 00122 k 3485739 [ Add ] k 1228: a b 1 Detail/Edit 2 Delete 3 Exit Delete (Deleting registered accounts) You can use this procedure to delete a registered account ID. 1 In the Job Account.Set. selection menu, press U or V to select Account. List. 2 Press [OK]. The - Kyocera FS-C8500DN | FS-C8500DN Operation Guide - Page 157
Job Account.Set.:a b 1 Job Accounting 2 Account. Report 3 Each Job Account [ Exit ] Unknown ID Job: a b 1 *Reject 2 Permit 3 Press U or V to select a setting and then press [OK]. The Job Account.Set. selection menu list reappears. Unknown ID Job (Operation settings for unknown account IDs) Use this - Kyocera FS-C8500DN | FS-C8500DN Operation Guide - Page 158
user who can use the printer and manage other users. When using the Security and Job Accounting functions, the administrator ID and password The default setting is "5500". Administrator: a b 1 Admin. ID 2 Admin. Password [ Exit ] 7 Press [Login] ([Right Select]). If the entered ID and password are - Kyocera FS-C8500DN | FS-C8500DN Operation Guide - Page 159
from the beginning.(You are returned to step 10.) 14 In the Administrator menu, press U or V to select Admin. Password. 15 Press [OK]. The New Password screen appears. 16 Enter the administrator password to be registered. Use Y or Z to select a number and then press [OK] to enter the number. You can - Kyocera FS-C8500DN | FS-C8500DN Operation Guide - Page 160
When you have finished, press [Enter] ([Right Select]). The Administrator menu screen appears. If the administrator passwords do not match, the New Password screen reappears. Enter the administrator password to be registered once more, starting again from the beginning. (You are returned to step 16 - Kyocera FS-C8500DN | FS-C8500DN Operation Guide - Page 161
cycle setting) • ColorCalibration • Color Regist. (Color registration [Standard]) • Color Regist. (Color registration [Detailed]) • Restart (Restart Printer) • Service Setting (for Maintenance) IMPORTANT Service Setting is primarily a menu used by service personnel for maintenance work. There is no - Kyocera FS-C8500DN | FS-C8500DN Operation Guide - Page 162
calibration. Color Regist. (Color registration [Standard]) When using the printer for the first time after set-up or after having moved it, or if printout of any color (magenta, cyan or yellow) is skewed, use this mode to correct the color registration on the operation panel. The options available - Kyocera FS-C8500DN | FS-C8500DN Operation Guide - Page 163
the login screen that appears. A confirmation screen appears after login. Press [Yes] ([Left Select]). A confirmation screen appears. Pressing [No] ([Right Select]) returns you to the Color Regist. Normal menu screen without printing the registration chart. The printed chart is the - Kyocera FS-C8500DN | FS-C8500DN Operation Guide - Page 164
Regist. menu screen appears. Press [Exit] ([Right Select]) to return to the standby screen. 3 Press U or V to select Normal. 4 Press [OK]. The Color Regist. Normal menu screen appears. Press [Exit] ([Right Select]) to return to the standby screen. 5 Press U or V to select Adjust Magenta. 6 Press [OK - Kyocera FS-C8500DN | FS-C8500DN Operation Guide - Page 165
values in the color registration correction chart and set them in the printer. Note As confirmation, try printing the color registration correction chart problem of skewed-color printout still persists even after correcting the color registration, call for service. Color Regist. (Color registration - Kyocera FS-C8500DN | FS-C8500DN Operation Guide - Page 166
the account ID. The printed chart is the color registration correction chart shown on the next page. There are H-1 to H-7 (upper part) and V-1 to V-5 (lower part) registration charts for each color (cyan, magenta and yellow) included on the color registration correction chart. 4-110 Using the - Kyocera FS-C8500DN | FS-C8500DN Operation Guide - Page 167
Regist. menu screen appears. Press [Exit] ([Right Select]) to return to the standby screen. 3 Press U or V to select Detail. 4 Press [OK]. The Color Regist. Detail menu screen appears. Press [Exit] ([Right Select]) to return to the standby screen. 5 Press U or V to select Adjust Magenta. Using the - Kyocera FS-C8500DN | FS-C8500DN Operation Guide - Page 168
displayed. 9 Press Y or Z to move the cursor right or left. Using the same procedure as for the H-1 value, display the other values identified in the color registration correction chart. When you have completed all the values, press [OK]. The setting is saved and you are returned to the - Kyocera FS-C8500DN | FS-C8500DN Operation Guide - Page 169
the color registration, call for service. Restart (Restart Printer) The procedure described below resets the printer's temporary conditions, such as the current page orientation, font, etc., set by commands to their default values. Downloaded fonts and macros are deleted from the printer's memory - Kyocera FS-C8500DN | FS-C8500DN Operation Guide - Page 170
Setting (for Maintenance) The options available in Service are as follows: • Service Status (Printing the service status page) • Network Status (Printing the network status page) • Test Page (Printing the test page) • DEV-CLN (Developer/Refresh mode setting) • Drum (Drum/Refresh mode setting) • LSU - Kyocera FS-C8500DN | FS-C8500DN Operation Guide - Page 171
Select]) returns you to the Service Setting menu screen without printing the service status page. Test Page (Printing the test page) The test page is printed to check the effectiveness of printer adjustments. This is primarily used for maintenance by service personnel, but it contains information - Kyocera FS-C8500DN | FS-C8500DN Operation Guide - Page 172
No ] Silent Mode a b 1 *Off 2 On Drum (Drum/Refresh mode setting) This sets the refresh mode for the drum. When the printing quality declines, refreshing the drum can restore the printing quality. This is primarily used for maintenance by service personnel. 1 In the Service Setting menu, press - Kyocera FS-C8500DN | FS-C8500DN Operation Guide - Page 173
to the default mode. IMPORTANT System initialization will erase all Custom Boxes and all data in the Job Box. Note If the optional security kit has been installed, this item will not appear. For information on the security kit, refer to Data Security Kit (E) Operation Guide. 1 In the Service Setting - Kyocera FS-C8500DN | FS-C8500DN Operation Guide - Page 174
4-118 Using the Operation Panel - Kyocera FS-C8500DN | FS-C8500DN Operation Guide - Page 175
5 Maintenance This chapter contains explanations on the following topics: General Information 5-2 Toner Container Replacement 5-2 Replacing the Waste Toner Box 5-6 Cleaning the Printer 5-8 Maintenance 5-1 - Kyocera FS-C8500DN | FS-C8500DN Operation Guide - Page 176
basic maintenance tasks you can perform on the printer. You can replace the following component according to the printer's display: • Toner Kits • Waste Toner Box Also, the following parts need periodic cleaning: • Separator • Transfer Roller Note Information Collection on Memory Chips - The memory - Kyocera FS-C8500DN | FS-C8500DN Operation Guide - Page 177
Kyocera Mita Parts and Supplies. The toner kits are supplied in 4 different colors: cyan, magenta, yellow and black. A new toner kit for each color contains the following items: • Toner Container • Waste Toner Box • Plastic waste bags for old toner container and old waste toner box • Installation - Kyocera FS-C8500DN | FS-C8500DN Operation Guide - Page 178
container by holding the handle and place it in the provided plastic disposal bag. 5 Take the new toner container out of the toner kit. 6 Hold the new toner container with both hands and shake it from side to side several times so that the toner is uniformly distributed inside. 5-4 Maintenance - Kyocera FS-C8500DN | FS-C8500DN Operation Guide - Page 179
. Use the same procedure to replace the toner containers of the other colors. 9 Close the front cover. Note After use, always dispose of the toner container and the waste toner box in accordance with Federal, State and Local rules and regulations. Proceed to the next section. Maintenance 5-5 - Kyocera FS-C8500DN | FS-C8500DN Operation Guide - Page 180
Waste Toner Box Replace the waste toner box when the Check waste toner box. Message is displayed. A new waste toner box is included with the toner kit. The waste toner box needs to be replaced before the printer will operate. 1 Open the front cover. 2 Press the release button and pull out the waste - Kyocera FS-C8500DN | FS-C8500DN Operation Guide - Page 181
the waste toner tray. When the tray reaches the correct position, it locks into place with a "click" sound. 10 Close the front cover. After replacing the toner containers and the waste toner box, clean the paper transfer unit. For instructions, refer to Cleaning the Printer on page 5-8. Maintenance - Kyocera FS-C8500DN | FS-C8500DN Operation Guide - Page 182
printer whenever the toner container or the waste toner box is replaced to maintain the best printing quality. To maintain optimum print quality, it is also recommended that the inside of the printer be cleaned once a month as well as when the toner and close the front cover. 5-8 Maintenance - Kyocera FS-C8500DN | FS-C8500DN Operation Guide - Page 183
Maintenance 6 Press the specified position to close left cover 1. Cleaning the Transfer Roller Print problems such as soiling of printed pages may occur if the transfer roller becomes dirty. Follow the steps below to clean the transfer roller. 1 Open the - Kyocera FS-C8500DN | FS-C8500DN Operation Guide - Page 184
6 Press the specified position to close left cover 1. 5-10 Maintenance - Kyocera FS-C8500DN | FS-C8500DN Operation Guide - Page 185
6 Troubleshooting This chapter contains explanations on the following topics: General Guidelines Print Quality Problems Error Messages Clearing Paper Jams 6-2 6-3 6-5 6-15 If a problem cannot be corrected, contact your service technician. Troubleshooting 6-1 - Kyocera FS-C8500DN | FS-C8500DN Operation Guide - Page 186
Try printing another file or using another print command. If the problem occurs only with a specific file or application, check the printer driver settings for that application. The printer is emitting steam in the area around the top tray. Check the room temperature to see if it Depending on the - Kyocera FS-C8500DN | FS-C8500DN Operation Guide - Page 187
may require cleaning or replacing parts of the printer. If the suggested corrective action will not solve the problem, call for service. Corrective Action Conduct color registration using the printer operation panel. For details, refer to Color Regist. (Color registration [Standard]) on page 4106 - Kyocera FS-C8500DN | FS-C8500DN Operation Guide - Page 188
(Drum/Refresh mode setting) on page 4-116. Check the operation panel for toner. If the Toner is running out. message is displayed, install a new toner kit. To replace the toner container, refer to Toner Container Replacement on page 5-2. Conduct color calibration either by switching the printer - Kyocera FS-C8500DN | FS-C8500DN Operation Guide - Page 189
[OK]. Error Messages The following table lists errors and maintenance messages that you can be dealt with by yourself. If Machine failure. Call service. appears, turn off the printer, disconnect the power cord, and contact your service technician. If Machine failure. Call service. or Error occurred - Kyocera FS-C8500DN | FS-C8500DN Operation Guide - Page 190
. Close top cover. The top cover of the printer is open. Close the printer top cover. Cannot remove the memory while in use. This message is displayed when Remove Memory was selected while a USB memory was being used. The previous screen is displayed again 1 or 2 seconds. 6-6 Troubleshooting - Kyocera FS-C8500DN | FS-C8500DN Operation Guide - Page 191
off and on. F### Turn off the printer then turn it back on to see if the printer has recovered. If the printer has not recovered, turn off the printer, disconnect the power cord, and contact your service representative or authorized service center. Error occurred. Turn the main power switch off - Kyocera FS-C8500DN | FS-C8500DN Operation Guide - Page 192
No multi copies. Press [OK]. Multiple copies cannot be printed. To return the printer to the print-ready status, press [OK]. Original toner installed. Displayed when the installed toner is the original Kyocera Mita product. Paper jammed in A paper jam has occurred. The location of the paper - Kyocera FS-C8500DN | FS-C8500DN Operation Guide - Page 193
page. Press [OK] to resume printing. Replace the toner. [C][M][Y][K] Clean the printer. Toner has run out in the toner container(s). Replace the toner container using a new toner kit for the particular color. The printer does not operate when this message is displayed. For example, if Replace the - Kyocera FS-C8500DN | FS-C8500DN Operation Guide - Page 194
a stored job is not correct. Check the user ID that you specified on the printer driver. For more information, refer to Custom Box on page 4-22. Incorrect account ID. The ID or Password entered for the Job Accounting function is not correct. Check the ID or Password. For more information, refer to - Kyocera FS-C8500DN | FS-C8500DN Operation Guide - Page 195
Message Close the finisher front cover. Corrective Finisher is open. Close tray C. Close the mailbox cover. The cover of the optional mail box is open. Close the cover. Close the Staple cover. The staple cover of the optional document paper feeder). Load paper in MP tray. Troubleshooting 6-11 - Kyocera FS-C8500DN | FS-C8500DN Operation Guide - Page 196
mode. For details, refer to ColorToner Empty (Setting when color toner runs out) on page 4-80. Check waste toner box. Finisher tray # is full of Paper. The waste toner box is almost full. Replace the waste toner box. For details, refer to Replacing the Waste Toner Box on page 5-6. The waste toner - Kyocera FS-C8500DN | FS-C8500DN Operation Guide - Page 197
in the 3,000 Sheet Document Finisher Operation Guide. Finisher path error. The optional document finisher is not correctly installed. Remove the document finisher from the printer and then correctly reinstall it. Set the punch waste box. The punch waste box of the optional 3,000 Sheet Document - Kyocera FS-C8500DN | FS-C8500DN Operation Guide - Page 198
press [OK]. Maintenance. (#) Replace the Maintenance Kit A or B which is displayed on the message display. Replacement of the maintenance kit is necessary at every 300,000 images of printing and requires professional servicing. # indicates A or B. Contact your service representative or authorized - Kyocera FS-C8500DN | FS-C8500DN Operation Guide - Page 199
the paper jam (the component where the paper jam has occurred) is also indicated. The printer automatically goes off-line when this message is displayed. Remove jammed paper. After removing jammed paper, the printer will re-start printing. Possible Paper Jam Locations The figure below explains the - Kyocera FS-C8500DN | FS-C8500DN Operation Guide - Page 200
Paper Jam Message Paper jammed in cassette 3. Paper jam location Description C Paper is jammed at the optional paper feeder cassette (3, 4). Reference Page page 6-20 [ Help ] D Paper jammed in Feed Unit. Paper is jammed at the MP tray or page 6-21 inside the printer. [ Help ] E Paper - Kyocera FS-C8500DN | FS-C8500DN Operation Guide - Page 201
Finisher or Document Finisher Operation Guide I Paper jammed in Folding document finisher. Document Finisher Operation Guide J Paper jammed in Mailbox. . Document Finisher Operation Guide [ Help ] General paper stack 180 degrees. The printer may have problems if paper jams recur after the - Kyocera FS-C8500DN | FS-C8500DN Operation Guide - Page 202
jammed paper. 3 Pull out paper cassette 1. 4 Remove the jammed paper. 5 Push paper cassette 1 back in place securely. 6 Press the specified position to close left cover 1. Troubleshooting - Kyocera FS-C8500DN | FS-C8500DN Operation Guide - Page 203
Paper Jam at Cassette 2 Follow the steps below to clear paper jams at paper cassette 2. 1 Open left cover 3. 2 Remove the jammed paper. 3 Pull out paper cassette 2. 4 Remove the jammed paper. 5 Push paper cassette 2 back in place securely. 6 Close left cover 3. Troubleshooting 6-19 - Kyocera FS-C8500DN | FS-C8500DN Operation Guide - Page 204
paper. 3 Pull out the paper cassette that is being used. 4 Remove the jammed paper. 5 Push the paper cassette back in place securely. 6 Close left cover 4. Troubleshooting - Kyocera FS-C8500DN | FS-C8500DN Operation Guide - Page 205
Paper Jam at MP Tray Follow the steps below to clear paper jams at the MP tray. 1 Remove the paper from the MP tray. 2 If paper is jammed inside, remove the jammed paper. 3 Pull up the left cover 1 lever and open left cover 1. 4 Remove the jammed paper. 5 Open feed guide B1. Troubleshooting 6-21 - Kyocera FS-C8500DN | FS-C8500DN Operation Guide - Page 206
6 Remove the jammed paper. 7 Pull out paper cassette 1. 8 Turn the lower green knob (B2) to the left at least 10 times. 9 Remove the jammed paper. If you cannot remove the paper, continue with the following steps. 10 Pull out the paper feed unit (B3). 6-22 Troubleshooting - Kyocera FS-C8500DN | FS-C8500DN Operation Guide - Page 207
paper jams from inside left cover 1, 3, or 4. 1 Open the left cover where the paper is jammed inside. 2 Remove the jammed paper. 3 Close the left cover. Troubleshooting 6-23 - Kyocera FS-C8500DN | FS-C8500DN Operation Guide - Page 208
1 Follow the steps below to clear paper jams at the duplex unit and paper cassette 1. 1 Pull up the left cover 1 lever and open left cover 1. Troubleshooting - Kyocera FS-C8500DN | FS-C8500DN Operation Guide - Page 209
Troubleshooting 2 Remove the jammed paper. 3 Press the specified position to close left cover 1. 4 If the left cover 2 indicator is flashing, open left cover 2. 5 Remove the jammed - Kyocera FS-C8500DN | FS-C8500DN Operation Guide - Page 210
not to tear it. Torn pieces of paper are difficult to remove and may be easily overlooked, deterring the jam recovery. 4 Remove the jammed paper. Troubleshooting - Kyocera FS-C8500DN | FS-C8500DN Operation Guide - Page 211
5 If jammed paper is visible in the paper ejection slot, pull the jammed paper toward you to remove it. 6 Open the top cover, and remove the jammed paper. 7 Close the top cover. 8 Push the fuser cover back in place and press the specified position to close left cover 1. Troubleshooting 6-27 - Kyocera FS-C8500DN | FS-C8500DN Operation Guide - Page 212
6-28 Troubleshooting - Kyocera FS-C8500DN | FS-C8500DN Operation Guide - Page 213
installed on the printer and shows the printer's specifications. Interface USB Interface Network Interface About the Options Expansion Memory Modules General Description of Options Specifications A-2 A-2 A-3 A-5 A-6 A-9 A-10 For availability of the options, consult your service technician. A-1 - Kyocera FS-C8500DN | FS-C8500DN Operation Guide - Page 214
USB Interface This printer supports the Hi-Speed USB. USB (Universal Serial Bus) interface specifications and interface signals are as follows. Specifications Basic Specification Complies with the Universal Serial Bus Specification Revision 2.0. Connectors Printer: B-type receptacle (female - Kyocera FS-C8500DN | FS-C8500DN Operation Guide - Page 215
security functions and priority based data transmission. Supports IPSec Supports IPSec, the security protocol that authenticates and encrypts in the network layer (IP layer). Specifications Connector 10 Base-T/100 Base-TX Operating Systems Windows 2000/XP/Vista/7/Server2003/Server2008, MacOS 10 - Kyocera FS-C8500DN | FS-C8500DN Operation Guide - Page 216
Operation Environment 10 to 35 °C (50 to 95 °F), 20-80 % RH (condensation-free) EMI Countermeasures VCCI Class B, FCC Class B (U.S.), CE (Europe) IMPORTANT When IPv6 functions are used, the devices used on the network (routers, PCs, etc) must support IPv6. A-4 - Kyocera FS-C8500DN | FS-C8500DN Operation Guide - Page 217
the Options This printer has the following options available to satisfy your printing requirements. For instructions on installing individual options, refer to the documentation included with the option. Some options are explained in the following sections. Expansion Memory 3,000 Sheet Document - Kyocera FS-C8500DN | FS-C8500DN Operation Guide - Page 218
installed to expand the printer's memory to 2 GB. The printer initially has 1 GB of memory installed. Expansion Memory Modules The optional memory module is 1 GB. Precautions for Handling the Printer's Main Controller Board and Memory Modules To protect electronic parts, discharge static electricity - Kyocera FS-C8500DN | FS-C8500DN Operation Guide - Page 219
in as far as it will go. 5 Close the stopper to secure the installed expansion memory module. 6 Replace the printer back cover and secure with the screws. Removing a Memory Module To remove a memory module, remove the back printer cover and then carefully open the two socket clamps. Ease the - Kyocera FS-C8500DN | FS-C8500DN Operation Guide - Page 220
Report Print menu, press U or V to select Status Page. 2 Press [OK]. A confirmation message is displayed. Print. 3 Press [Yes] ([Left Select]). Accepted. appears and the printer prints the status page. Are you sure? Check the amount of memory with the printed status page. If the z Status Page - Kyocera FS-C8500DN | FS-C8500DN Operation Guide - Page 221
for clearing paper jams. 3,000 Sheet Paper Feeder In addition to the printer's paper cassettes, you can install an optional paper feeder that can Document Finisher Operation Guide. A mail box and folding unit are also available as options. Data Security Kit(E) The data security kit overwrites all - Kyocera FS-C8500DN | FS-C8500DN Operation Guide - Page 222
3 hours) 57.5 seconds or less 57.5 seconds or less Controller Memory Standard Maximum Operating Systems Interface USB Network Monthly Duty Average Maximum PowerPC750GL (750MHz) 1 GB 2 GB Microsoft Windows 2000/XP/Vista/7, Windows Server 2003/2008 Apple Macintosh OS X Hi-Speed USB 10 BASE - Kyocera FS-C8500DN | FS-C8500DN Operation Guide - Page 223
, Preprinted, Labels, Bond, Recycled, Vellum, Rough, Letterhead, Color, Prepunched, Envelope, Cardstock, Coated, Thick, High quality, and LpA = 57 dB (A) During Sleep Mode immeasurably low Dimensions (W × D × H) 775 × 825 × 1,006 mm 30-1/2 × 32-1/2 × 39-5/8" Weight Approx. 95 kg (209 lbs) †. - Kyocera FS-C8500DN | FS-C8500DN Operation Guide - Page 224
, Legal, Oficio II, 8-1/2 × 13-1/2", Letter, Letter-R, Executive, ExecutiveR, Statement-R, A3, B4, A4, A4-R, B5-R, A5-R, Folio, 8K, 16K, 16K-R Paper weight: 60 - 163 g/m2 Media types: standard, recycled, color 585 × 590 × 315 mm 23-1/32 × 23-15/64 × 12-13/32" Approx. 26 kg (57 lbs) 3,000 Sheet Paper - Kyocera FS-C8500DN | FS-C8500DN Operation Guide - Page 225
, Ledger, Legal, 12 × 18", A3, B4, 8K: 100 sheets Letter, Letter-R, Statement-R, A4, A4R, B5, B5R, A5, A5R, 16K, 16KR: 200 sheets Tray C Supported Paper Weight Letter, Statement-R, A4, B5, A5, A5R, 16K: 50 sheets Stapling: 90 g/m2 or less Maximum Sheets for Stapling A3, B4, Ledger, Legal, Oficio - Kyocera FS-C8500DN | FS-C8500DN Operation Guide - Page 226
A-14 - Kyocera FS-C8500DN | FS-C8500DN Operation Guide - Page 227
computer on the same AppleTalk network. Custom Box The Custom Box function stores print data for each individual user on the printer and allows the user to print single or multiple copies of the stored data later using the printer's operation panel. Default Gateway This indicates the device, such as - Kyocera FS-C8500DN | FS-C8500DN Operation Guide - Page 228
a unique number that represents a specific computer in a network. The format of an IP Address is four numbers separated by dots, e.g. 192.168.110.171. Each number should be a decimal between 0 and 255. Job Box The Job Box function stores print data on the printer and allows users to print single or - Kyocera FS-C8500DN | FS-C8500DN Operation Guide - Page 229
this mode, power is reduced to the minimum. The default setting can be changed. Status page This lists machine conditions, such as the machine's memory, the An interface standard for low to middle speed serial interfaces. This printer supports Hi-Speed USB. The maximum transfer rate is 480 Mbps and - Kyocera FS-C8500DN | FS-C8500DN Operation Guide - Page 230
Glossary-4 - Kyocera FS-C8500DN | FS-C8500DN Operation Guide - Page 231
xii Cleaning 5-8 Cleaning Brush 1-4 Separator 5-8 Transfer Roller 5-9 Coated Paper 3-11 Color Mode 4-61 Colored Paper 3-11 Counter 4-44 Custom Paper Size Duplex Printing 4-53 Paper Weight 4-52 D Data Security Kit A-9 Date Setting 4-73 Device Common 4-72 Display Bright 4-76 Document - Kyocera FS-C8500DN | FS-C8500DN Operation Guide - Page 232
Memory Checking Expansion Memory A-8 Expansion Memory A-6 Installation A-7 Remove A-7 Status Page 4-14 Menu Map 4-11 Message Display 1-5, 4-3 Display Bright 4-76 Language 4-72 Status Information 4-4 Mode Problems 6-3 Printer Driver 2-4 Installing on Macintosh 2-6 Installing on Windows - Kyocera FS-C8500DN | FS-C8500DN Operation Guide - Page 233
Top Tray 1-2 Transfer Roller Cleaning 5-9 Transparency 3-8 Troubleshooting 6-1 U USB Interface 1-3 USB Memory Print 4-16 Remove 4-21 Slot 1-2, 1-5 W Waste Toner Box 1-4 Replacing 5-6 Wide A4 4-63 X XPS Fit to Page 4-63 Index-3 - Kyocera FS-C8500DN | FS-C8500DN Operation Guide - Page 234
Index-4 - Kyocera FS-C8500DN | FS-C8500DN Operation Guide - Page 235
A1 - Kyocera FS-C8500DN | FS-C8500DN Operation Guide - Page 236
- Kyocera FS-C8500DN | FS-C8500DN Operation Guide - Page 237
2009 is a trademark of Kyocera Corporation - Kyocera FS-C8500DN | FS-C8500DN Operation Guide - Page 238
MEMO - Kyocera FS-C8500DN | FS-C8500DN Operation Guide - Page 239
MEMO - Kyocera FS-C8500DN | FS-C8500DN Operation Guide - Page 240
First edition 2009.10 Printed in China 302KA56010
-
 1
1 -
 2
2 -
 3
3 -
 4
4 -
 5
5 -
 6
6 -
 7
7 -
8
-
9
-
10
-
11
-
12
-
13
-
14
-
15
-
16
-
17
-
18
-
19
-
20
-
21
-
22
-
23
-
24
-
25
-
26
-
27
-
28
-
29
-
30
-
31
-
32
-
33
-
34
-
35
-
36
-
37
-
38
-
39
-
40
-
41
-
42
-
43
-
44
-
45
-
46
-
47
-
48
-
49
-
50
-
51
-
52
-
53
-
54
-
55
-
56
-
57
-
58
-
59
-
60
-
61
-
62
-
63
-
64
-
65
-
66
-
67
-
68
-
69
-
70
-
71
-
72
-
73
-
74
-
75
-
76
-
77
-
78
-
79
-
80
-
81
-
82
-
83
-
84
-
85
-
86
-
87
-
88
-
89
-
90
-
91
-
92
-
93
-
94
-
95
-
96
-
97
-
98
-
99
-
100
-
101
-
102
-
103
-
104
-
105
-
106
-
107
-
108
-
109
-
110
-
111
-
112
-
113
-
114
-
115
-
116
-
117
-
118
-
119
-
120
-
121
-
122
-
123
-
124
-
125
-
126
-
127
-
128
-
129
-
130
-
131
-
132
-
133
-
134
-
135
-
136
-
137
-
138
-
139
-
140
-
141
-
142
-
143
-
144
-
145
-
146
-
147
-
148
-
149
-
150
-
151
-
152
-
153
-
154
-
155
-
156
-
157
-
158
-
159
-
160
-
161
-
162
-
163
-
164
-
165
-
166
-
167
-
168
-
169
-
170
-
171
-
172
-
173
-
174
-
175
-
176
-
177
-
178
-
179
-
180
-
181
-
182
-
183
-
184
-
185
-
186
-
187
-
188
-
189
-
190
-
191
-
192
-
193
-
194
-
195
-
196
-
197
-
198
-
199
-
200
-
201
-
202
-
203
-
204
-
205
-
206
-
207
-
208
-
209
-
210
-
211
-
212
-
213
-
214
-
215
-
216
-
217
-
218
-
219
-
220
-
221
-
222
-
223
-
224
-
225
-
226
-
227
-
228
-
229
-
230
-
231
-
232
-
233
-
234
-
235
-
236
-
237
-
238
-
239
-
240
 |
 |
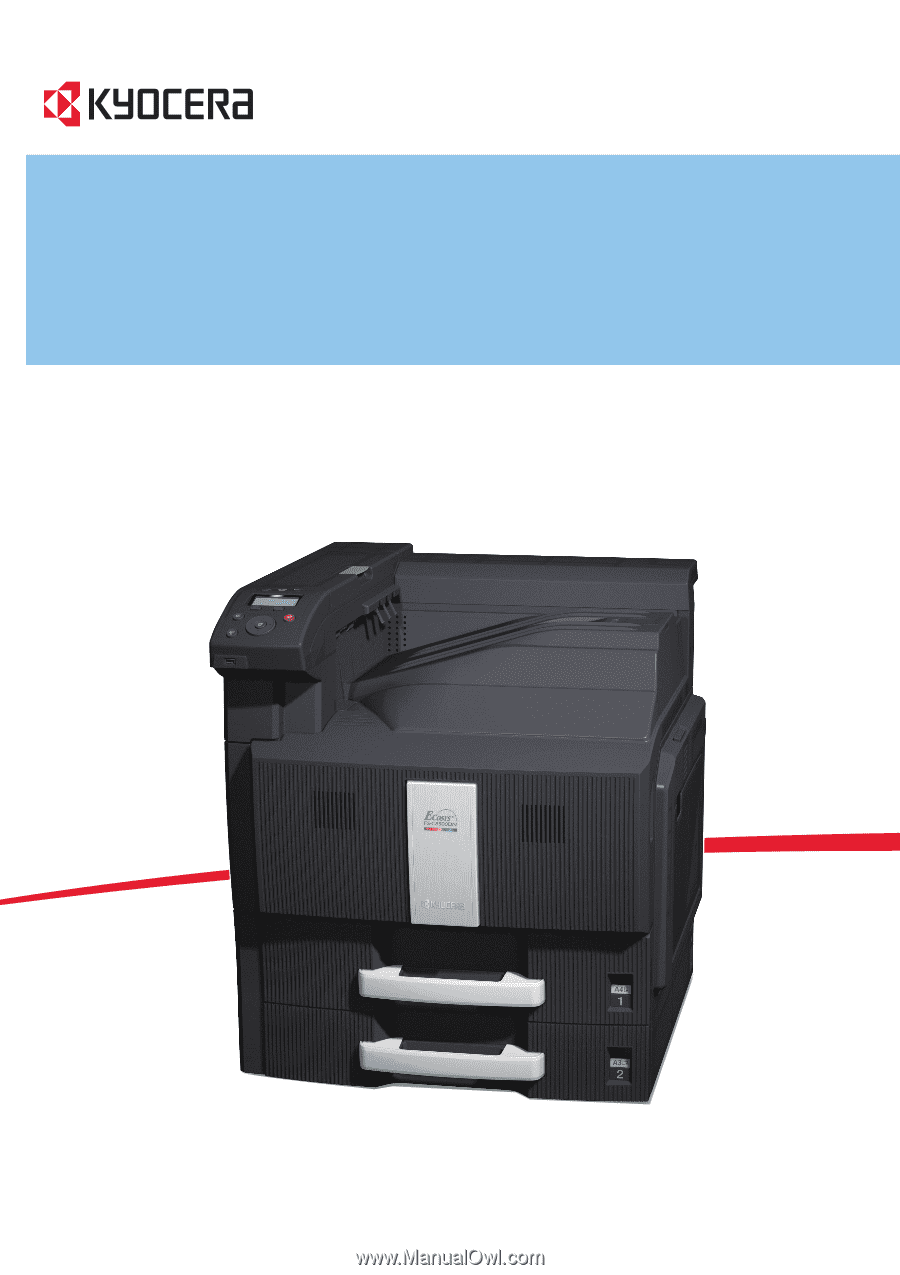
OPERATION GUIDE
Please read this Operation Guide before using this machine. Keep it close to the machine for easy reference.
FS-C8500DN