Kyocera FS-C8500DN FS-C8500DN Operation Guide - Page 73
Print File (Prints the selected file), Print Function Settings, Copies, Function], Paper Selection
 |
View all Kyocera FS-C8500DN manuals
Add to My Manuals
Save this manual to your list of manuals |
Page 73 highlights
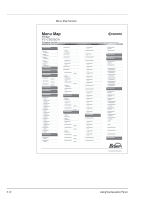
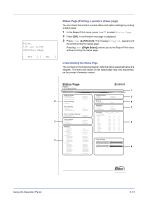
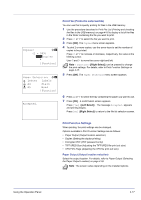
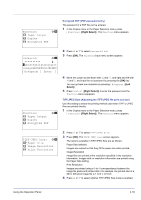
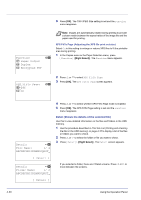
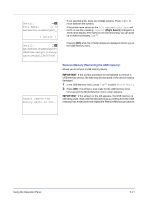
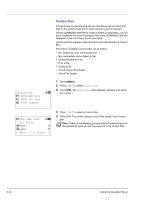
Copies: a b (1 - 999) /**1-copies M [Function ] Paper Selection: a b F Letter Labels A A4 Plain B A5 Bond [Function ] Accepted. Print File (Prints the selected file) You can use this to specify printing for files in the USB memory. 1 Use the procedure described in Print File List (Printing and checking the files in the USB memory) on page 4-16 to display a list of the files in the folder containing the file you want to print. 2 Press U or V to select the file you want to print. 3 Press [OK]. The Copies menu screen appears. 4 To print 2 or more copies, use the arrow keys to set the number of copies to be printed. Press U or V to increase or decrease, respectively, the value at the blinking cursor. Use Y and Z to move the cursor right and left. Note [Function] ([Right Select]) can be pressed to change the print settings. For details, refer to Print Function Settings on page 4-17. 5 Press [OK]. The Paper Selection menu screen appears. 6 Press U or V to select the tray containing the paper you want to use. 7 Press [OK]. A confirmation screen appears. Press [Yes] ([Left Select]). The message Accepted. appears and printing begins. Press [No] ([Right Select]) to return to the file list selection screen. Print Function Settings When printing, the print settings can be changed. Options available in Print Function Settings are as follows: • Paper Output (Output location selection) • Duplex (Setting the duplex printing) • Encrypted PDF (PDF password entry) • TIFF/JPEG Size (Adjusting the TIFF/JPEG file print out size) • XPS FitTo Page (Adjusting the XPS file print out size) Paper Output (Output location selection) Select the output location. For details, refer to Paper Output (Selecting the Paper Output Location) on page 4-58. Note The screen varies depending on the installed options. Using the Operation Panel 4-17
-
 1
1 -
2
-
3
-
4
-
5
-
6
-
7
-
8
-
9
-
10
-
11
-
12
-
13
-
14
-
15
-
16
-
17
-
18
-
19
-
20
-
21
-
22
-
23
-
24
-
25
-
26
-
27
-
28
-
29
-
30
-
31
-
32
-
33
-
34
-
35
-
36
-
37
-
38
-
39
-
40
-
41
-
42
-
43
-
44
-
45
-
46
-
47
-
48
-
49
-
50
-
51
-
52
-
53
-
54
-
55
-
56
-
57
-
58
-
59
-
60
-
61
-
62
-
63
-
64
-
65
-
66
-
67
-
 68
68 -
 69
69 -
 70
70 -
 71
71 -
 72
72 -
 73
73 -
 74
74 -
 75
75 -
 76
76 -
 77
77 -
 78
78 -
79
-
80
-
81
-
82
-
83
-
84
-
85
-
86
-
87
-
88
-
89
-
90
-
91
-
92
-
93
-
94
-
95
-
96
-
97
-
98
-
99
-
100
-
101
-
102
-
103
-
104
-
105
-
106
-
107
-
108
-
109
-
110
-
111
-
112
-
113
-
114
-
115
-
116
-
117
-
118
-
119
-
120
-
121
-
122
-
123
-
124
-
125
-
126
-
127
-
128
-
129
-
130
-
131
-
132
-
133
-
134
-
135
-
136
-
137
-
138
-
139
-
140
-
141
-
142
-
143
-
144
-
145
-
146
-
147
-
148
-
149
-
150
-
151
-
152
-
153
-
154
-
155
-
156
-
157
-
158
-
159
-
160
-
161
-
162
-
163
-
164
-
165
-
166
-
167
-
168
-
169
-
170
-
171
-
172
-
173
-
174
-
175
-
176
-
177
-
178
-
179
-
180
-
181
-
182
-
183
-
184
-
185
-
186
-
187
-
188
-
189
-
190
-
191
-
192
-
193
-
194
-
195
-
196
-
197
-
198
-
199
-
200
-
201
-
202
-
203
-
204
-
205
-
206
-
207
-
208
-
209
-
210
-
211
-
212
-
213
-
214
-
215
-
216
-
217
-
218
-
219
-
220
-
221
-
222
-
223
-
224
-
225
-
226
-
227
-
228
-
229
-
230
-
231
-
232
-
233
-
234
-
235
-
236
-
237
-
238
-
239
-
240
 |
 |
