Kyocera FS-C8500DN FS-C8500DN Operation Guide - Page 159
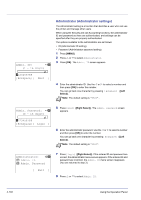
New ID, 16 digit, Bckspace] [ Enter ], Confirm ID, Administrator, Admin. ID, Admin. Password, Exit ]
 |
View all Kyocera FS-C8500DN manuals
Add to My Manuals
Save this manual to your list of manuals |
Page 159 highlights
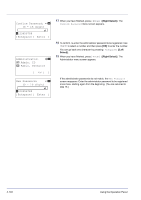
New ID: P b (1 - 16 digit) S 0123456789 [Bckspace] [ Enter ] Confirm ID: P b (1 - 16 digit) S 0123456789 [Bckspace] [ Enter ] Administrator: a b 1 Admin. ID 2 Admin. Password [ Exit ] New ID: P b (1 - 16 digit) S 0123456789 [Bckspace] [ Enter ] New Password: P b (0 - 16 digit) S 0123456789 [Bckspace] [ Enter ] 9 Press [OK]. The New ID screen appears. 10 Enter the administrator ID to be registered. Use Y or Z to select a number and then press [OK] to enter the number. You can go back one character by pressing [Bckspace] ([Left Select]). 11 When you have finished, press [Enter] ([Right Select]). The Confirm ID menu screen appears. 12 To confirm, re-enter the administrator ID to be registered. Use Y or Z to select a number and then press [OK] to enter the number. You can go back one character by pressing [Bckspace] ([Left Select]). 13 When you have finished, press [Enter] ([Right Select]). You return to the Administrator menu screen. If the administrator IDs do not match, the New ID reappears. Enter the administrator ID to be registered once more, starting again from the beginning.(You are returned to step 10.) 14 In the Administrator menu, press U or V to select Admin. Password. 15 Press [OK]. The New Password screen appears. 16 Enter the administrator password to be registered. Use Y or Z to select a number and then press [OK] to enter the number. You can go back one character by pressing [Bckspace] ([Left Select]). Using the Operation Panel 4-103
-
 1
1 -
2
-
3
-
4
-
5
-
6
-
7
-
8
-
9
-
10
-
11
-
12
-
13
-
14
-
15
-
16
-
17
-
18
-
19
-
20
-
21
-
22
-
23
-
24
-
25
-
26
-
27
-
28
-
29
-
30
-
31
-
32
-
33
-
34
-
35
-
36
-
37
-
38
-
39
-
40
-
41
-
42
-
43
-
44
-
45
-
46
-
47
-
48
-
49
-
50
-
51
-
52
-
53
-
54
-
55
-
56
-
57
-
58
-
59
-
60
-
61
-
62
-
63
-
64
-
65
-
66
-
67
-
68
-
69
-
70
-
71
-
72
-
73
-
74
-
75
-
76
-
77
-
78
-
79
-
80
-
81
-
82
-
83
-
84
-
85
-
86
-
87
-
88
-
89
-
90
-
91
-
92
-
93
-
94
-
95
-
96
-
97
-
98
-
99
-
100
-
101
-
102
-
103
-
104
-
105
-
106
-
107
-
108
-
109
-
110
-
111
-
112
-
113
-
114
-
115
-
116
-
117
-
118
-
119
-
120
-
121
-
122
-
123
-
124
-
125
-
126
-
127
-
128
-
129
-
130
-
131
-
132
-
133
-
134
-
135
-
136
-
137
-
138
-
139
-
140
-
141
-
142
-
143
-
144
-
145
-
146
-
147
-
148
-
149
-
150
-
151
-
152
-
153
-
 154
154 -
 155
155 -
 156
156 -
 157
157 -
 158
158 -
 159
159 -
 160
160 -
 161
161 -
 162
162 -
 163
163 -
 164
164 -
165
-
166
-
167
-
168
-
169
-
170
-
171
-
172
-
173
-
174
-
175
-
176
-
177
-
178
-
179
-
180
-
181
-
182
-
183
-
184
-
185
-
186
-
187
-
188
-
189
-
190
-
191
-
192
-
193
-
194
-
195
-
196
-
197
-
198
-
199
-
200
-
201
-
202
-
203
-
204
-
205
-
206
-
207
-
208
-
209
-
210
-
211
-
212
-
213
-
214
-
215
-
216
-
217
-
218
-
219
-
220
-
221
-
222
-
223
-
224
-
225
-
226
-
227
-
228
-
229
-
230
-
231
-
232
-
233
-
234
-
235
-
236
-
237
-
238
-
239
-
240
 |
 |