Kyocera FS-C8500DN FS-C8500DN Operation Guide - Page 94
Private/Stored, User01, All Files, Data01, Select ], Print, Delete, Bckspace] [ Enter ]
 |
View all Kyocera FS-C8500DN manuals
Add to My Manuals
Save this manual to your list of manuals |
Page 94 highlights
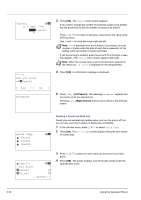
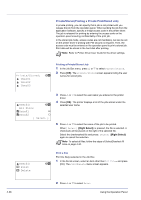
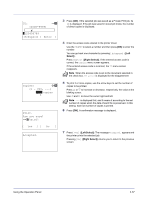
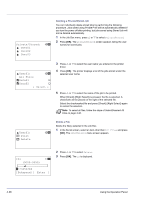
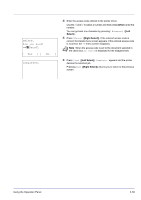
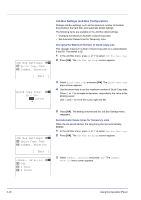
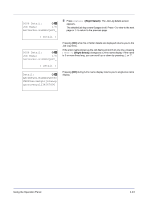
Private/Stored: a b l User01 l User02 l User03 Deleting a Private/Stored Job You can individually delete stored jobs by performing the following procedure. Jobs saved using Private Print will be automatically deleted if you turn the power off after printing, but jobs saved using Stored Job will not be deleted automatically. 1 In the Job Box menu, press U or V to select Private/Stored. 2 Press [OK]. The Private/Stored screen appears listing the user names for stored jobs. l User01: a b All Files Q Data01 T Q Data02 T [ Select ] 3 Press U or V to select the user name you entered in the printer driver. 4 Press [OK]. The printer displays a list of the jobs stored under the selected user name. 5 Press U or V to select the name of the job to be printed. When [Check] ([Right Select]) is pressed, the file is selected. A checkmark will be placed on the right of the selected file. Select the checkmarked file and press [Check] ([Right Select]) again to cancel the selection. Note To select all files, follow the steps of Select/Deselect All Files on page 4-30. l User01: 1 Print 2 Delete a b Delete a File Delete the file(s) selected in the Job Box. 1 In the file list screen, select an item other than All Files and press [OK]. The Print/Delete menu screen appears. ID: P b (0000-9999) S 0123456789 [Bckspace] [ Enter ] 2 Press U or V to select Delete. 3 Press [OK]. The ID is displayed. 4-38 Using the Operation Panel
-
 1
1 -
2
-
3
-
4
-
5
-
6
-
7
-
8
-
9
-
10
-
11
-
12
-
13
-
14
-
15
-
16
-
17
-
18
-
19
-
20
-
21
-
22
-
23
-
24
-
25
-
26
-
27
-
28
-
29
-
30
-
31
-
32
-
33
-
34
-
35
-
36
-
37
-
38
-
39
-
40
-
41
-
42
-
43
-
44
-
45
-
46
-
47
-
48
-
49
-
50
-
51
-
52
-
53
-
54
-
55
-
56
-
57
-
58
-
59
-
60
-
61
-
62
-
63
-
64
-
65
-
66
-
67
-
68
-
69
-
70
-
71
-
72
-
73
-
74
-
75
-
76
-
77
-
78
-
79
-
80
-
81
-
82
-
83
-
84
-
85
-
86
-
87
-
88
-
 89
89 -
 90
90 -
 91
91 -
 92
92 -
 93
93 -
 94
94 -
 95
95 -
 96
96 -
 97
97 -
 98
98 -
 99
99 -
100
-
101
-
102
-
103
-
104
-
105
-
106
-
107
-
108
-
109
-
110
-
111
-
112
-
113
-
114
-
115
-
116
-
117
-
118
-
119
-
120
-
121
-
122
-
123
-
124
-
125
-
126
-
127
-
128
-
129
-
130
-
131
-
132
-
133
-
134
-
135
-
136
-
137
-
138
-
139
-
140
-
141
-
142
-
143
-
144
-
145
-
146
-
147
-
148
-
149
-
150
-
151
-
152
-
153
-
154
-
155
-
156
-
157
-
158
-
159
-
160
-
161
-
162
-
163
-
164
-
165
-
166
-
167
-
168
-
169
-
170
-
171
-
172
-
173
-
174
-
175
-
176
-
177
-
178
-
179
-
180
-
181
-
182
-
183
-
184
-
185
-
186
-
187
-
188
-
189
-
190
-
191
-
192
-
193
-
194
-
195
-
196
-
197
-
198
-
199
-
200
-
201
-
202
-
203
-
204
-
205
-
206
-
207
-
208
-
209
-
210
-
211
-
212
-
213
-
214
-
215
-
216
-
217
-
218
-
219
-
220
-
221
-
222
-
223
-
224
-
225
-
226
-
227
-
228
-
229
-
230
-
231
-
232
-
233
-
234
-
235
-
236
-
237
-
238
-
239
-
240
 |
 |
