Kyocera FS-C8500DN FS-C8500DN Operation Guide - Page 106
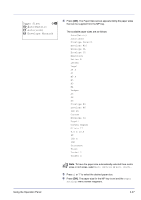
Media Type Set. (Paper type settings), Cassette 1 Set., Paper Size, Media Type, Exit ], Plain
 |
View all Kyocera FS-C8500DN manuals
Add to My Manuals
Save this manual to your list of manuals |
Page 106 highlights
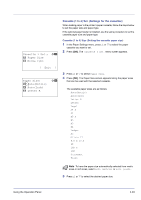
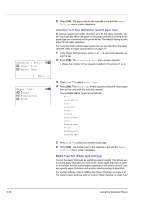
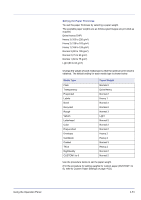
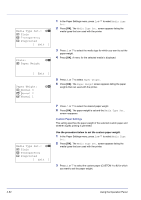
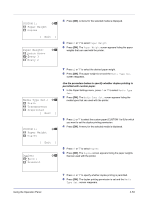
Cassette 1 Set.: a b 1 Paper Size 2 Media Type [ Exit ] Media Type: a b 1 *Plain 2 Preprinted 3 Bond 6 Press [OK]. The paper size for the cassette is set and the Paper Settings menu screen reappears. Cassette (1 to 4) Type (Setting the cassette paper type) By setting a paper type (plain, recycled, etc.) for the paper cassette, you can automatically select the paper in the paper cassette according to the paper type you command on the printer driver. The default setting is plain paper for all paper cassettes. For more information about paper types that you can feed from the paper cassette, refer to Paper Specifications on page 3-2. 1 In the Paper Settings menu, press U or V to select the cassette you want to set. 2 Press [OK]. The Cassette # Set. menu screen appears. # shows the number of the cassette installed in the printer (1 to 4). 3 Press U or V to select Media Type. 4 Press [OK]. The Media Type screen appears listing the media types that can be used with the selected cassette. The available Media Types are as follows: Plain Preprinted Bond Recycled Rough Vellum Letterhead Color Prepunched Thick HighQuality CUSTOM1 to 8 5 Press U or V to select the desired media type. 6 Press [OK]. The media type for the cassette is set and the Paper Settings menu screen reappears. Media Type Set. (Paper type settings) You set the paper thickness by selecting a paper weight. This allows you to set the paper thickness for each of the media types that can be used on the printer. And for custom paper registered in the printer (up to 8), you can specify paper thickness and whether duplex printing is permitted. For normal settings, refer to Setting the Paper Thickness on page 4-51. For custom paper settings, refer to Custom Paper Settings on page 4-52. 4-50 Using the Operation Panel
-
 1
1 -
2
-
3
-
4
-
5
-
6
-
7
-
8
-
9
-
10
-
11
-
12
-
13
-
14
-
15
-
16
-
17
-
18
-
19
-
20
-
21
-
22
-
23
-
24
-
25
-
26
-
27
-
28
-
29
-
30
-
31
-
32
-
33
-
34
-
35
-
36
-
37
-
38
-
39
-
40
-
41
-
42
-
43
-
44
-
45
-
46
-
47
-
48
-
49
-
50
-
51
-
52
-
53
-
54
-
55
-
56
-
57
-
58
-
59
-
60
-
61
-
62
-
63
-
64
-
65
-
66
-
67
-
68
-
69
-
70
-
71
-
72
-
73
-
74
-
75
-
76
-
77
-
78
-
79
-
80
-
81
-
82
-
83
-
84
-
85
-
86
-
87
-
88
-
89
-
90
-
91
-
92
-
93
-
94
-
95
-
96
-
97
-
98
-
99
-
100
-
 101
101 -
 102
102 -
 103
103 -
 104
104 -
 105
105 -
 106
106 -
 107
107 -
 108
108 -
 109
109 -
 110
110 -
 111
111 -
112
-
113
-
114
-
115
-
116
-
117
-
118
-
119
-
120
-
121
-
122
-
123
-
124
-
125
-
126
-
127
-
128
-
129
-
130
-
131
-
132
-
133
-
134
-
135
-
136
-
137
-
138
-
139
-
140
-
141
-
142
-
143
-
144
-
145
-
146
-
147
-
148
-
149
-
150
-
151
-
152
-
153
-
154
-
155
-
156
-
157
-
158
-
159
-
160
-
161
-
162
-
163
-
164
-
165
-
166
-
167
-
168
-
169
-
170
-
171
-
172
-
173
-
174
-
175
-
176
-
177
-
178
-
179
-
180
-
181
-
182
-
183
-
184
-
185
-
186
-
187
-
188
-
189
-
190
-
191
-
192
-
193
-
194
-
195
-
196
-
197
-
198
-
199
-
200
-
201
-
202
-
203
-
204
-
205
-
206
-
207
-
208
-
209
-
210
-
211
-
212
-
213
-
214
-
215
-
216
-
217
-
218
-
219
-
220
-
221
-
222
-
223
-
224
-
225
-
226
-
227
-
228
-
229
-
230
-
231
-
232
-
233
-
234
-
235
-
236
-
237
-
238
-
239
-
240
 |
 |
