Kyocera FS-C8500DN FS-C8500DN Operation Guide - Page 114
Paper Output (Selecting the Paper Output Location), Duplex, Bind Long Edge, Paper Output
 |
View all Kyocera FS-C8500DN manuals
Add to My Manuals
Save this manual to your list of manuals |
Page 114 highlights
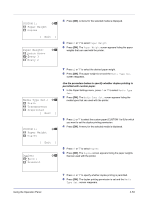
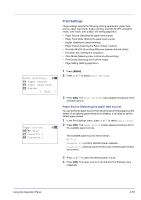
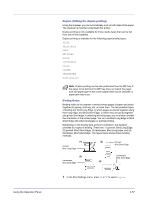
Duplex: a b 1 *Off 2 Bind Long Edge 3 Bind Short Edge 2 Press [OK]. The Duplex screen appears showing the list of available duplex printing modes. 3 Press U or V to select the desired duplex printing mode. The message display toggles through the following: Off (default) Bind Long Edge Bind Short Edge Selecting Off disables duplex printing. 4 Press [OK]. The duplex printing mode is set and the Print Settings menu reappears. Paper Output (Selecting the Paper Output Location) This setting can be specified when an optional document finisher is installed. You can select whether print jobs are output to the top tray of the printer, or to the optional document finisher or mail box. Note The screen varies depending on the installed options. Paper Output: a b 1 *TopTray FaceDown 2 Tray A Face Down 3 Tray B Face UP 1 In the Print Settings menu, press U or V to select Paper Output. 2 Press [OK]. The Paper Output screen appears showing the available output locations. Note The screen shown appears when a 3,000 Sheet Document Finisher is installed. 3 Press U or V to select the desired output location. The available output locations are as follows: 3,000 Sheet Document Finisher installed TopTray FaceDown (default) Tray A Face Down Tray B Face UP Tray B Face Down Tray C Face UP Tray C Face Down Tray 1 Face UP* Tray 1 Face Down* Tray 2 Face UP* Tray 2 Face Down* 4-58 Using the Operation Panel
-
 1
1 -
2
-
3
-
4
-
5
-
6
-
7
-
8
-
9
-
10
-
11
-
12
-
13
-
14
-
15
-
16
-
17
-
18
-
19
-
20
-
21
-
22
-
23
-
24
-
25
-
26
-
27
-
28
-
29
-
30
-
31
-
32
-
33
-
34
-
35
-
36
-
37
-
38
-
39
-
40
-
41
-
42
-
43
-
44
-
45
-
46
-
47
-
48
-
49
-
50
-
51
-
52
-
53
-
54
-
55
-
56
-
57
-
58
-
59
-
60
-
61
-
62
-
63
-
64
-
65
-
66
-
67
-
68
-
69
-
70
-
71
-
72
-
73
-
74
-
75
-
76
-
77
-
78
-
79
-
80
-
81
-
82
-
83
-
84
-
85
-
86
-
87
-
88
-
89
-
90
-
91
-
92
-
93
-
94
-
95
-
96
-
97
-
98
-
99
-
100
-
101
-
102
-
103
-
104
-
105
-
106
-
107
-
108
-
 109
109 -
 110
110 -
 111
111 -
 112
112 -
 113
113 -
 114
114 -
 115
115 -
 116
116 -
 117
117 -
 118
118 -
 119
119 -
120
-
121
-
122
-
123
-
124
-
125
-
126
-
127
-
128
-
129
-
130
-
131
-
132
-
133
-
134
-
135
-
136
-
137
-
138
-
139
-
140
-
141
-
142
-
143
-
144
-
145
-
146
-
147
-
148
-
149
-
150
-
151
-
152
-
153
-
154
-
155
-
156
-
157
-
158
-
159
-
160
-
161
-
162
-
163
-
164
-
165
-
166
-
167
-
168
-
169
-
170
-
171
-
172
-
173
-
174
-
175
-
176
-
177
-
178
-
179
-
180
-
181
-
182
-
183
-
184
-
185
-
186
-
187
-
188
-
189
-
190
-
191
-
192
-
193
-
194
-
195
-
196
-
197
-
198
-
199
-
200
-
201
-
202
-
203
-
204
-
205
-
206
-
207
-
208
-
209
-
210
-
211
-
212
-
213
-
214
-
215
-
216
-
217
-
218
-
219
-
220
-
221
-
222
-
223
-
224
-
225
-
226
-
227
-
228
-
229
-
230
-
231
-
232
-
233
-
234
-
235
-
236
-
237
-
238
-
239
-
240
 |
 |
