Kyocera FS-C8500DN FS-C8500DN Operation Guide - Page 90
Copies, Print., Are you sure?, Data01, Accepted., Quick Copy, User01, All Files, Select ]
 |
View all Kyocera FS-C8500DN manuals
Add to My Manuals
Save this manual to your list of manuals |
Page 90 highlights
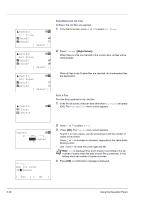
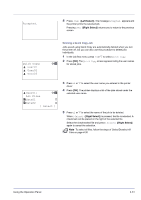
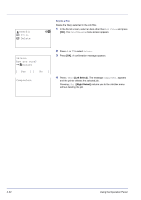
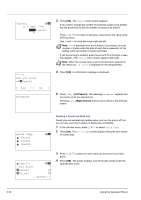
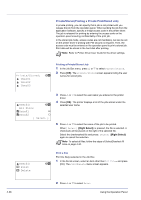
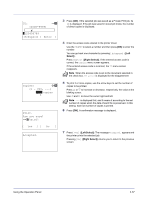
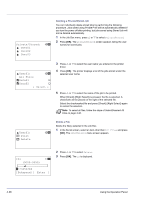
Copies: a b (1 - 999, ---) /**1-copies M Print. Are you sure? z Q Data01 [ Yes ] [ No ] Accepted. 3 Press [OK]. The Copies menu screen appears. If you want to change the number of remaining copies to be printed, use the arrow keys to set the number of copies to be printed. Press U or V to increase or decrease, respectively, the value at the blinking cursor. Use Y and Z to move the cursor right and left. Note --- is displayed first, and it means it according to the set number of copies when the data of each file is preserved. In this setting, each set number of copies is printed. If Job Accounting is enabled, enter the account ID in the login screen that appears. The Copies menu screen appears after login. Note When the access code is set to the document selected in the check box, ID error is displayed for the disagreement. 4 Press [OK]. A confirmation message is displayed. 5 Press [Yes] ([Left Select]). The message Accepted. appears and the printer prints the selected job. Pressing [No] ([Right Select]) returns you to return to the previous screen. Quick Copy: l User01 l User02 l User03 a b Deleting a Proof-and-Hold Job Saved jobs are automatically deleted when you turn the printer off, but you can also use this procedure to delete jobs individually. 1 In the Job Box menu, press U or V to select Quick Copy. 2 Press [OK]. The Quick Copy screen appears listing the user names for stored jobs. l User01: a b All Files Q Data01 T Q Data02 T [ Select ] 3 Press U or V to select the user name you entered in the printer driver. 4 Press [OK]. The printer displays a list of the jobs stored under the selected user name. 4-34 Using the Operation Panel
-
 1
1 -
2
-
3
-
4
-
5
-
6
-
7
-
8
-
9
-
10
-
11
-
12
-
13
-
14
-
15
-
16
-
17
-
18
-
19
-
20
-
21
-
22
-
23
-
24
-
25
-
26
-
27
-
28
-
29
-
30
-
31
-
32
-
33
-
34
-
35
-
36
-
37
-
38
-
39
-
40
-
41
-
42
-
43
-
44
-
45
-
46
-
47
-
48
-
49
-
50
-
51
-
52
-
53
-
54
-
55
-
56
-
57
-
58
-
59
-
60
-
61
-
62
-
63
-
64
-
65
-
66
-
67
-
68
-
69
-
70
-
71
-
72
-
73
-
74
-
75
-
76
-
77
-
78
-
79
-
80
-
81
-
82
-
83
-
84
-
 85
85 -
 86
86 -
 87
87 -
 88
88 -
 89
89 -
 90
90 -
 91
91 -
 92
92 -
 93
93 -
 94
94 -
 95
95 -
96
-
97
-
98
-
99
-
100
-
101
-
102
-
103
-
104
-
105
-
106
-
107
-
108
-
109
-
110
-
111
-
112
-
113
-
114
-
115
-
116
-
117
-
118
-
119
-
120
-
121
-
122
-
123
-
124
-
125
-
126
-
127
-
128
-
129
-
130
-
131
-
132
-
133
-
134
-
135
-
136
-
137
-
138
-
139
-
140
-
141
-
142
-
143
-
144
-
145
-
146
-
147
-
148
-
149
-
150
-
151
-
152
-
153
-
154
-
155
-
156
-
157
-
158
-
159
-
160
-
161
-
162
-
163
-
164
-
165
-
166
-
167
-
168
-
169
-
170
-
171
-
172
-
173
-
174
-
175
-
176
-
177
-
178
-
179
-
180
-
181
-
182
-
183
-
184
-
185
-
186
-
187
-
188
-
189
-
190
-
191
-
192
-
193
-
194
-
195
-
196
-
197
-
198
-
199
-
200
-
201
-
202
-
203
-
204
-
205
-
206
-
207
-
208
-
209
-
210
-
211
-
212
-
213
-
214
-
215
-
216
-
217
-
218
-
219
-
220
-
221
-
222
-
223
-
224
-
225
-
226
-
227
-
228
-
229
-
230
-
231
-
232
-
233
-
234
-
235
-
236
-
237
-
238
-
239
-
240
 |
 |