Kyocera FS-C8500DN FS-C8500DN Operation Guide - Page 124
Subnet Mask Subnet mask setting, IP Address, Subnet Mask
 |
View all Kyocera FS-C8500DN manuals
Add to My Manuals
Save this manual to your list of manuals |
Page 124 highlights
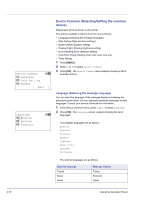
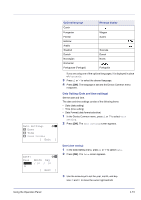
IP Address: a b /123.145.167.123M The IP addresses currently used on the Internet (IPv4) have a fixed length of 32 bits. Note When you enter the IP address, be sure to set the DHCP setting to Off. 1 In the IPv4 Setting menu, press U or V to select IP Address. 2 Press [OK]. The IP Address screen appears. Subnet Mask: a b /123.145.167.123M 3 Use the arrow keys to set the IP address. Press U or V to increase or decrease, respectively, the value at the blinking cursor. You can set any value between 000 and 255. Use Y and Z to move the cursor right and left. 4 Press [OK]. The IP address is stored and the IPv4 Setting menu reappears. Subnet Mask (Subnet mask setting) The subnet mask is a way of augmenting the network address section of an IP address. A subnet mask represents all network address sections as 1 and all host address sections as 0. The number of bits in the prefix indicates the length of the network address. The term "prefix" refers to something added to the beginning and, in this context, indicates the first section of the IP address. When an IP address is written, the length of the network address can indicated by the prefix length after a forward slash (/). For example, "24" in the address "133.210.2.0/24". In this way, "133.210.2.0/24" denotes the IP address "133.210.2.0" with a 24-bit prefix (network section). This new network address section (originally part of the host address) made possible by the subnet mask is referred to as the subnet address. Note When you enter the subnet mask, be sure to set the DHCP setting to Off. 1 In the IPv4 Setting menu, press U or V to select Subnet Mask. 2 Press [OK]. The Subnet Mask screen appears. 3 Use the arrow keys to set the subnet mask. Press U or V to increase or decrease, respectively, the value at the blinking cursor. You can set any value between 000 and 255. Use Y and Z to move the cursor right and left. 4-68 Using the Operation Panel
-
 1
1 -
2
-
3
-
4
-
5
-
6
-
7
-
8
-
9
-
10
-
11
-
12
-
13
-
14
-
15
-
16
-
17
-
18
-
19
-
20
-
21
-
22
-
23
-
24
-
25
-
26
-
27
-
28
-
29
-
30
-
31
-
32
-
33
-
34
-
35
-
36
-
37
-
38
-
39
-
40
-
41
-
42
-
43
-
44
-
45
-
46
-
47
-
48
-
49
-
50
-
51
-
52
-
53
-
54
-
55
-
56
-
57
-
58
-
59
-
60
-
61
-
62
-
63
-
64
-
65
-
66
-
67
-
68
-
69
-
70
-
71
-
72
-
73
-
74
-
75
-
76
-
77
-
78
-
79
-
80
-
81
-
82
-
83
-
84
-
85
-
86
-
87
-
88
-
89
-
90
-
91
-
92
-
93
-
94
-
95
-
96
-
97
-
98
-
99
-
100
-
101
-
102
-
103
-
104
-
105
-
106
-
107
-
108
-
109
-
110
-
111
-
112
-
113
-
114
-
115
-
116
-
117
-
118
-
 119
119 -
 120
120 -
 121
121 -
 122
122 -
 123
123 -
 124
124 -
 125
125 -
 126
126 -
 127
127 -
 128
128 -
 129
129 -
130
-
131
-
132
-
133
-
134
-
135
-
136
-
137
-
138
-
139
-
140
-
141
-
142
-
143
-
144
-
145
-
146
-
147
-
148
-
149
-
150
-
151
-
152
-
153
-
154
-
155
-
156
-
157
-
158
-
159
-
160
-
161
-
162
-
163
-
164
-
165
-
166
-
167
-
168
-
169
-
170
-
171
-
172
-
173
-
174
-
175
-
176
-
177
-
178
-
179
-
180
-
181
-
182
-
183
-
184
-
185
-
186
-
187
-
188
-
189
-
190
-
191
-
192
-
193
-
194
-
195
-
196
-
197
-
198
-
199
-
200
-
201
-
202
-
203
-
204
-
205
-
206
-
207
-
208
-
209
-
210
-
211
-
212
-
213
-
214
-
215
-
216
-
217
-
218
-
219
-
220
-
221
-
222
-
223
-
224
-
225
-
226
-
227
-
228
-
229
-
230
-
231
-
232
-
233
-
234
-
235
-
236
-
237
-
238
-
239
-
240
 |
 |
