Kyocera FS-C8500DN FS-C8500DN Operation Guide - Page 141
Security (Security function setting), Admin. ID, 16 digit, Bckspace] [ Next ], Admin. Password
 |
View all Kyocera FS-C8500DN manuals
Add to My Manuals
Save this manual to your list of manuals |
Page 141 highlights
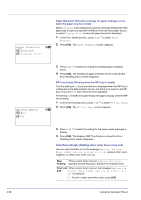
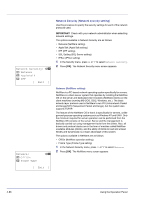
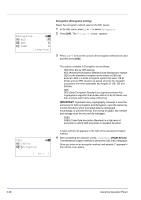
Admin. ID: P b (1 - 16 digit) S 0123456789 [Bckspace] [ Next ] Admin. Password: P b (0 - 16 digit) S 0123456789 [Bckspace] [ Login ] Security: a b 1 Network Security 2 I/F Block Set. 3 Security Level [ Exit ] Security (Security function setting) The security functions can be set up to protect printer operation and the print data. IMPORTANT To specify the Security function settings, you must enter an administrator ID and password. For information on how to set the administrator ID and password, refer to Administrator (Administrator settings) on page 4-102. The options available in Security are as follows: • Network Security (Network security setting) • I/F Block Set. (External interface block setting) • Data Security (Data Security setting) Note The Data Security menu is used with the optional Data Security Kit (E). For details, refer to Data Security Kit (E) Operation Guide. 1 Press [MENU]. 2 Press U or V to select Security. 3 Press [OK]. The Admin. ID screen appears. 4 Enter the administrator ID. Use the Y or Z to select a number and then press [OK] to enter the number. You can go back one character by pressing [Bckspace] ([Left Select]). 5 Press [Next] ([Right Select]). The Admin. Password screen appears. 6 Enter the administrator password. Use the Y or Z to select a number and then press [OK] to enter the number. You can go back one character by pressing [Bckspace] ([Left Select]). 7 Press [Login] ([Right Select]). If the entered ID and password are correct, the Security menu screen appears. If the entered ID and password are incorrect, the Admin. ID menu screen reappears. (You are returned to step 3.) Using the Operation Panel 4-85
-
 1
1 -
2
-
3
-
4
-
5
-
6
-
7
-
8
-
9
-
10
-
11
-
12
-
13
-
14
-
15
-
16
-
17
-
18
-
19
-
20
-
21
-
22
-
23
-
24
-
25
-
26
-
27
-
28
-
29
-
30
-
31
-
32
-
33
-
34
-
35
-
36
-
37
-
38
-
39
-
40
-
41
-
42
-
43
-
44
-
45
-
46
-
47
-
48
-
49
-
50
-
51
-
52
-
53
-
54
-
55
-
56
-
57
-
58
-
59
-
60
-
61
-
62
-
63
-
64
-
65
-
66
-
67
-
68
-
69
-
70
-
71
-
72
-
73
-
74
-
75
-
76
-
77
-
78
-
79
-
80
-
81
-
82
-
83
-
84
-
85
-
86
-
87
-
88
-
89
-
90
-
91
-
92
-
93
-
94
-
95
-
96
-
97
-
98
-
99
-
100
-
101
-
102
-
103
-
104
-
105
-
106
-
107
-
108
-
109
-
110
-
111
-
112
-
113
-
114
-
115
-
116
-
117
-
118
-
119
-
120
-
121
-
122
-
123
-
124
-
125
-
126
-
127
-
128
-
129
-
130
-
131
-
132
-
133
-
134
-
135
-
 136
136 -
 137
137 -
 138
138 -
 139
139 -
 140
140 -
 141
141 -
 142
142 -
 143
143 -
 144
144 -
 145
145 -
 146
146 -
147
-
148
-
149
-
150
-
151
-
152
-
153
-
154
-
155
-
156
-
157
-
158
-
159
-
160
-
161
-
162
-
163
-
164
-
165
-
166
-
167
-
168
-
169
-
170
-
171
-
172
-
173
-
174
-
175
-
176
-
177
-
178
-
179
-
180
-
181
-
182
-
183
-
184
-
185
-
186
-
187
-
188
-
189
-
190
-
191
-
192
-
193
-
194
-
195
-
196
-
197
-
198
-
199
-
200
-
201
-
202
-
203
-
204
-
205
-
206
-
207
-
208
-
209
-
210
-
211
-
212
-
213
-
214
-
215
-
216
-
217
-
218
-
219
-
220
-
221
-
222
-
223
-
224
-
225
-
226
-
227
-
228
-
229
-
230
-
231
-
232
-
233
-
234
-
235
-
236
-
237
-
238
-
239
-
240
 |
 |
