Kyocera FS-C8500DN FS-C8500DN Operation Guide - Page 119
Wide A4 Wide A4 pitch, XPS FitTo Adjusting the XPS file print out size, Orientation, Portrait
 |
View all Kyocera FS-C8500DN manuals
Add to My Manuals
Save this manual to your list of manuals |
Page 119 highlights
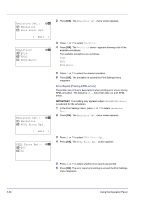
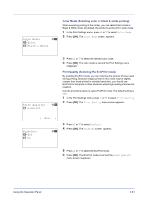
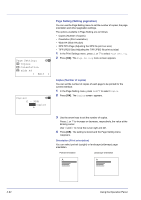
Orientation: 1 *Portrait 2 Landscape a b 1 In the Page Setting menu, press U or V to select Orientation. 2 Press [OK]. The Orientation screen appears. Wide A4: 1 *Off 2 On a b 3 Press U or V to select the desired Orientation. 4 Press [OK]. The orientation is set and the Page Setting menu reappears. Wide A4 (Wide A4 pitch) Turn this to On to increase the maximum number of characters that can be printed in a line for an A4 page (78 characters at 10 pitch) and Letter size page (80 characters at 10 pitch). This setting is only effective in PCL 6 emulation. 1 In the Page Setting menu, press U or V to select Wide A4. 2 Press [OK]. The Wide A4 screen appears. XPS FitTo Page: a b 1 *Off 2 On 3 Press U or V to select whether Wide A4 mode is enabled. 4 Press [OK]. The wide mode setting is set and the Page Setting menu reappears. XPS FitTo Page (Adjusting the XPS file print out size) Select On in this setting to enlarge or reduce XPS files to fit the printable area during printing. 1 In the Page Setting menu, press U or V to select XPS FitTo Page. 2 Press [OK]. The XPS FitTo Page screen appears. 3 Press U or V to select whether XPS FitTo Page mode is enabled. 4 Press [OK]. The XPS FitTo Page setting is set and the Page Setting menu reappears. Using the Operation Panel 4-63
-
 1
1 -
2
-
3
-
4
-
5
-
6
-
7
-
8
-
9
-
10
-
11
-
12
-
13
-
14
-
15
-
16
-
17
-
18
-
19
-
20
-
21
-
22
-
23
-
24
-
25
-
26
-
27
-
28
-
29
-
30
-
31
-
32
-
33
-
34
-
35
-
36
-
37
-
38
-
39
-
40
-
41
-
42
-
43
-
44
-
45
-
46
-
47
-
48
-
49
-
50
-
51
-
52
-
53
-
54
-
55
-
56
-
57
-
58
-
59
-
60
-
61
-
62
-
63
-
64
-
65
-
66
-
67
-
68
-
69
-
70
-
71
-
72
-
73
-
74
-
75
-
76
-
77
-
78
-
79
-
80
-
81
-
82
-
83
-
84
-
85
-
86
-
87
-
88
-
89
-
90
-
91
-
92
-
93
-
94
-
95
-
96
-
97
-
98
-
99
-
100
-
101
-
102
-
103
-
104
-
105
-
106
-
107
-
108
-
109
-
110
-
111
-
112
-
113
-
 114
114 -
 115
115 -
 116
116 -
 117
117 -
 118
118 -
 119
119 -
 120
120 -
 121
121 -
 122
122 -
 123
123 -
 124
124 -
125
-
126
-
127
-
128
-
129
-
130
-
131
-
132
-
133
-
134
-
135
-
136
-
137
-
138
-
139
-
140
-
141
-
142
-
143
-
144
-
145
-
146
-
147
-
148
-
149
-
150
-
151
-
152
-
153
-
154
-
155
-
156
-
157
-
158
-
159
-
160
-
161
-
162
-
163
-
164
-
165
-
166
-
167
-
168
-
169
-
170
-
171
-
172
-
173
-
174
-
175
-
176
-
177
-
178
-
179
-
180
-
181
-
182
-
183
-
184
-
185
-
186
-
187
-
188
-
189
-
190
-
191
-
192
-
193
-
194
-
195
-
196
-
197
-
198
-
199
-
200
-
201
-
202
-
203
-
204
-
205
-
206
-
207
-
208
-
209
-
210
-
211
-
212
-
213
-
214
-
215
-
216
-
217
-
218
-
219
-
220
-
221
-
222
-
223
-
224
-
225
-
226
-
227
-
228
-
229
-
230
-
231
-
232
-
233
-
234
-
235
-
236
-
237
-
238
-
239
-
240
 |
 |
