Kyocera TASKalfa 181 Fax System (R) Operation Guide - Page 154
Modifying or Deleting Encryption Boxes, Notes
 |
View all Kyocera TASKalfa 181 manuals
Add to My Manuals
Save this manual to your list of manuals |
Page 154 highlights
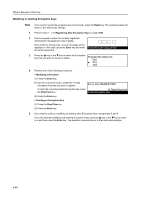
Other Features of this Fax 10 Enter the 2-digit Encryption Key ID (01 - 20) that corresponds to the Encryption Key to be used for this Encryption Key ID:00 Encryption Box. Enter 2-Digit Key ID 11 Press the Enter key. 12 Press the S key or the T key to select whether or not you want documents received into this Encryption Box to be automatically printed out. Print on RX.: On Off 13 Press the Enter key. > If you want to continue registering other Encryption Boxes, return to step 4. > If you are finished registering Encryption Boxes, press the Reset key. The operation panel will return to the initial mode settings. Modifying or Deleting Encryption Boxes Notes 1 2 • You CANNOT modify a registered Encryption Box ID. • You CANNOT delete an Encryption Box which still contains received documents. • If you want to cancel the procedure part way through, press the Reset key. The operation panel will return to the initial mode settings. Perform steps 1 - 3 of Registering New Encryption Boxes on page 5-59. Press the S key or the T key to select the Encryption Box you want to modify or delete. Program encryption box: End #01 5265 #02 3 Select whether you want to modify information that is registered in that box or to completely delete the box, and then perform the corresponding procedure below. > Modifying information in the box (1) Press the Enter key. (2) Enter the 4-digit Box ID that corresponds to that box. Box. ID: Delete Enter Box ID (3) Press the Enter key. (4) Press the S key or the T key to select the item that you want to modify and then press the Enter key. Encryption box:#01 End Box.No. Box.ID :5265 :5555 (5) See Registering New Encryption Boxes on page 5-59, and modify the desired item. (6) Press the Enter key. The message display will return to the same message as in step (4). If you want to modify other items as well, repeat steps (4) - (6). (7) Once you are finished modifying information in the Encryption Box, press the S key to select End. 5-60
-
 1
1 -
2
-
3
-
4
-
5
-
6
-
7
-
8
-
9
-
10
-
11
-
12
-
13
-
14
-
15
-
16
-
17
-
18
-
19
-
20
-
21
-
22
-
23
-
24
-
25
-
26
-
27
-
28
-
29
-
30
-
31
-
32
-
33
-
34
-
35
-
36
-
37
-
38
-
39
-
40
-
41
-
42
-
43
-
44
-
45
-
46
-
47
-
48
-
49
-
50
-
51
-
52
-
53
-
54
-
55
-
56
-
57
-
58
-
59
-
60
-
61
-
62
-
63
-
64
-
65
-
66
-
67
-
68
-
69
-
70
-
71
-
72
-
73
-
74
-
75
-
76
-
77
-
78
-
79
-
80
-
81
-
82
-
83
-
84
-
85
-
86
-
87
-
88
-
89
-
90
-
91
-
92
-
93
-
94
-
95
-
96
-
97
-
98
-
99
-
100
-
101
-
102
-
103
-
104
-
105
-
106
-
107
-
108
-
109
-
110
-
111
-
112
-
113
-
114
-
115
-
116
-
117
-
118
-
119
-
120
-
121
-
122
-
123
-
124
-
125
-
126
-
127
-
128
-
129
-
130
-
131
-
132
-
133
-
134
-
135
-
136
-
137
-
138
-
139
-
140
-
141
-
142
-
143
-
144
-
145
-
146
-
147
-
148
-
 149
149 -
 150
150 -
 151
151 -
 152
152 -
 153
153 -
 154
154 -
 155
155 -
 156
156 -
 157
157 -
 158
158 -
 159
159 -
160
-
161
-
162
-
163
-
164
-
165
-
166
-
167
-
168
-
169
-
170
-
171
-
172
-
173
-
174
-
175
-
176
-
177
-
178
-
179
-
180
-
181
-
182
-
183
-
184
-
185
-
186
-
187
-
188
-
189
-
190
-
191
-
192
-
193
-
194
-
195
-
196
-
197
-
198
-
199
-
200
-
201
-
202
-
203
-
204
-
205
-
206
-
207
-
208
-
209
-
210
-
211
-
212
-
213
-
214
-
215
-
216
-
217
-
218
-
219
-
220
 |
 |
