Kyocera TASKalfa 181 Fax System (R) Operation Guide - Page 186
Registering the Remote Test ID, Remote Test ID setting
 |
View all Kyocera TASKalfa 181 manuals
Add to My Manuals
Save this manual to your list of manuals |
Page 186 highlights
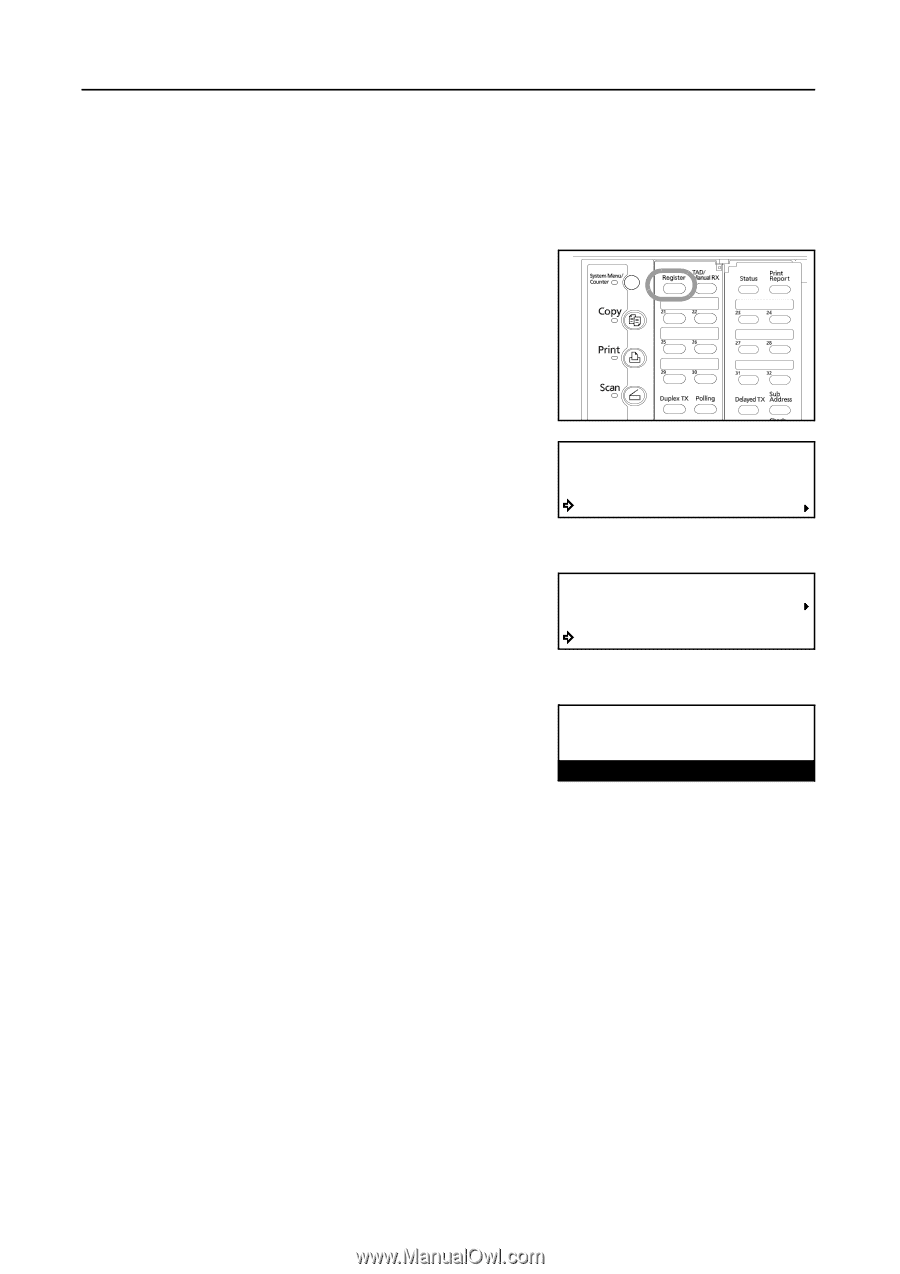
Various Settings and Registration Registering the Remote Test ID ("Remote Test ID" setting) Notes 1 • A previously registered Remote Test ID can also be modified by performing the following procedure. • If you want to cancel the procedure part way through, press the Reset key. The operation panel will return to the initial mode settings. Open the cover plate to the left and press the Register key. 2 Press the S key or the T key to select Program Fax Parameter. Program: Program encryption box Program Encryption ID Program Fax Parameter 3 Press the Enter key. 4 Press the S key or the T key to select Remote Test ID. Program Fax Parameter: Fax Forwarding Remote Switch :55 Remote Test ID :0000 5 Press the Enter key. 6 Use the keypad to enter the designated 4-digit Remote Test ID. Remote Test ID:0000 If you want to reset the displayed number to "0000", simply press the Stop/Clear key. Enter Remote ID 7 Press the Enter key. Registration of the Remote Test ID is complete. If you are finished making settings, press the Reset key. The operation panel will return to the initial mode settings. 7-18
-
 1
1 -
2
-
3
-
4
-
5
-
6
-
7
-
8
-
9
-
10
-
11
-
12
-
13
-
14
-
15
-
16
-
17
-
18
-
19
-
20
-
21
-
22
-
23
-
24
-
25
-
26
-
27
-
28
-
29
-
30
-
31
-
32
-
33
-
34
-
35
-
36
-
37
-
38
-
39
-
40
-
41
-
42
-
43
-
44
-
45
-
46
-
47
-
48
-
49
-
50
-
51
-
52
-
53
-
54
-
55
-
56
-
57
-
58
-
59
-
60
-
61
-
62
-
63
-
64
-
65
-
66
-
67
-
68
-
69
-
70
-
71
-
72
-
73
-
74
-
75
-
76
-
77
-
78
-
79
-
80
-
81
-
82
-
83
-
84
-
85
-
86
-
87
-
88
-
89
-
90
-
91
-
92
-
93
-
94
-
95
-
96
-
97
-
98
-
99
-
100
-
101
-
102
-
103
-
104
-
105
-
106
-
107
-
108
-
109
-
110
-
111
-
112
-
113
-
114
-
115
-
116
-
117
-
118
-
119
-
120
-
121
-
122
-
123
-
124
-
125
-
126
-
127
-
128
-
129
-
130
-
131
-
132
-
133
-
134
-
135
-
136
-
137
-
138
-
139
-
140
-
141
-
142
-
143
-
144
-
145
-
146
-
147
-
148
-
149
-
150
-
151
-
152
-
153
-
154
-
155
-
156
-
157
-
158
-
159
-
160
-
161
-
162
-
163
-
164
-
165
-
166
-
167
-
168
-
169
-
170
-
171
-
172
-
173
-
174
-
175
-
176
-
177
-
178
-
179
-
180
-
 181
181 -
 182
182 -
 183
183 -
 184
184 -
 185
185 -
 186
186 -
 187
187 -
 188
188 -
 189
189 -
 190
190 -
 191
191 -
192
-
193
-
194
-
195
-
196
-
197
-
198
-
199
-
200
-
201
-
202
-
203
-
204
-
205
-
206
-
207
-
208
-
209
-
210
-
211
-
212
-
213
-
214
-
215
-
216
-
217
-
218
-
219
-
220
 |
 |