Canon EOS C70 Instruction Manual - Page 124
Displaying Clip Information, play Clip Info].
 |
View all Canon EOS C70 manuals
Add to My Manuals
Save this manual to your list of manuals |
Page 124 highlights
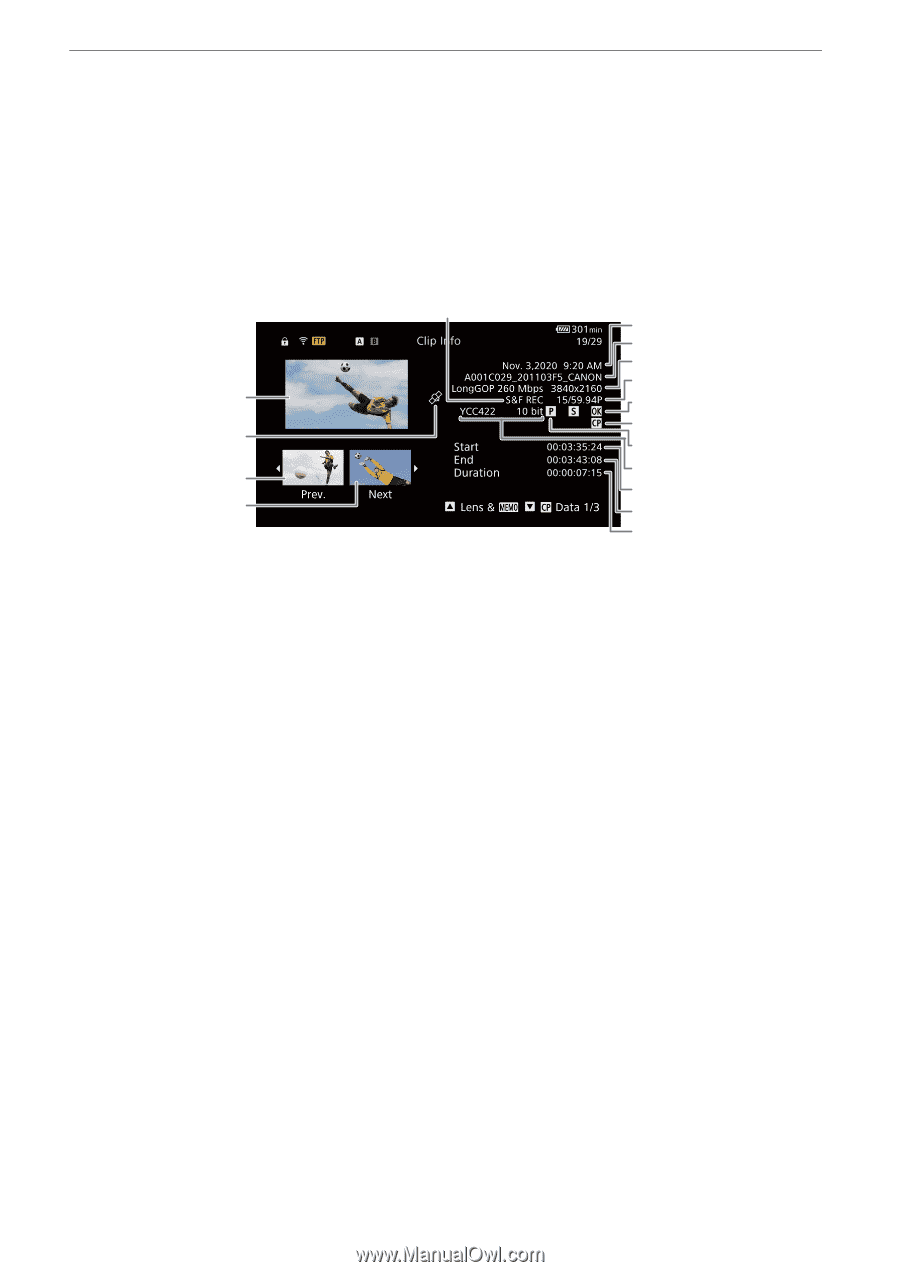
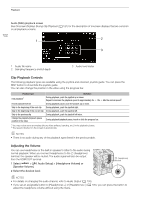
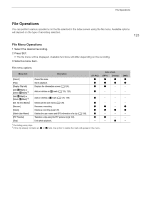
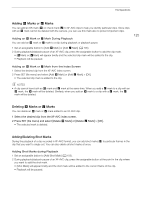
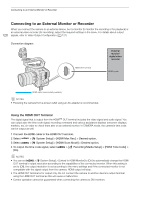
File Operations 124 Displaying Clip Information 1 Select the desired clip in the clip index screen. 2 On the file menu, select [Display Clip Info]. • The [Clip Info] screen will appear. • Push the joystick left/right to move to the previous/next clip. Press the CANCEL button to return to the index screen. 5 6 7 8 9 1 10 2 11 12 3 13 14 4 15 16 1 Thumbnail of the selected clip 10 Shot mark (A 125) and $ mark / % mark2 2 Clip geotagged with GPS information 3 Thumbnail of the previous clip (A 125) 11 Custom picture file embedded2 (A 112) 4 Thumbnail of the next clip 5 Special recording mode (A 100) 12 Proxy clip (A 56) 13 Color sampling2 and color bit depth (A 53) 6 Recording date and time 14 Clip's start time code 7 Clip file name (A 37) 15 Clip's end time code 8 Compression, bit rate and resolution (A 52) 9 Frame rate1 (A 53) 16 Clip duration 1 For clips recorded using slow & fast motion recording, the shooting frame rate and playback frame rate will both be displayed. 2 XF-AVC clips only. Displaying Additional Information (XF-AVC Clips Only) From the [Clip Info] screen of an XF-AVC clip, you can push the joystick up/down or turn the SELECT dial to display additional information screens. [Lens & Q] screen: Details about the lens used to record the clip. If a user memo was recorded with the clip's metadata, this screen will show also the user memo details. [/ Data 1/3] to [/ Data 3/3] screens: If a custom picture file was embedded with the clip, these screens show the custom picture settings used. Push the joystick down repeatedly or turn the SELECT dial right to check the information screens in the following order: [/ Data 1/3] to [/ Data 3/3] screens [Lens & Q] screen [Clip Info] screen.
-
 1
1 -
2
-
3
-
4
-
5
-
6
-
7
-
8
-
9
-
10
-
11
-
12
-
13
-
14
-
15
-
16
-
17
-
18
-
19
-
20
-
21
-
22
-
23
-
24
-
25
-
26
-
27
-
28
-
29
-
30
-
31
-
32
-
33
-
34
-
35
-
36
-
37
-
38
-
39
-
40
-
41
-
42
-
43
-
44
-
45
-
46
-
47
-
48
-
49
-
50
-
51
-
52
-
53
-
54
-
55
-
56
-
57
-
58
-
59
-
60
-
61
-
62
-
63
-
64
-
65
-
66
-
67
-
68
-
69
-
70
-
71
-
72
-
73
-
74
-
75
-
76
-
77
-
78
-
79
-
80
-
81
-
82
-
83
-
84
-
85
-
86
-
87
-
88
-
89
-
90
-
91
-
92
-
93
-
94
-
95
-
96
-
97
-
98
-
99
-
100
-
101
-
102
-
103
-
104
-
105
-
106
-
107
-
108
-
109
-
110
-
111
-
112
-
113
-
114
-
115
-
116
-
117
-
118
-
 119
119 -
 120
120 -
 121
121 -
 122
122 -
 123
123 -
 124
124 -
 125
125 -
 126
126 -
 127
127 -
 128
128 -
 129
129 -
130
-
131
-
132
-
133
-
134
-
135
-
136
-
137
-
138
-
139
-
140
-
141
-
142
-
143
-
144
-
145
-
146
-
147
-
148
-
149
-
150
-
151
-
152
-
153
-
154
-
155
-
156
-
157
-
158
-
159
-
160
-
161
-
162
-
163
-
164
-
165
-
166
-
167
-
168
-
169
-
170
-
171
-
172
-
173
-
174
-
175
-
176
-
177
-
178
-
179
-
180
-
181
-
182
-
183
-
184
-
185
-
186
-
187
-
188
-
189
-
190
-
191
-
192
-
193
-
194
-
195
-
196
-
197
-
198
-
199
-
200
-
201
-
202
-
203
-
204
-
205
-
206
-
207
-
208
-
209
-
210
-
211
-
212
-
213
-
214
-
215
 |
 |