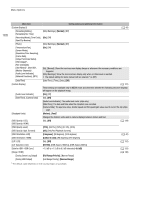
Canon EOS C70 Instruction Manual - Page 173
Displaying the Status Screens, ignable button again or
 |
View all Canon EOS C70 manuals
Add to My Manuals
Save this manual to your list of manuals |
Page 173 highlights
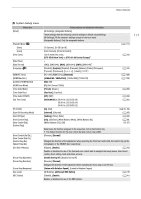
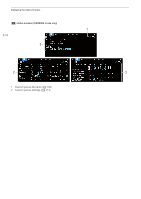
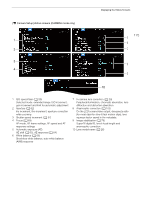
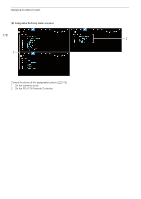
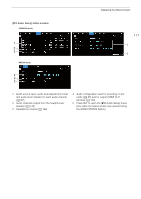
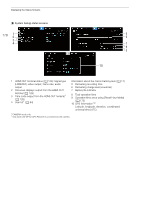
Displaying the Status Screens Displaying the Status Screens You can use the status screens to check the camera's various settings. You can also output the status screens to an external monitor. 1 Set an assignable button to [Status] (A 105). 2 Press the assignable button to open the status screens. • The status screen most recently displayed will appear unless you turned off the camera or changed the operating mode. • You can also press the AUDIO STATUS button to open directly only the [¡ Audio Setup] status screen. 3 Scroll through the status screens to check the desired settings. • Bring the cursor to a page number and push the joystick left/right to move between the status screens. • You can also use front/rear control dials and the SELECT dial to navigate the status screens in the same way as the setup menus. 4 Press the assignable button again or select [X CLOSE] to close the status screens. • You can also press the MENU button to close the status screens and open the menu instead. 173 To skip directly to the page of a specific status screen: [ Gamma/Color Space/Range] [/] (custom picture file in use) [v Camera Setup] [ Assignable Buttons] (A 173) (A 174) (A 175) (A 176) [¡ Audio Setup] [B System Setup] [Æ Recording/Media Setup] [ Network Settings] (A 177) (A 178) (A 179) (A 180) [ Gamma/Color Space/Range] status screens (CAMERA mode only) 1 2 3 4 1 Gamma curve, color space (A 113) and range used for clips recorded on the cards 2 Look File applied (A 111) 3 Gain for HDR-to-SDR conversion (A 132) 4 HLG color quality (A 113) 5 5 Gamma curve, color space (A 113, 131) and range (A 130) used for video outputs/monitoring devices [HDMI]: Video output from the HDMI OUT terminal [LCD]: LCD screen [IP Strm. (8 bit)]: IP streaming signal (A 154)
-
 1
1 -
2
-
3
-
4
-
5
-
6
-
7
-
8
-
9
-
10
-
11
-
12
-
13
-
14
-
15
-
16
-
17
-
18
-
19
-
20
-
21
-
22
-
23
-
24
-
25
-
26
-
27
-
28
-
29
-
30
-
31
-
32
-
33
-
34
-
35
-
36
-
37
-
38
-
39
-
40
-
41
-
42
-
43
-
44
-
45
-
46
-
47
-
48
-
49
-
50
-
51
-
52
-
53
-
54
-
55
-
56
-
57
-
58
-
59
-
60
-
61
-
62
-
63
-
64
-
65
-
66
-
67
-
68
-
69
-
70
-
71
-
72
-
73
-
74
-
75
-
76
-
77
-
78
-
79
-
80
-
81
-
82
-
83
-
84
-
85
-
86
-
87
-
88
-
89
-
90
-
91
-
92
-
93
-
94
-
95
-
96
-
97
-
98
-
99
-
100
-
101
-
102
-
103
-
104
-
105
-
106
-
107
-
108
-
109
-
110
-
111
-
112
-
113
-
114
-
115
-
116
-
117
-
118
-
119
-
120
-
121
-
122
-
123
-
124
-
125
-
126
-
127
-
128
-
129
-
130
-
131
-
132
-
133
-
134
-
135
-
136
-
137
-
138
-
139
-
140
-
141
-
142
-
143
-
144
-
145
-
146
-
147
-
148
-
149
-
150
-
151
-
152
-
153
-
154
-
155
-
156
-
157
-
158
-
159
-
160
-
161
-
162
-
163
-
164
-
165
-
166
-
167
-
 168
168 -
 169
169 -
 170
170 -
 171
171 -
 172
172 -
 173
173 -
 174
174 -
 175
175 -
 176
176 -
 177
177 -
 178
178 -
179
-
180
-
181
-
182
-
183
-
184
-
185
-
186
-
187
-
188
-
189
-
190
-
191
-
192
-
193
-
194
-
195
-
196
-
197
-
198
-
199
-
200
-
201
-
202
-
203
-
204
-
205
-
206
-
207
-
208
-
209
-
210
-
211
-
212
-
213
-
214
-
215
 |
 |
